


cowsurgeon
Junior Member
- Messages
- 354
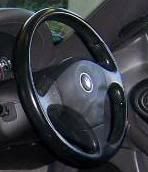
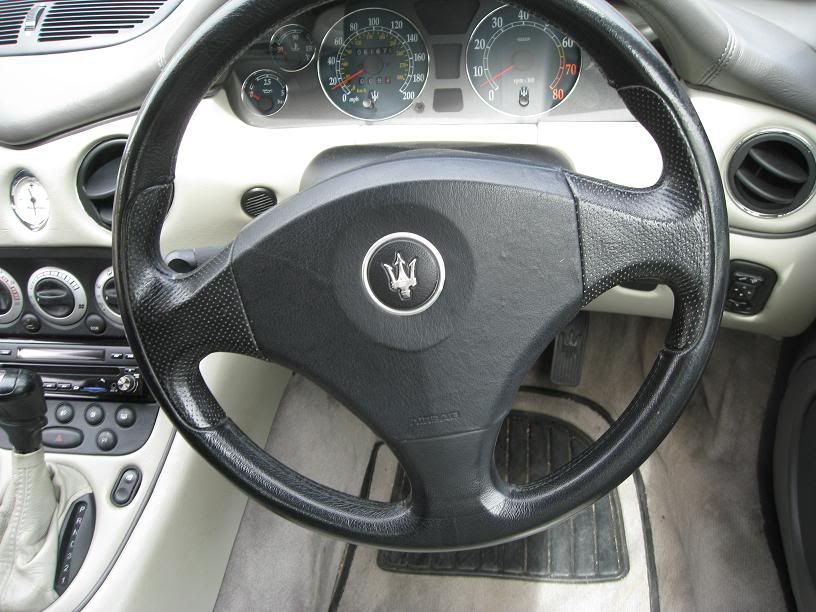
The steering wheel leather tends to lift as the glue holding it on to the airbag cover denatures. This causes it to look like there are air bubbles underneath the leather, and it looks rubbish:
This isn't my wheel (I realised afterwards, I didn't take a 'before' picture) but this is an example of how they look with the leather lifting:
One suggestion was to inject more PVA glue directly in to these lifted areas through the leather itself, but I decided to do the job (semi-) properly, and take the cover off and reglue it:
THIS IS A REPORT ONLY - AIRBAGS ARE VERY DANGEROUS AND CAN DEPLOY INSTANTLY CAUSING PERSONAL INJURY AND/OR DEATH. FOLLOW THESE STEPS AT YOUR OWN RISK. I AM NOT A QUALIFIED CAR MECHANIC/AIRBAG INSTALLATION ENGINEER, AND HAVE NO TRAINING IN AIRBAG INSTALLATION/DISCONNECTION.
Step 1:
Lower the car windows an inch or so and then disconnect the car battery either by using the switch/screw if you have one installed, or by taking the lead off the old fashioned way. Leave the car alone for at least an hour.
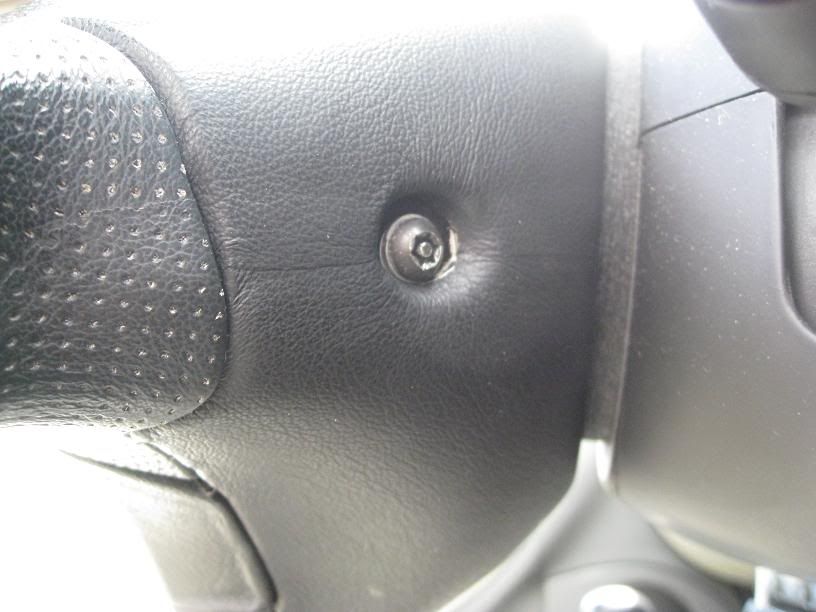
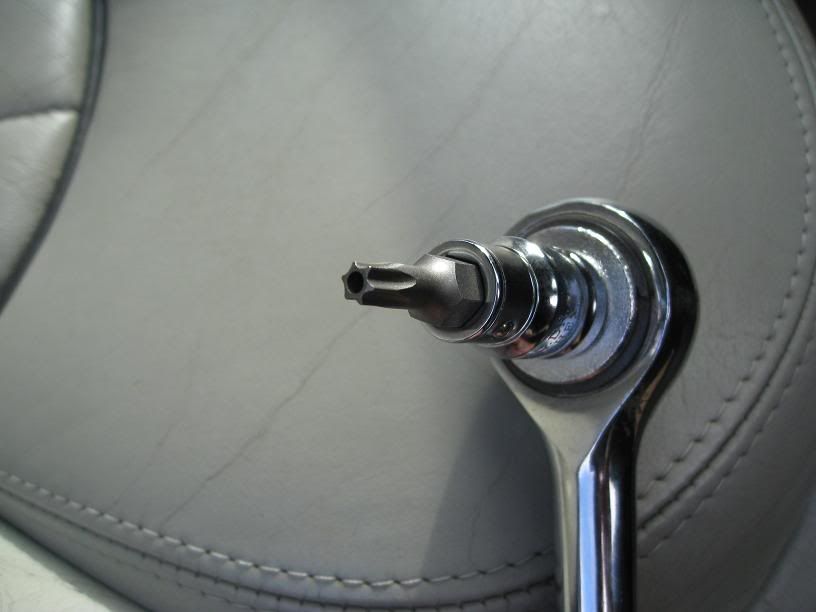
Step 2:
Locate and undo the security torx screws holding the airbag in to the steering wheel. There are 2 - one on each side. The special sockets are available from screwfix online for £8.99:
http://www.screwfix.com/prods/36856...ts-Hex/Forge-Steel-Star-Socket-Bit-Set-23Pcs#
Step 3:
Gently wiggle the airbag forward
Step 4:
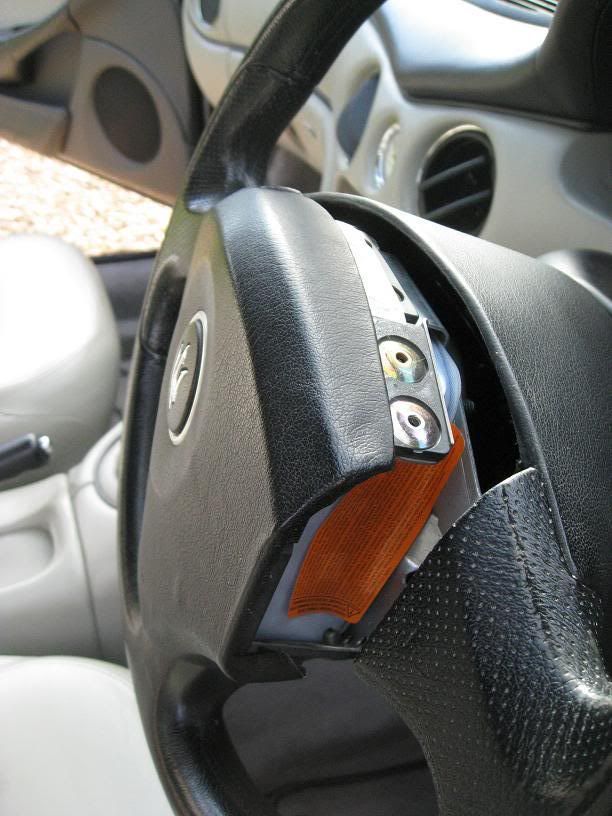
Pull forward the airbag fron the steering wheel exposing the yellow wire and red plug to the airbag.
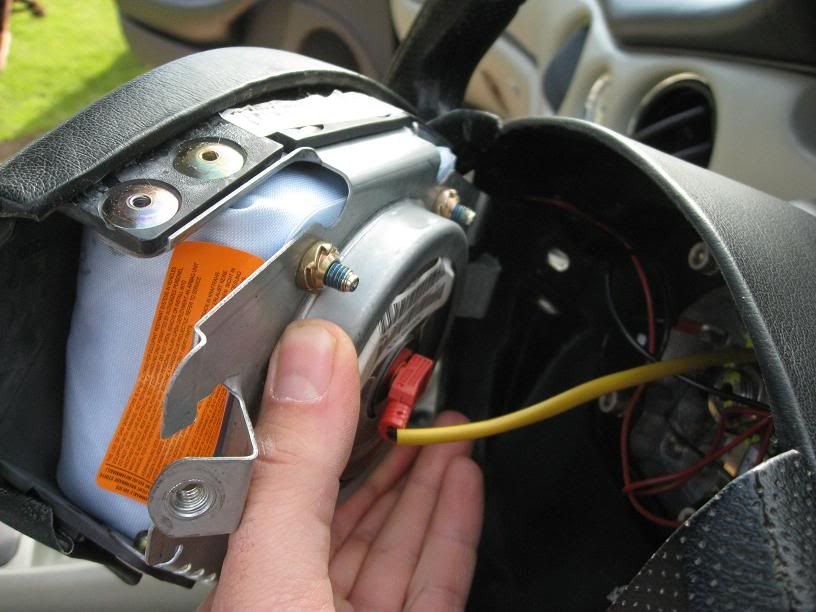
Disconnect the wire (it pulls straight back out of the airbag). It needed some force as it 'snaps' back in when you reassemble the whole thing. I held the airbag pointing well away from my face at this point as I am a scaredy-cat.
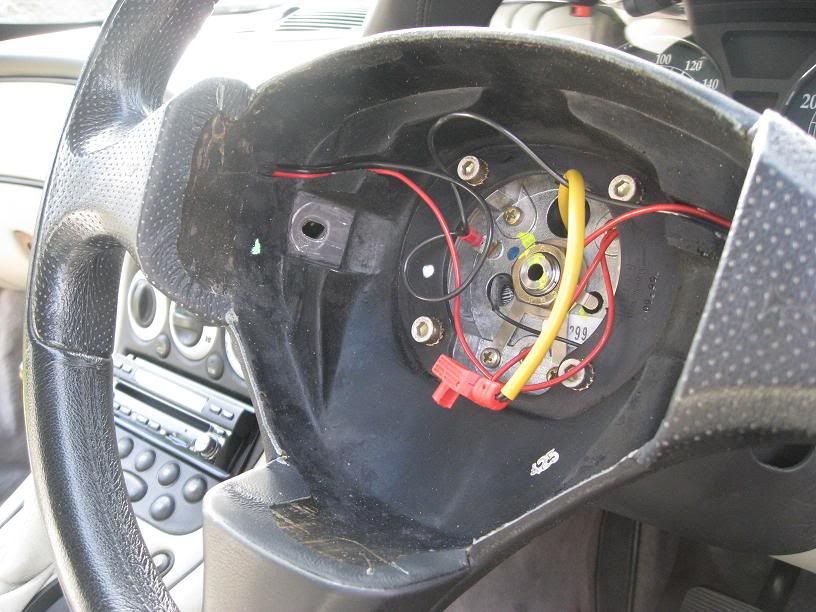
Steering wheel without airbag in centre - note yellow wire and red plug:
Step 5:
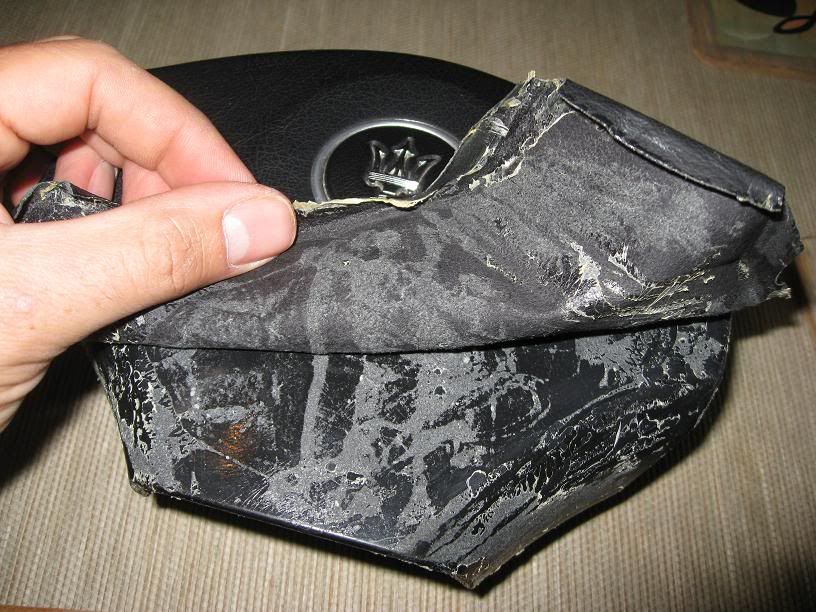
Lay the airbag face down on a hard surface, and start to peel the leather away from the plastic cover:
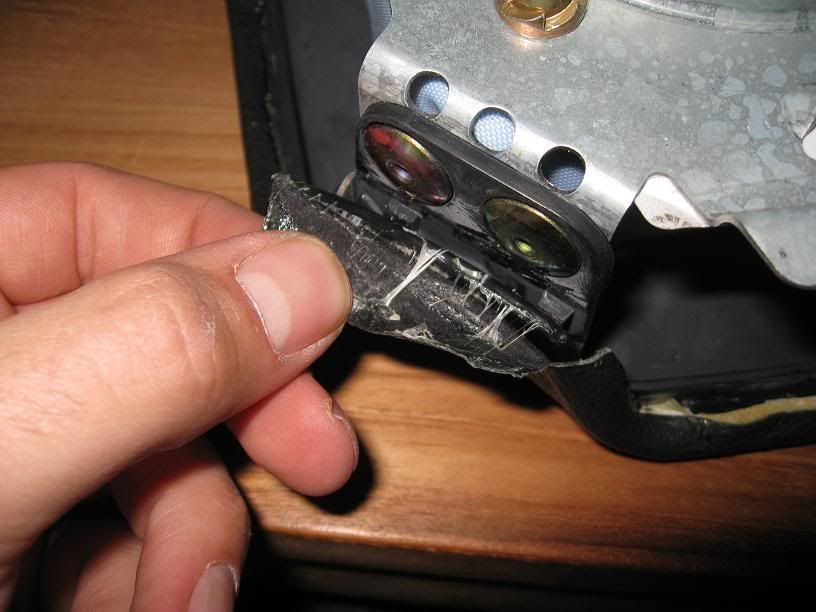
It comes away slowly and with a little difficulty, depending on how well the sides have been stuck down. Take care not to rip or damage the leather. I did it just using my fingers, but a blade has been suggested by others - didn't want to risk putting a hole in the leather!
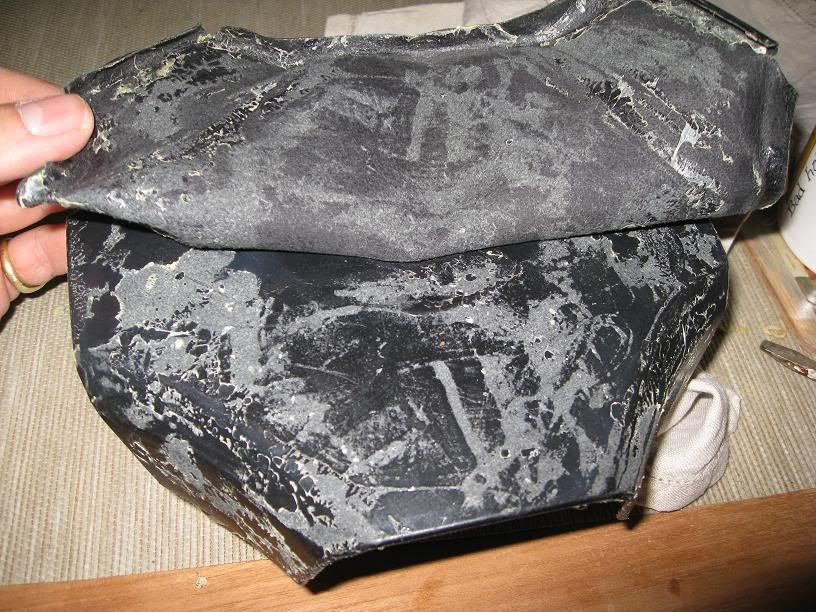
Once the sides have been peeled off it should look like this:
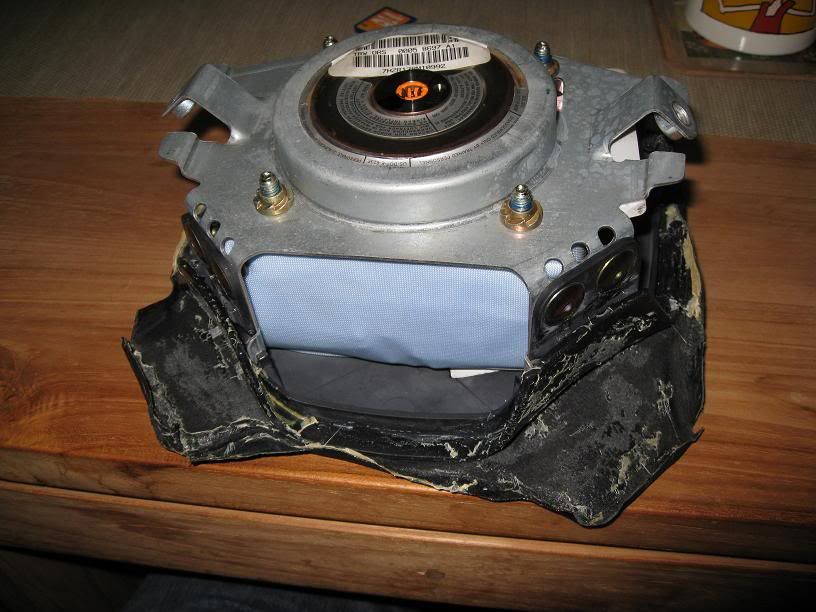
Step 6:
Turn it over and continue carefully peeling the leather back:
Step 7:
I continued until I had both sides off, but not the top edge ( I had no bubbles in the top part), and i left the Maserati badge in place too (couldn't work out how to get it off without damaging it!):
Step 8:
Clean all the old glue off the plastic airbag cover AND the underside of the leather - I can't stress this enough - if you leave any on you'll get palpable lumps when you've stuck the leather back down.
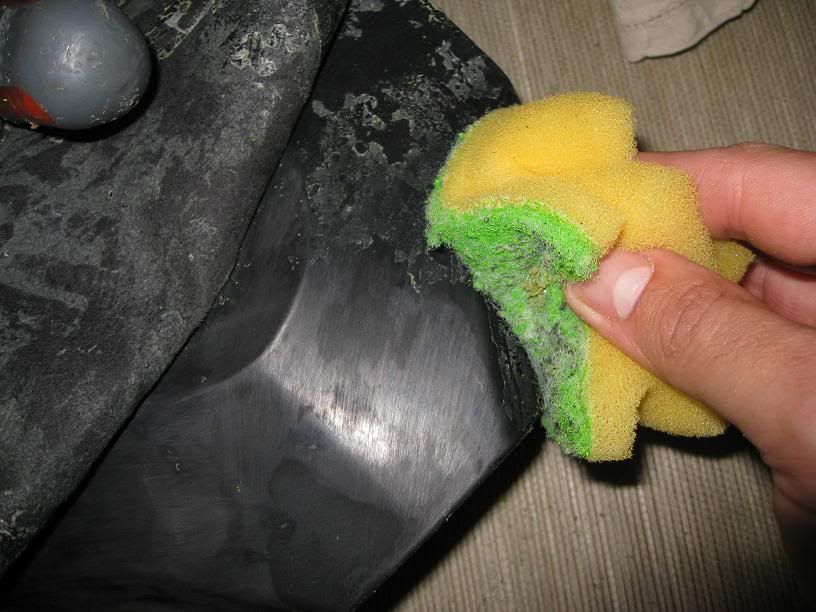
It should look shiny and clean when you're done:
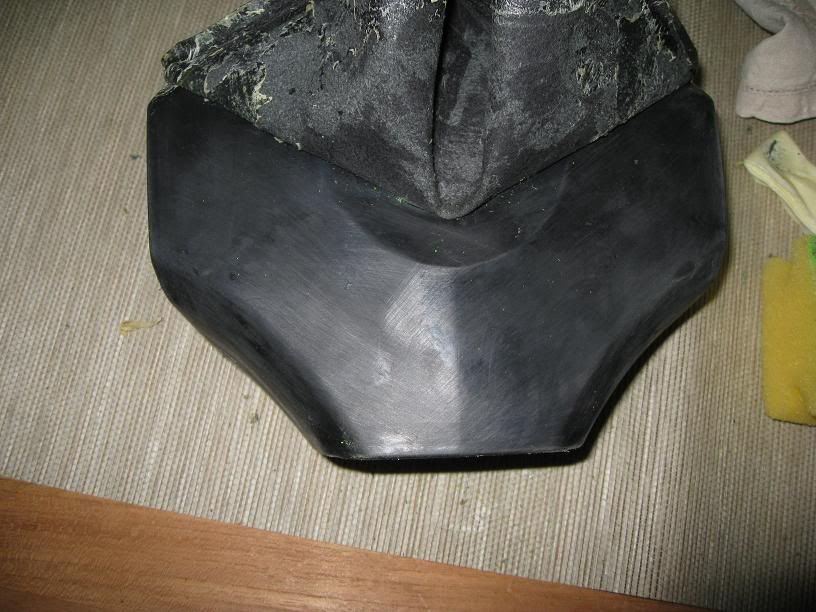
Step 9:
Next I scratched all the shiny clean surface with a wire brush - I forgot to take a picture of this, but roughing up the surface will help the new glue to stay stuck down and not lift again.
Step 10:
Apply PVA glue and leave it to become tacky before smoothing the leather back down over the plastic, making sure no air bubbles or lumps of old glue are left between the leather and the plastic:
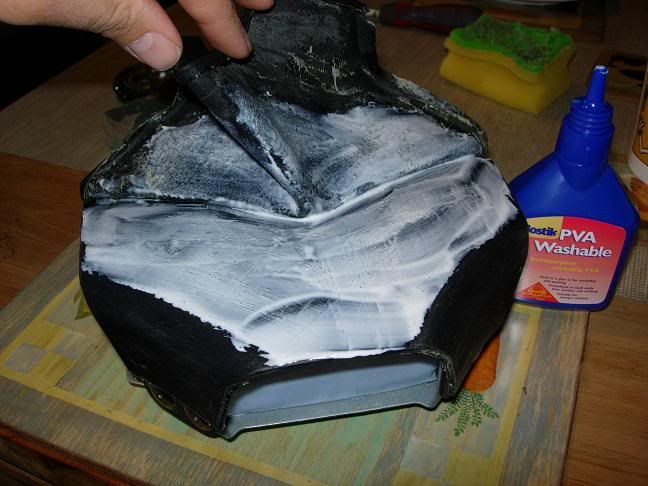
I left it for a few hours, intermittently tensioning the leather and smoothing the surface down, to ensure a nice finish.
Step 11:
Reassembly is the reverse of the dissasembly steps unsurprisingly.
Finished wheel:
Ideally if I do it again I'll take the leather off all the way around as you can see a slight line on the left side where the old glue meets the new.. Still, it looks a **** sight better than it did before!
This isn't my wheel (I realised afterwards, I didn't take a 'before' picture) but this is an example of how they look with the leather lifting:
One suggestion was to inject more PVA glue directly in to these lifted areas through the leather itself, but I decided to do the job (semi-) properly, and take the cover off and reglue it:
THIS IS A REPORT ONLY - AIRBAGS ARE VERY DANGEROUS AND CAN DEPLOY INSTANTLY CAUSING PERSONAL INJURY AND/OR DEATH. FOLLOW THESE STEPS AT YOUR OWN RISK. I AM NOT A QUALIFIED CAR MECHANIC/AIRBAG INSTALLATION ENGINEER, AND HAVE NO TRAINING IN AIRBAG INSTALLATION/DISCONNECTION.
Step 1:
Lower the car windows an inch or so and then disconnect the car battery either by using the switch/screw if you have one installed, or by taking the lead off the old fashioned way. Leave the car alone for at least an hour.
Step 2:
Locate and undo the security torx screws holding the airbag in to the steering wheel. There are 2 - one on each side. The special sockets are available from screwfix online for £8.99:
http://www.screwfix.com/prods/36856...ts-Hex/Forge-Steel-Star-Socket-Bit-Set-23Pcs#
Step 3:
Gently wiggle the airbag forward
Step 4:
Pull forward the airbag fron the steering wheel exposing the yellow wire and red plug to the airbag.
Disconnect the wire (it pulls straight back out of the airbag). It needed some force as it 'snaps' back in when you reassemble the whole thing. I held the airbag pointing well away from my face at this point as I am a scaredy-cat.
Steering wheel without airbag in centre - note yellow wire and red plug:
Step 5:
Lay the airbag face down on a hard surface, and start to peel the leather away from the plastic cover:
It comes away slowly and with a little difficulty, depending on how well the sides have been stuck down. Take care not to rip or damage the leather. I did it just using my fingers, but a blade has been suggested by others - didn't want to risk putting a hole in the leather!
Once the sides have been peeled off it should look like this:
Step 6:
Turn it over and continue carefully peeling the leather back:
Step 7:
I continued until I had both sides off, but not the top edge ( I had no bubbles in the top part), and i left the Maserati badge in place too (couldn't work out how to get it off without damaging it!):
Step 8:
Clean all the old glue off the plastic airbag cover AND the underside of the leather - I can't stress this enough - if you leave any on you'll get palpable lumps when you've stuck the leather back down.
It should look shiny and clean when you're done:
Step 9:
Next I scratched all the shiny clean surface with a wire brush - I forgot to take a picture of this, but roughing up the surface will help the new glue to stay stuck down and not lift again.
Step 10:
Apply PVA glue and leave it to become tacky before smoothing the leather back down over the plastic, making sure no air bubbles or lumps of old glue are left between the leather and the plastic:
I left it for a few hours, intermittently tensioning the leather and smoothing the surface down, to ensure a nice finish.
Step 11:
Reassembly is the reverse of the dissasembly steps unsurprisingly.
Finished wheel:
Ideally if I do it again I'll take the leather off all the way around as you can see a slight line on the left side where the old glue meets the new.. Still, it looks a **** sight better than it did before!


")