Devonboy
Member
- Messages
- 1,509
After the trim plate's success (see Part 1 here A Nice Little Project – Sticky Buttons – Part 1 /50! | SportsMaserati.co.uk ) I tried the driver's door card. Removing the door card is easy and there are many videos online to help. Once removed, I set about dismantling the door mechanisms from the card – this is logical and easy if tackled slowly. This is also the time to completely clean the leather as the armrest has to come off to access the window switch tray – again – YouTube has videos and a search function.
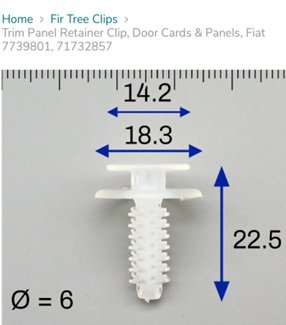
If (like my car), you find someone has been there before you, make sure you have a water shield (OEM or homemade from clear plastic – both will suffice). If you are missing the fir tree clips that secure the door card to the door, then these are perfect (except they are white, not black) and half the price with free delivery from www.vehicleclips.co.uk (thanks @Zep and other suppliers are available). I was also missing several M5 spire clips which were found via Amazon.
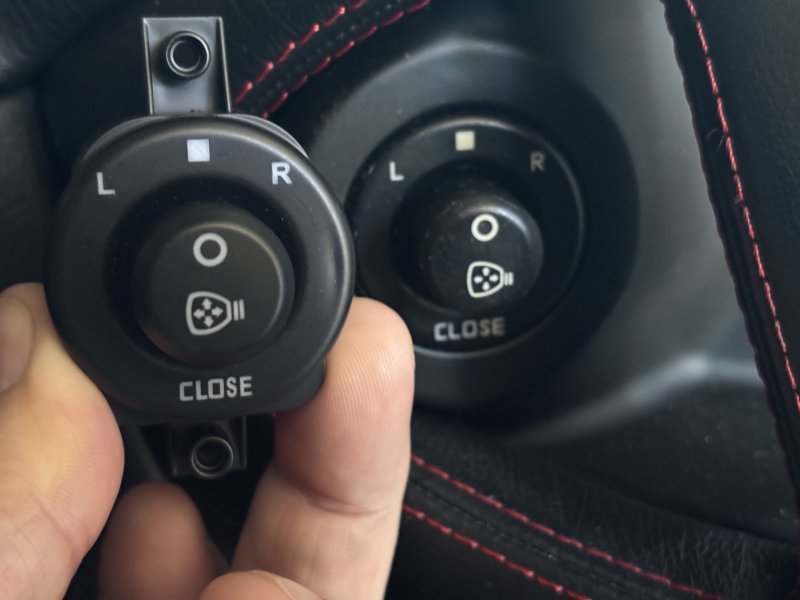
The wing mirror adjustment switch was broken so a new one was ordered on Ali Express (OEM 190934) from the catchily named Mapai Car Modification and Upgrading Store for around £55 delivered. It looks identical to the OEM broken one and allowed me to experiment with the old one.
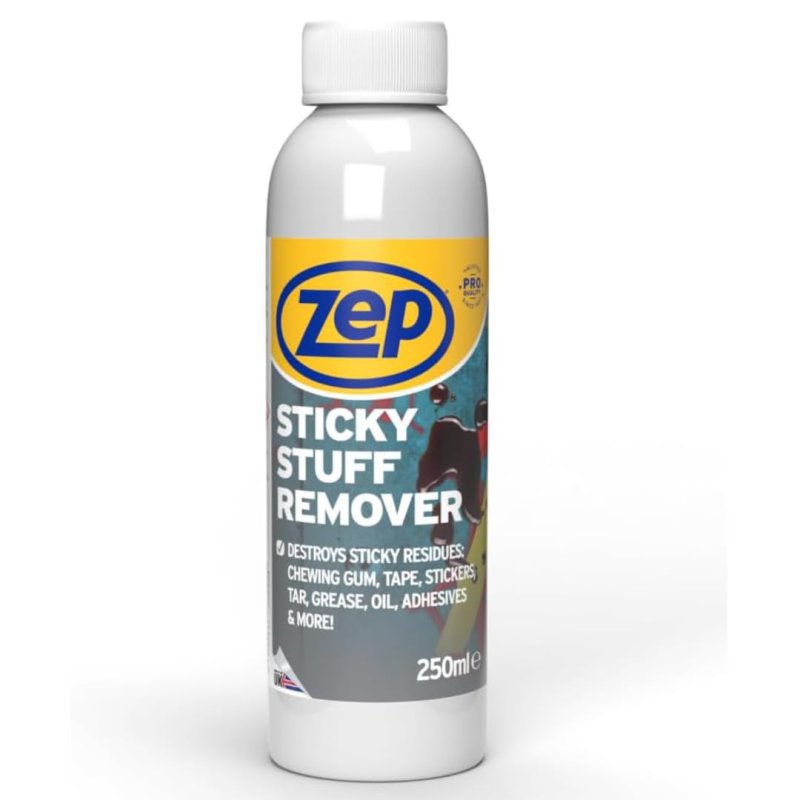
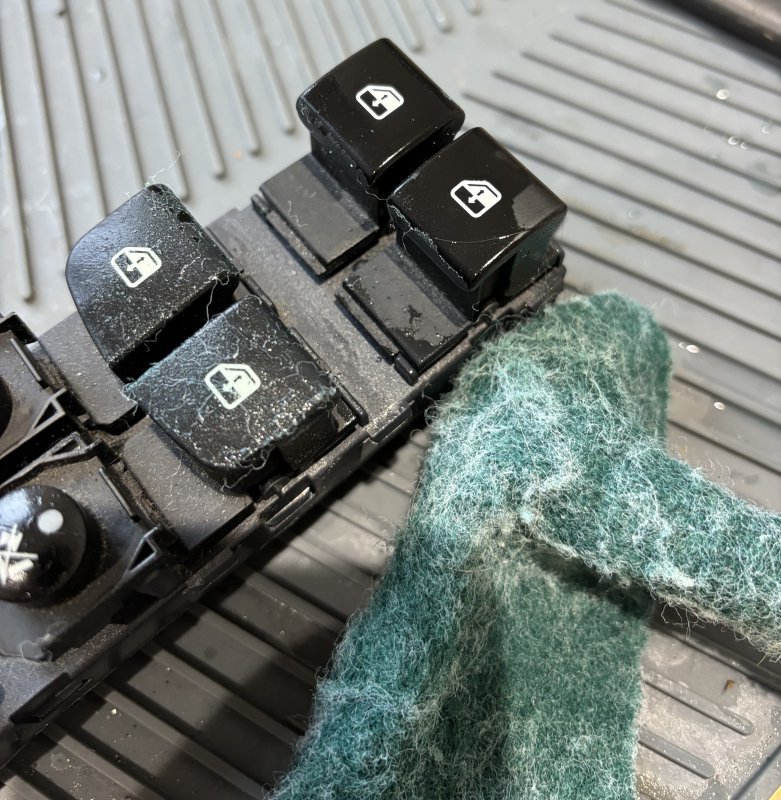
The window switches were started in situe but then popped out of the unit and having experimented, I used Zep’s (no relation to this parish) Sticky Stuff Remover which dissolves the stickiness but leaves the graphics in place. I used the same approach on the window button tray – fluid then a non-scratch abrasive (Tesco’s green pan scrubs). You should be left with smooth hard plastic. It may require two treatments or more for the buttons, which were far harder than the window switches which are shown with early treatment below.
As the Zep’s fluid had no impact the door handle surround, I went for Nitromors Paint Remover as it had worked on the trim plate. A few hours later was the moment I realised I had effd up!
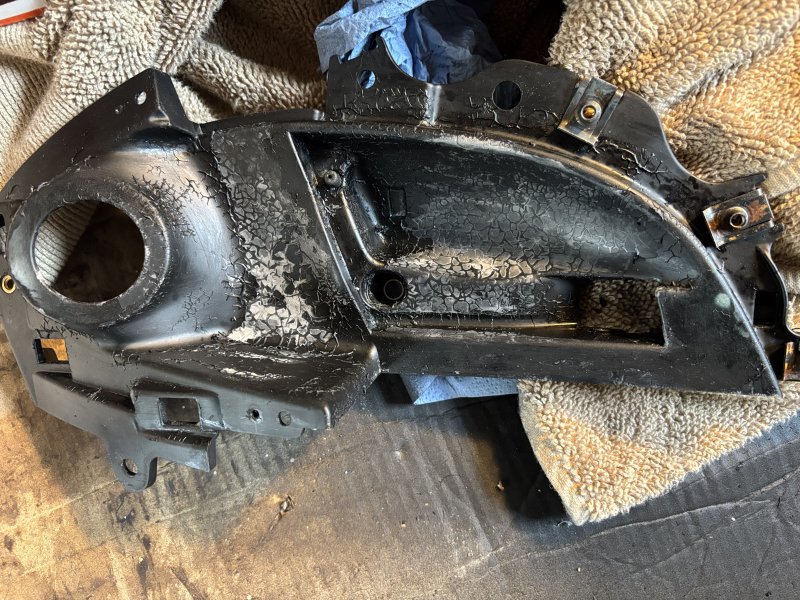
Whilst it removed some of the sticky stuff, it bubbled the paint so I had to then sand the whole unit back – and that wasn’t completely effective. Zeps, thinners, WD40 etc were all useless and what worked in the end was soaking it in hot water with Vanish and then removing the excess stickiness with Wet and Dry Sandpaper (900 grit). Trust me – half-way through this, the £250 for a new surround will start to seem quite reasonable – but stay strong!
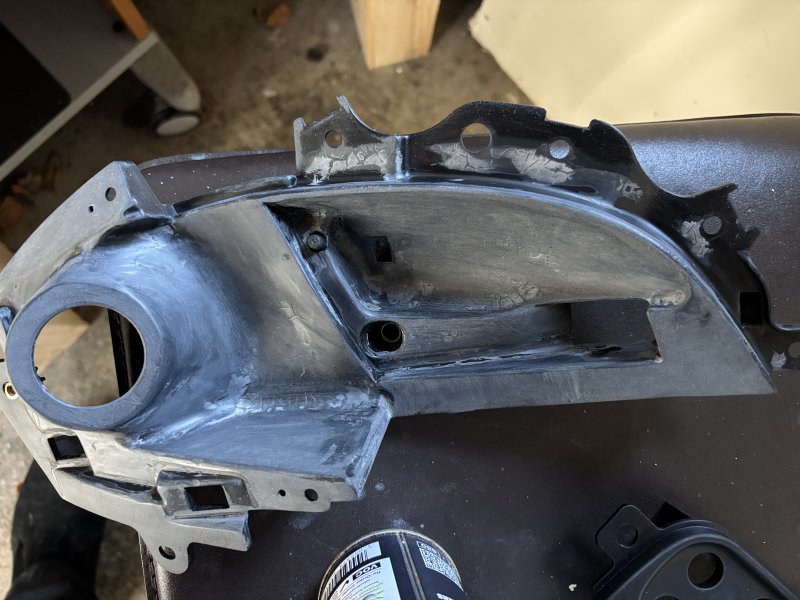
We got to a better place at the end of this, ready for some plastic primer (not used on the buttons).
I used 3 coats of satin black paint on the window button tray and door handle surround. These are high-traffic areas so I wanted a highly durable finish. These and the buttons were all then sprayed with 4 light coats of Pro XL Matt lacquer – including the new wing mirror switch to ensure all the buttons had a similar sheen.
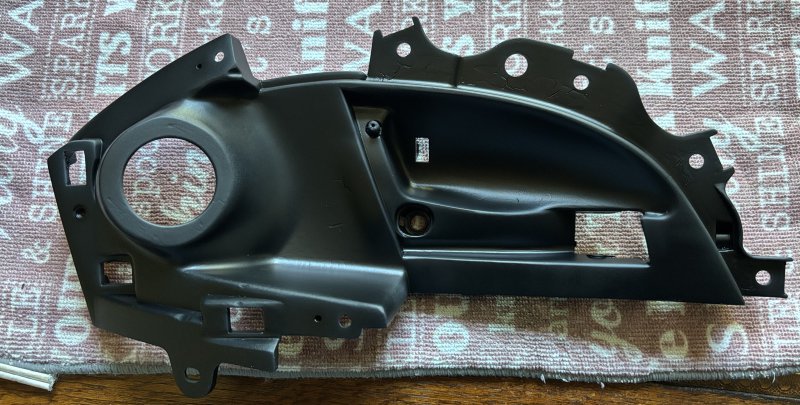
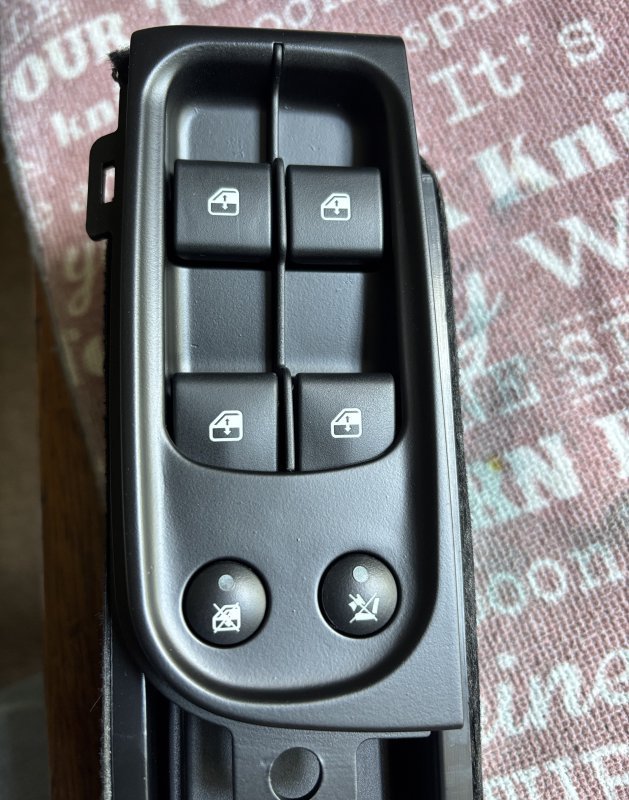
Before reassembly, is the pre-install electrics test. The new Chinese wing mirror control worked and fits perfectly as does the window control unit. The only issue is the LED – it has never lit up as it should. A cheap second-hand unit was sourced from eBay – just for the LED, but the unit can also be used to speed up the renovation of the rear door. The water shield was also repaired and refixed.
On reassembling the interior door unit, I decided that the door handle wasn’t up to par., in fact, all of them were pretty grim. The damage had gone beyond re-lacquering – it looked like a woman’s engagement had gone ice skating over it and the prospect of sanding them back, respraying and re-lacquering them felt too much, so 4 new ones were ordered from the Mapai Car Modification and Upgrading Store for £35 each delivered. They are the perfect size but need the rubber grommets from the originals. They feel good (after the odd rough patch on the rear was sanded down) and they fit perfectly but are more shiny/chrome than the OEM versions. I decided to use them while I figure out how to restore the damaged originals.
All that was left to do, was re-assemble, refit and check everything worked. Thankfully all went well and it all looks and feels good.
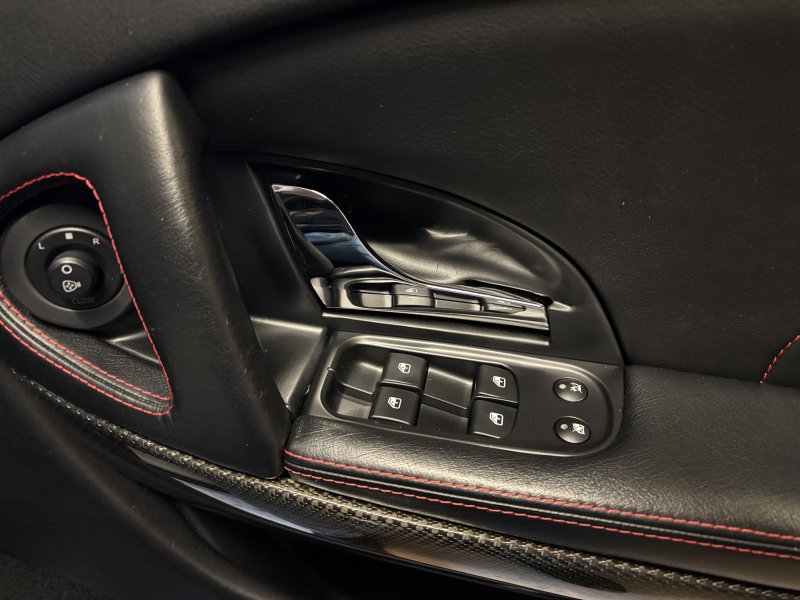
I have now started on the back door (probably best to start with the back and passenger door before the driver's door if you are new to this) and I am having great success with BORAX in stripping the sticky stuff from the door handle surround – more to follow in part 3!
#Devonboy
If (like my car), you find someone has been there before you, make sure you have a water shield (OEM or homemade from clear plastic – both will suffice). If you are missing the fir tree clips that secure the door card to the door, then these are perfect (except they are white, not black) and half the price with free delivery from www.vehicleclips.co.uk (thanks @Zep and other suppliers are available). I was also missing several M5 spire clips which were found via Amazon.

The wing mirror adjustment switch was broken so a new one was ordered on Ali Express (OEM 190934) from the catchily named Mapai Car Modification and Upgrading Store for around £55 delivered. It looks identical to the OEM broken one and allowed me to experiment with the old one.

The window switches were started in situe but then popped out of the unit and having experimented, I used Zep’s (no relation to this parish) Sticky Stuff Remover which dissolves the stickiness but leaves the graphics in place. I used the same approach on the window button tray – fluid then a non-scratch abrasive (Tesco’s green pan scrubs). You should be left with smooth hard plastic. It may require two treatments or more for the buttons, which were far harder than the window switches which are shown with early treatment below.


As the Zep’s fluid had no impact the door handle surround, I went for Nitromors Paint Remover as it had worked on the trim plate. A few hours later was the moment I realised I had effd up!

Whilst it removed some of the sticky stuff, it bubbled the paint so I had to then sand the whole unit back – and that wasn’t completely effective. Zeps, thinners, WD40 etc were all useless and what worked in the end was soaking it in hot water with Vanish and then removing the excess stickiness with Wet and Dry Sandpaper (900 grit). Trust me – half-way through this, the £250 for a new surround will start to seem quite reasonable – but stay strong!

We got to a better place at the end of this, ready for some plastic primer (not used on the buttons).
I used 3 coats of satin black paint on the window button tray and door handle surround. These are high-traffic areas so I wanted a highly durable finish. These and the buttons were all then sprayed with 4 light coats of Pro XL Matt lacquer – including the new wing mirror switch to ensure all the buttons had a similar sheen.


Before reassembly, is the pre-install electrics test. The new Chinese wing mirror control worked and fits perfectly as does the window control unit. The only issue is the LED – it has never lit up as it should. A cheap second-hand unit was sourced from eBay – just for the LED, but the unit can also be used to speed up the renovation of the rear door. The water shield was also repaired and refixed.
On reassembling the interior door unit, I decided that the door handle wasn’t up to par., in fact, all of them were pretty grim. The damage had gone beyond re-lacquering – it looked like a woman’s engagement had gone ice skating over it and the prospect of sanding them back, respraying and re-lacquering them felt too much, so 4 new ones were ordered from the Mapai Car Modification and Upgrading Store for £35 each delivered. They are the perfect size but need the rubber grommets from the originals. They feel good (after the odd rough patch on the rear was sanded down) and they fit perfectly but are more shiny/chrome than the OEM versions. I decided to use them while I figure out how to restore the damaged originals.
All that was left to do, was re-assemble, refit and check everything worked. Thankfully all went well and it all looks and feels good.

I have now started on the back door (probably best to start with the back and passenger door before the driver's door if you are new to this) and I am having great success with BORAX in stripping the sticky stuff from the door handle surround – more to follow in part 3!
#Devonboy


