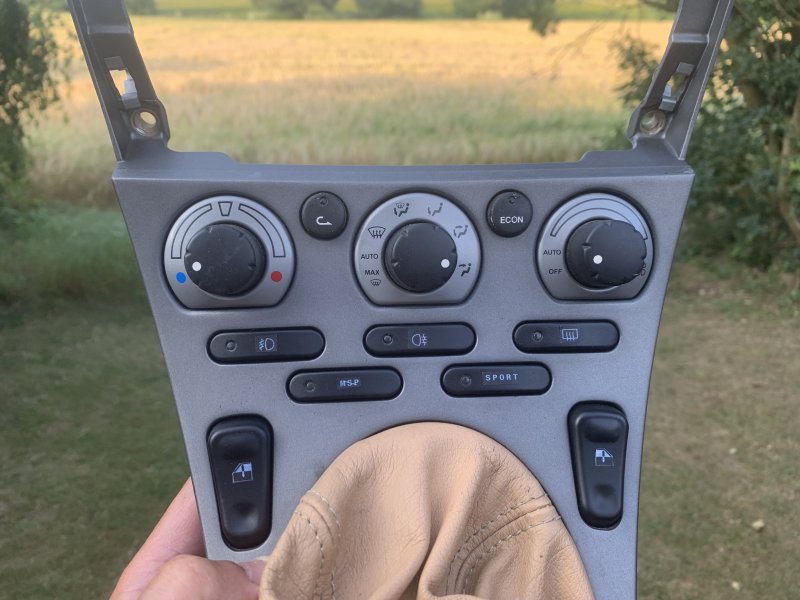
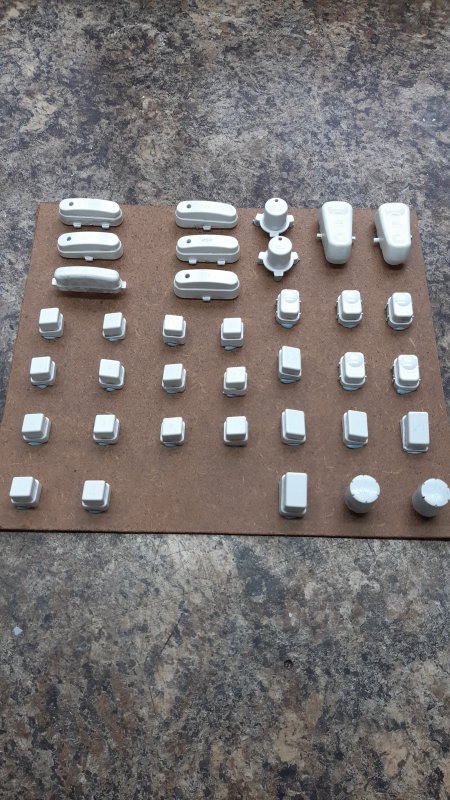
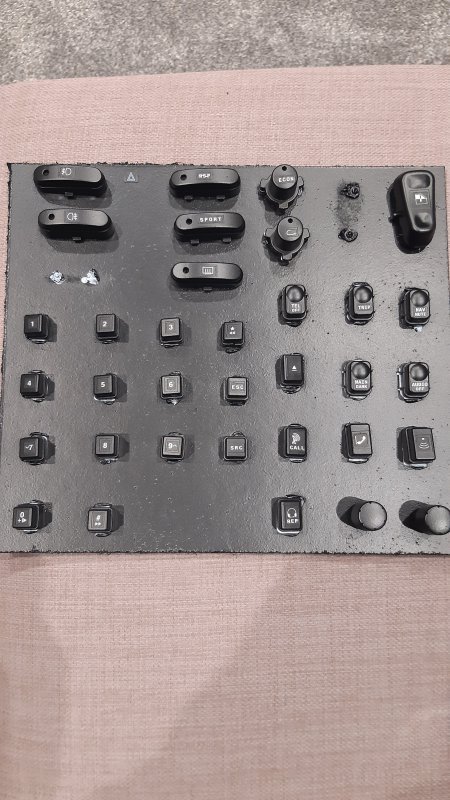
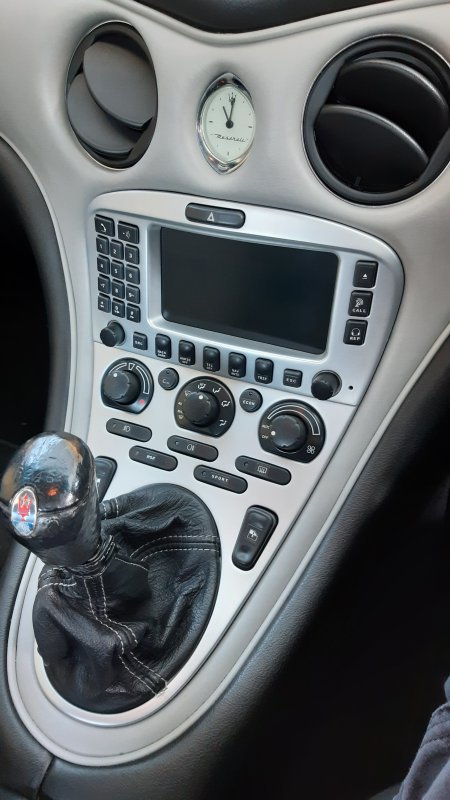
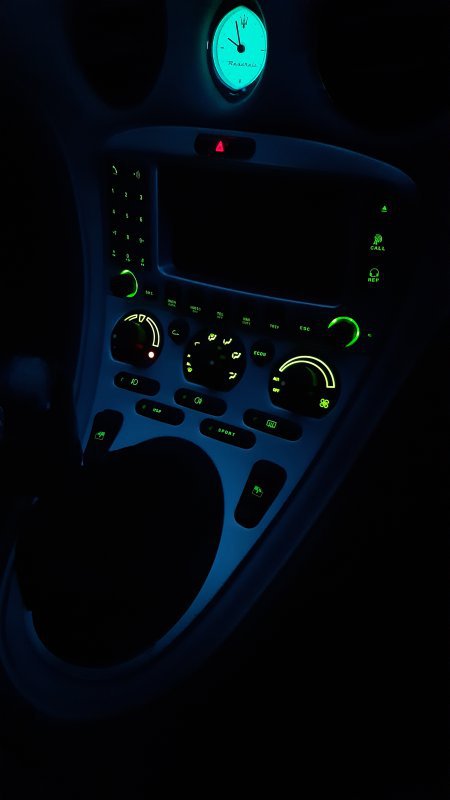
Sticky buttons sorted today

Nibby

Member
Messages
2,092
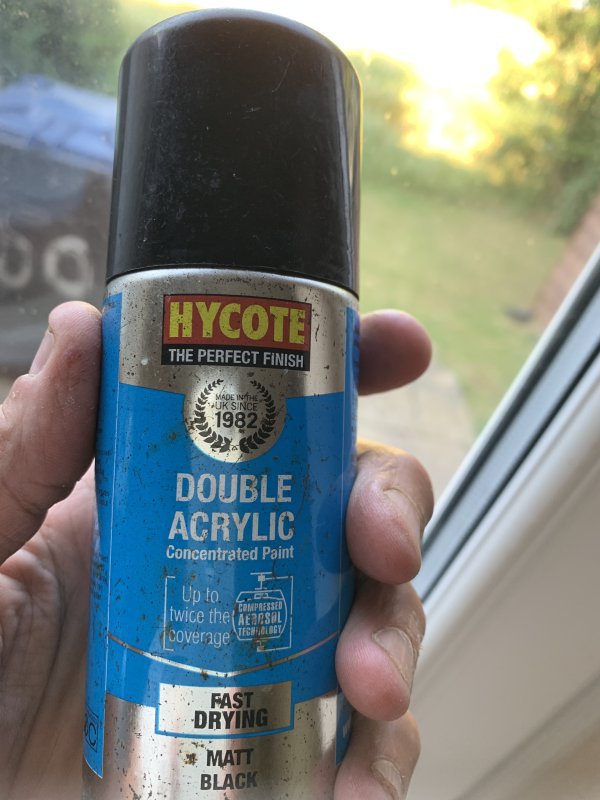
Fantastic, that's a brilliant result! Can I ask what paint you used to finish the buttons with?

I managed to remove the vent cans yesterday, going to have a good go at getting them scrubbed clean this week. My front middle pair had three clips, was a little fiddly but a screwdriver while keeping tension on the can allowed it to come free.
Thanks.
I used a couple of coats of this.
IMG_2808.jpeg
 

Ebenezer

Member
Messages
4,506
Welcome Mr Murderer! Was curious to know what you were murdering, so found myself in another world!

"The Unggoy (Monachus frigus), colloquially known as Grunts or Fodder, are a naturally evolved species of bipedal demiarthropods. Native to the planet Balaho, Unggoy are one of a limited number of species known to boast a sentient-class intelligence capacity, albeit a somewhat limited one.

By 2142, the majority of the Unggoy were absorbed into the interstellar Covenant Empire, a federation of unique, sentient species. Centuries of discrimination and oppression against the Unggoy led to widespread regressions in cultural, societal, and technological infrastructures; consequently, many were led to believe that the race as a whole is generally incapable of matching or even coming close to the mean intelligence quotients of other sentient races; in reality, following their liberation by the Humans and Sangheili at the end of the First Great War, an assisted cultural boom laid the framework for a well-developed central Unggoy society, governed for the most part by the Kabu'a Protectorate."

The rest of us would appear to be safe.

Eb
 

Unggoy Murderer

New Member
Messages
15
Welcome Mr Murderer! Was curious to know what you were murdering, so found myself in another world!

"The Unggoy (Monachus frigus), colloquially known as Grunts or Fodder, are a naturally evolved species of bipedal demiarthropods. Native to the planet Balaho, Unggoy are one of a limited number of species known to boast a sentient-class intelligence capacity, albeit a somewhat limited one.

By 2142, the majority of the Unggoy were absorbed into the interstellar Covenant Empire, a federation of unique, sentient species. Centuries of discrimination and oppression against the Unggoy led to widespread regressions in cultural, societal, and technological infrastructures; consequently, many were led to believe that the race as a whole is generally incapable of matching or even coming close to the mean intelligence quotients of other sentient races; in reality, following their liberation by the Humans and Sangheili at the end of the First Great War, an assisted cultural boom laid the framework for a well-developed central Unggoy society, governed for the most part by the Kabu'a Protectorate."

The rest of us would appear to be safe.

Eb
Yeah that's the one! It's a handle I've used for quite a while, originated back in the days of enjoying Halo on the Xbox. :)
 

Soenvious

Member
Messages
129
Following on after I got some new stickers off Andy4200, I’m pleased with the result, I’m cack-handed so accuracy is not my strongest point but pleased nonetheless.
Thanks Andy4200
View attachment 115623
Looks really tidy, it's on my 'to do' list, but does using the paint and stickers block the light from shining through the graphics?
 

Nibby

Member
Messages
2,092
Looks really tidy, it's on my 'to do' list, but does using the paint and stickers block the light from shining through the graphics?
I don’t know to be honest. The little round clear piece that the light shines through on the buttons is removable once the buttons are off, a poke from the back with a darning needle will make them stick proud at the front and then pull them out, this to avoid spraying them of course.
 

Andy4200

Member
Messages
143
Just to let you know a bit more detail on these (not wishing to patronise, just clarify:)). The little round piece you can press out that Nibby is referring to is the indicator light, which shines when the button is switched on.
All the buttons including the nav buttons etc, have backlighting which comes on when the sidelights are on, so you can find them in the dark.
I designed the stickers to account for that by following the below, very fiddly process.

1. Strip buttons back to the white coating. (Or like I accidently did, strip the white as well and need to re-paint the white) Ensure you keep the buttons in order and orientation as they have slightly different profiles and heights.
2. Carefully use a scalpel to cut out the required sticker leaving a decent black border around the icon.
3. Peel off the backing of the sticker and attach to the white button using the just visible original marking for lining up.
4. Carefully cut and attach a piece of masking tape that just covers the icon but not the whole sticker.
5. Spray the buttons a couple of coats of satin black. Not too many otherwise you will have a thick edge of paint build up.
6. Remove the masking carefully, using tweezers advised.
7. Spray as many coats of matt laquer as you can be bothered to. The more coats, the more the paint and sticker edges blend.
8. Fit all the buttons back in place, once dry.

The attached photos show a bit more of the process and the another of the finished result.
Any questions, please fire away. I'll try and get some pics at night with them lit up. *Now added*
As stated before this is obviously not as professional as Roland or others can manage but I think it looks presentable.
 

Attachments

  • 20221230_110933.jpg
    20221230_110933.jpg
    110.1 KB · Views: 64
  • 20230117_201128.jpg
    20230117_201128.jpg
    90.8 KB · Views: 55
  • 20230120_134645.jpg
    20230120_134645.jpg
    69.6 KB · Views: 63
  • 20230618_215849.jpg
    20230618_215849.jpg
    25.2 KB · Views: 56
Last edited:

Soenvious

Member
Messages
129
Just to let you know a bit more detail on these (not wishing to patronise, just clarify:)). The little round piece you can press out that Nibby is referring to is the indicator light, which shines when the button is switched on.
All the buttons including the nav buttons etc, have backlighting which comes on when the sidelights are on, so you can find them in the dark.
I designed the stickers to account for that by following the below, very fiddly process.

1. Strip buttons back to the white coating. (Or like I accidently did, strip the white as well and need to re-paint the white)
2. Carefully use a scalpel to cut out the required sticker leaving a decent black border around the icon.
3. Peel off the backing of the sticker and attach to the white button using the just visible original marking for lining up.
4. Carefully cut and attach a piece of masking tape that just covers the icon but not the whole sticker.
5. Spray the buttons a couple of coats of satin black. Not too many otherwise you will have a thick edge of paint build up.
6. Remove the masking carefully, using tweezers advised.
7. Spray as many coats of matt laquer as you can be bothered to. The more coats, the more the paint and sticker edges blend.
8. Fit all the buttons back in place, once dry.

The attached photos show a bit more of the process and the another of the finished result.
Any questions, please fire away. I'll try and get some pics at night with them lit up. *Now added*
As stated before this is obviously not as professional as Roland or others can manage but I think it looks presentable.
Andy4200, PM'd you.
 

tonycharente

Member
Messages
182
Thank you all for these wonderful posts - I have been in denial about dealing with my sticky buttons for some months now (2005 Maserati 4200).
Like others no doubt, I've been reluctant to go to the effort, risk and considerable cost of having them redone professionally in America or the UK (I live in France), so these posts have given me new hope.
In my case, all of the buttons on the radio unit are good or better, all of the other buttons are really bad. That's NINE buttons in all (recycle with the little arrow, ECON,
front fog lights, rear fog lights, heated rear screen, MSP off, SPORT, left window and right window).
Armed with these posts I feel up to attacking the problem - please could somebody tell me how to remove the lower unit (the one with the window switches)?
I'm also about to send a PM to Andy4200 about buying his stickers.
Thanks again to all,
Tony
 

tonycharente

Member
Messages
182
I've ordered some stickers from Andy4200. Please could somebody tell me how to remove the lower unit (the one with the window switches)?
Many thanks
Tony
 

tonycharente

Member
Messages
182
Many thanks Vampyrebat - that's really helpful. I won't be changing any buttons on the radio unit but I can see that I need to remove it anyway.
Thanks again
Tony
 

Vampyrebat

Member
Messages
3,130
Many thanks Vampyrebat - that's really helpful. I won't be changing any buttons on the radio unit but I can see that I need to remove it anyway.
Thanks again
Tony
Your welcome Tony
Yep, the radio buttons seem to be more resilient than the other ones. If I can do it anyone can!