Exhaust Solenoid Valve Bypass

conaero

Forum Owner
Messages
34,630
Just had mine done at my local auto electrician mates shop, brilliant, brilliant, brilliant!

Ok, its probably not worth it if your running a stock GS exhaust, but for me running the Larini de cat, all **** brakes loose, stainless system, its great.

I can now operate my exhaust remotely from the Sports button, so I can run in SPORT mode with the flaps closed and saves me sinking down in my seat and hiding from everyone who stares at me!

The sparky has taken pictures and I will supply a complete how to guide in a day or so, its pretty simple. All is needed is about 5 meters or insulated cable, some cable ties and a toggle switch. Takes about 2 hrs to do.

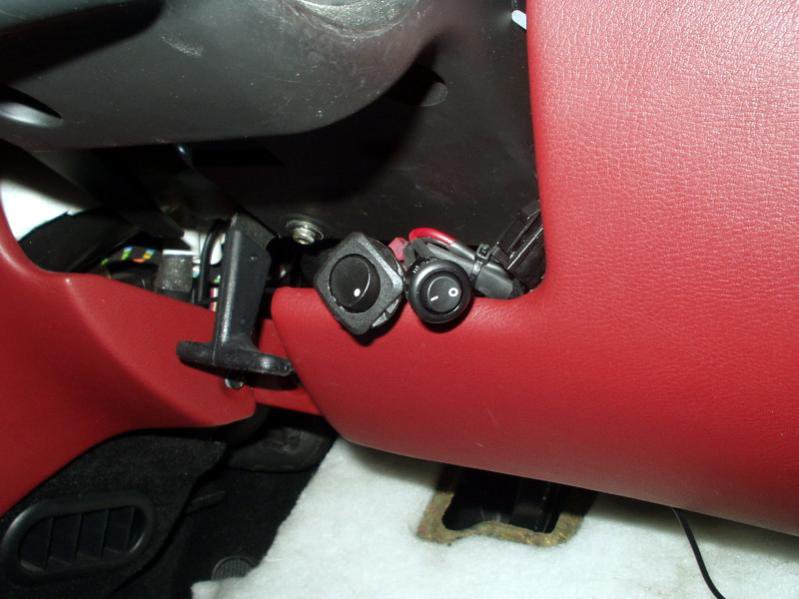
What I now effectively have are 2 buttons under my steering column, 1 for the FD DWB and another for the Exhaust bypass.

Incidentally, if you have a stock GS system, and want the full noise all the time, you can just disconnect the solenoid. Its located on the underside of the car, just forward of the passenger rear (NSR) wheel, under a black plastic cover. You can also, just pull the vacuum pipes from the rear boxes, but make sure you plug them and tie them our of the way, or they will suck up all sorts of muck and shaft the whole system.

You cold also, just pull the control fuse in the panel under the passenger footwell carpet.

Its F70 in Block D

fuses.jpg
 
Last edited:

conaero

Forum Owner
Messages
34,630
Ok, here is the pictorial:

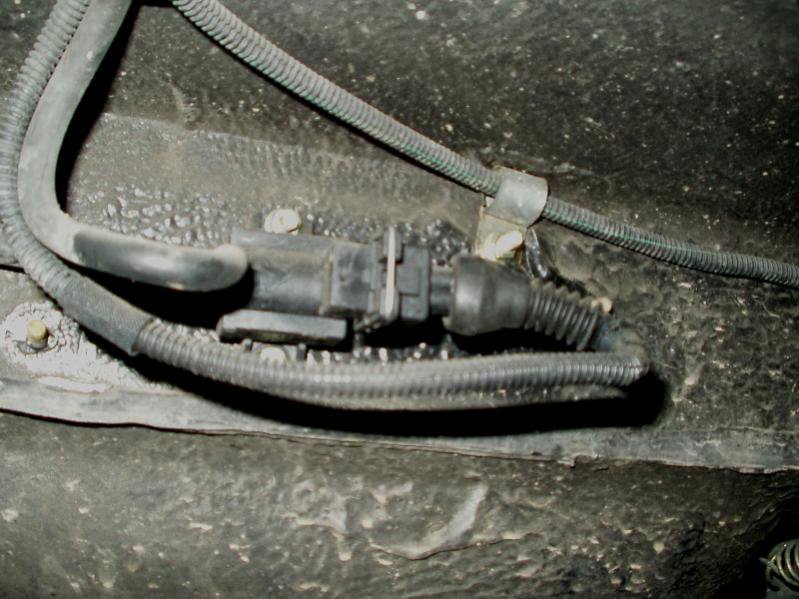
  1. Locate vacuum actuator mounted on the underside of the car just forward of the passenger rear wheel and remove plastic protective cover.

    maser 1.jpg
  2. Peel back conduit from wiring loom to two pin plug attached to actuator and locate blue and white wire. Best to check that this is the correct wire using a voltmeter. With the sport switch on, you should 12 volts on this wire and with the switch off, this wire should be 0 volts. (The ECU earths this wire to complete the circuit and energise the solenoid).
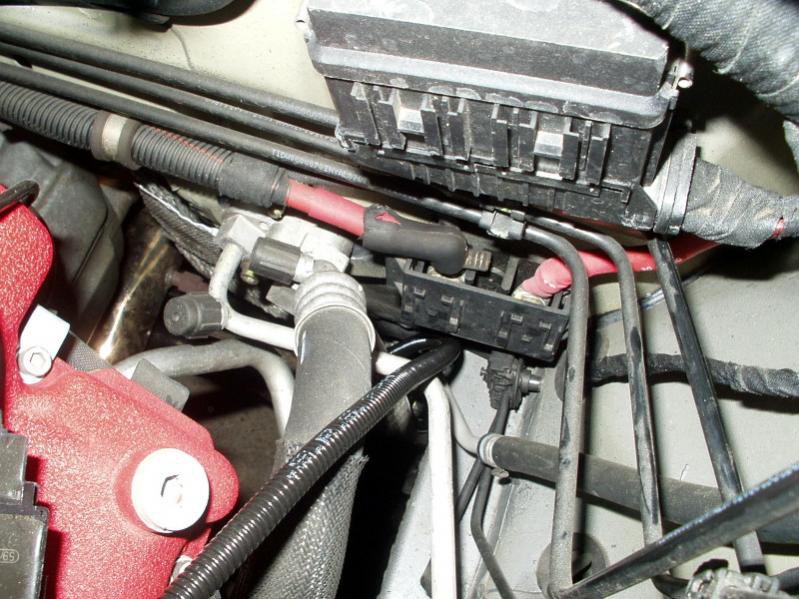
  3. Under bonnet - remove plastic covers from near side inner wing etc to allow access to bulk head at the back of the inner wing and locate main wiring loom were it passes through the bulk head into passenger compartment.
  4. VERY carefully, make a small incision into the end of this grommet just big enough to allow your twin core cable to be pushed through the grommet.
  5. Inside the car, remove the fabric trim panel from below the glove box and the panel on the side of the centre console to allow access under the heater box.
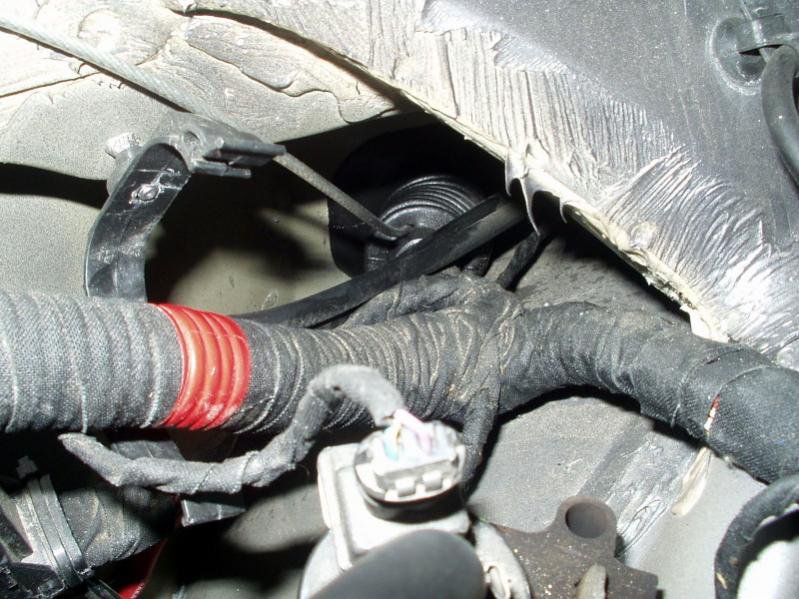
  6. I used a twin core 1mm 2 cable (twin 14 strand) which I then sleeved in a split conduit were it runs under the vehicle for added protection. I ran this under the vehicle, following the vacuum pipe that goes to the actuator. Make sure it goes behind the heat shield at the front of the foot well, to keep it away from the exhaust.

    maser 3.jpg
  7. It’s fun getting the wire through the grommet into the car. I used a "pull wire" consisting of an old Speedo cable to poke through first. Be careful not to snag or damage other cables in the loom when doing this. Seal the hole in the grommet with some silicone sealer or similar once you have completed your cable run.

    maser 2.jpg
  8. Drop the lower fabric trim from under the steering column and poke the cable through behind the centre console, following existing wiring looms were possible and attach to a simple on/off switch.
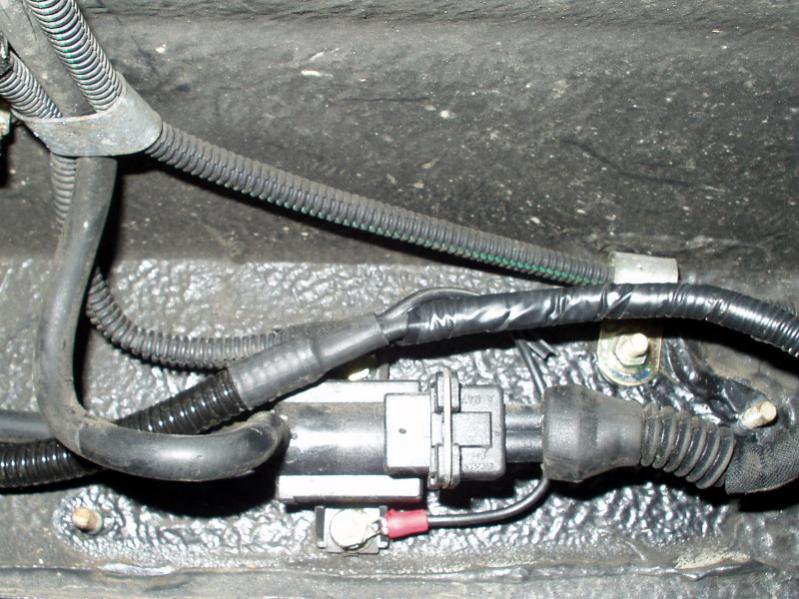
  9. Going back underneath, I earthed to black wire of the two core cable to the actuator mounting bolt and spliced into the white and blue, soldering and sleeving the red wire in the two core to it. Time to test!

    maser 4.jpg
  10. Refit vehicle.

    maser 5.jpg
 
Last edited:

urbanmaser

Member
Messages
2,911
Matt I never realised you were such a technical wizz kid...... my wife would love you.........she has been nagging me to change a zillion light bulbs around the house.........how about doing a favour for a mate???? :tomato4:
 

conaero

Forum Owner
Messages
34,630
I did not do it, its been written by my mate who is an auto electrician. As much as I would like to take the credit, I cant :crying:
 

Hedgetrimmer

Junior Member
Messages
145
A great write up and something I am going to have a go at. The only bit that I cannot fully understand relates to how to integrate the twin core to the original circuit. It suggests that the red twin core wire should be spliced into the original blue and white original wire. I assume that the red and black wires then connect to each terminal on the new switch located inside the car. The black cable them becomes the return from the switch and splices into the other end of the cut blue and white wire to close the circuit. I don't understand why and how the black cable needs to be earthed to the car. Anyone have a better idea of how the circuit works as I am sure I am missing something!

Thanks Carl
 

Fair2

Junior Member
Messages
211
Matt,
I was wanting to be able to open the valve/on with the Sport button off. The opposite to what you did on your write up.With the state of some of our roads it is to firm at times and also to avoid cracked rims.
If I understand I need to get a positive/power to Actuator .I located the plastic box so I need to get the power to a switch under the dash from a source. Any suggestions.
Robert F
 

MAF260

Member
Messages
7,662
Matt,
I was wanting to be able to open the valve/on with the Sport button off. The opposite to what you did on your write up.With the state of some of our roads it is to firm at times and also to avoid cracked rims.
If I understand I need to get a positive/power to Actuator .I located the plastic box so I need to get the power to a switch under the dash from a source. Any suggestions.
Robert F
if you want the noise all the time just unplug the solenoid at the exhaust end and it will keep the valves open all the time.
 

safrane

Member
Messages
16,852
I did that mod. But as mentioned you do not get the blip on down shifts so I have reverted to standard now.
 

Fair2

Junior Member
Messages
211
I understand, but I still want to turn it off when needed. I.e. When the "the boys in blue"are around!
Robert
 

Spartacus

Member
Messages
3,185
Did any one actually figure out which wires are to be spliced into which wires on the car as its not that clear in the description ? i dont understand why there is an earth from the new switch . Surley the two new switch wires should just interupt the blue and white origional wire ?