4200 WITH XENONS : ADJUSTING HEADLAMPS (HEADLIGHTS)

tonycharente

Member
Messages
182
I know this topic has been the subject of various posts, even a very good video (for a GS), but there appears to be some conflicting information.
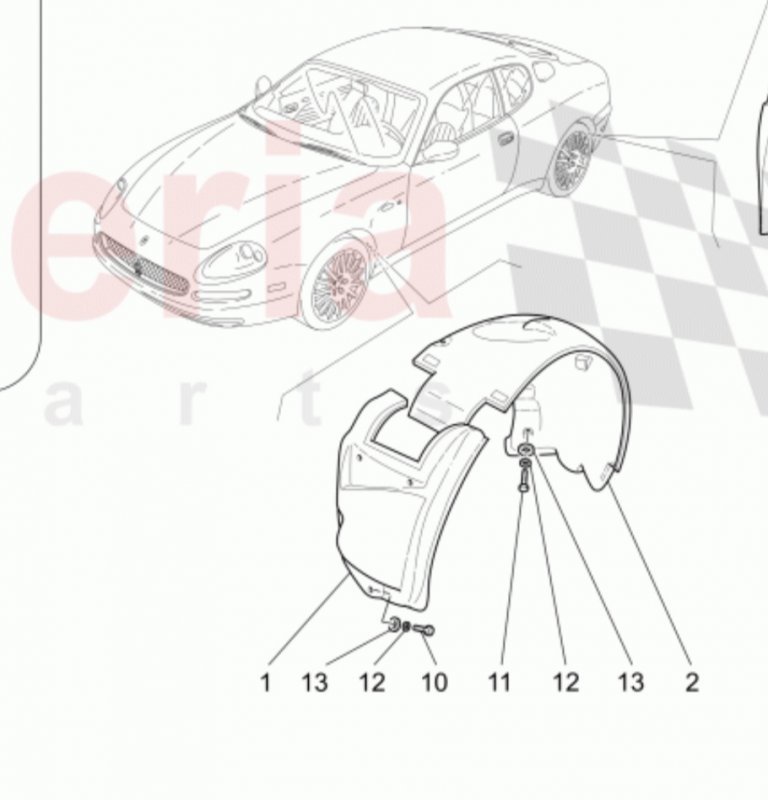
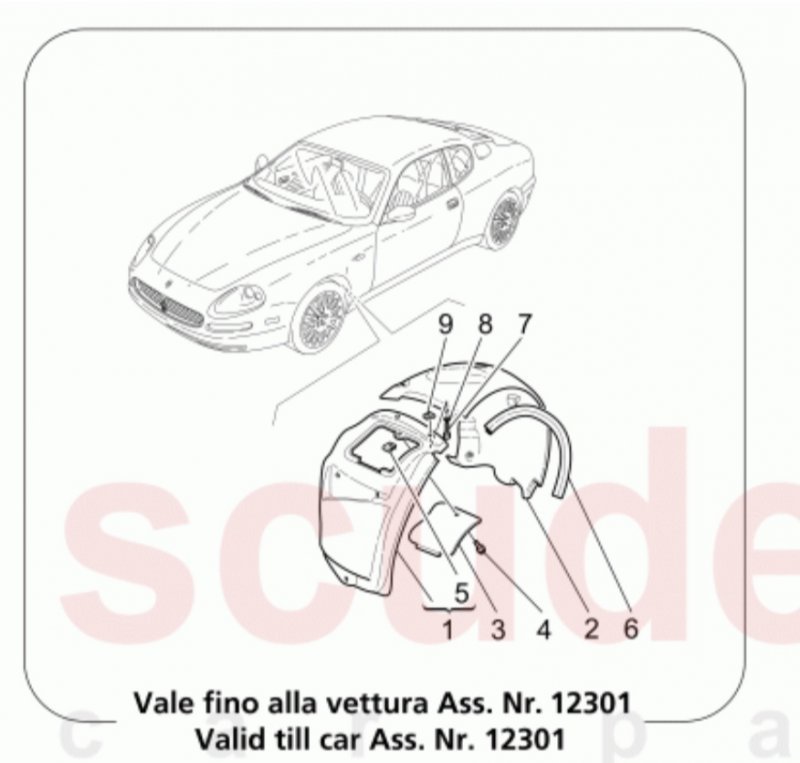
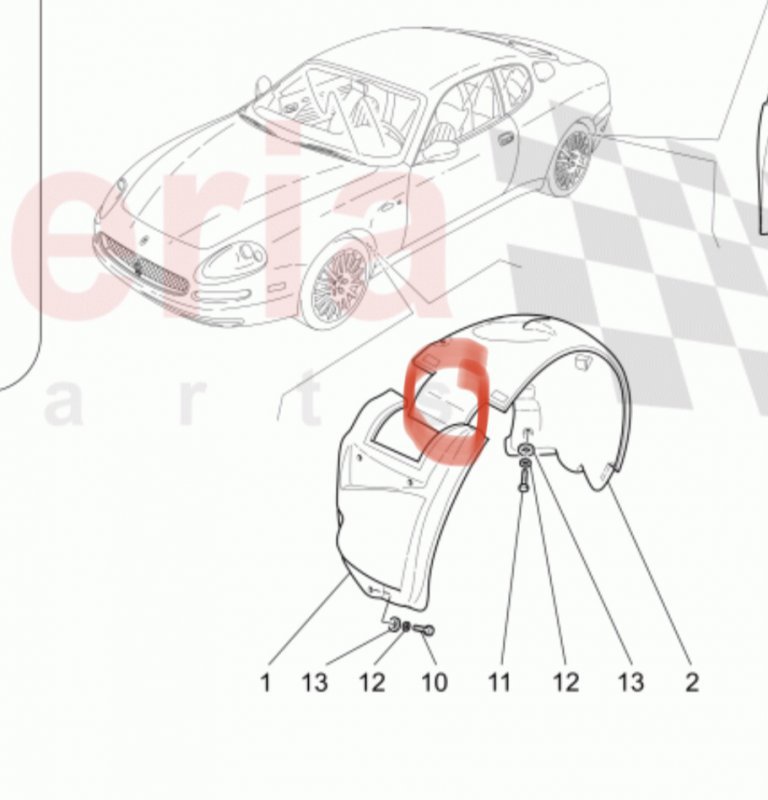
I've removed the wheel arch liners and can see the two adjustment screws - so far so good.
One version is that one adjustment screw is for the low (dipped) beam, the other for the high (main) beam, in which case how do you adjust for left and right? The other version is that one adjustment screw is for up and down, and the other for left and right, in which case which screw is which, and does this mean there's no seperate adjustment for each light (both lamps get adjusted at once)? I'm asking before just doing it as I don't want to lose track of what I've done.
Whilst I'm at it, which way does turning the adjustment screws work - as in clockwise/anticlockwise, up /down, left/right ???
Many thanks
Tony
 

tonycharente

Member
Messages
182
Surprisingly there have been 104 "views" of this topic, but not a single reply.

I had removed the right hand wheel arch liners in order to replace the thermostat, and this having been completed I decided to try adjusting my Xenon headlamps without waiting any longer for an answer.

With the wheel arch liners out of the way, this is what you can see:-
9621096211
My confusion (see my original post) was which adjusting screw to turn and which way to turn it. My goal was to raise the aim of the right hand dipped beam. I decided to start by trying turning the left hand screw anti-clockwise and see what happened. I used a socket with a very short extension bar and a very small ratchet. I'd marked the initial position of the screw with Tipp-Ex (see the photos) so as to be able to revert to where I was if need be. The problem was that with the socket in place I could no longer see the Tipp-Ex, and it took a lot of ratchet movements to achieve any visible movement of the headlamp beam, so I don't actually know how many times I turned the screw - one or two rotations? Nevertheless the dipped beam did slowly move up.

I then put the wheel back on but I have yet to drive the car at night to see if I've done it OK (dipped beam aimed better, and not being flashed by other cars).

I didn't touch the other screw, so am not certain what it does, (both lamps left/right or main beam up/down) - if anyone knows I would still very much welcome an answer to my original questions.

Tony
 

philw696

Member
Messages
25,651
Tony,
Now you have the arch liners out and everything looks in good order there pop into your local garage as they all have beam setters and will take minutes to do and you know they will then be right.
 

GTVGEOFF

Member
Messages
396
I have been hoping like you that someone would respond to this. The cars last MOT a few weeks ago the inspector passed the car but commented how low the lights were set, he didn't have time to adjust them through.
So thought I would have a go, I still haven't done them as like you I am waiting for clarification.
Why do these cars seem to have there lights incorrectly set?
 

philw696

Member
Messages
25,651
As an ex MOT tester I always adjusted them if needed during the test it took moments if they weren't seizedor broken.
 

Oneball

Member
Messages
11,133
This is what the light looks like inside. So outside (of the car) one seems to be for up down and other left right. 96217
 

tonycharente

Member
Messages
182
As an ex MOT tester I always adjusted them if needed during the test it took moments if they weren't seizedor broken.
Hello Phil,
I doubt you would have done it on a 4200 though, at least not for free. You have to remove the wheel, then the wheel arch liners before you can reach the adjusters, at which point the whole car is pointing up in the air making precise adjustment difficult.
 

2b1ask1

Special case
Messages
20,309
Hello Phil,
I doubt you would have done it on a 4200 though, at least not for free. You have to remove the wheel, then the wheel arch liners before you can reach the adjusters, at which point the whole car is pointing up in the air making precise adjustment difficult.

I disagree, there is a small hatch in the arch liners retained by a single screw, a stubby screwdriver removes that and then a 14" ratchet and deep socket easily adjusts them, you can reach both adjusters quite easily. best put the car on full lock first for each side. I did mine one evening on a quiet industrial estate, pointed it at a big brick wall about 20m away. took no more than 10 mins total.
 

tonycharente

Member
Messages
182
This is what the light looks like inside. So outside (of the car) one seems to be for up down and other left right. View attachment 96217
Hello Oneball,
Thanks that's very helpful. In your photo it looks like both lamps are mounted on the same base, so both do get adjusted at once just as you suggest, thank you.

Your avatar looks to show a 3200 though? Do you have Xenons? Same as on a 4200?
 

tonycharente

Member
Messages
182
I disagree, there is a small hatch in the arch liners retained by a single screw, a stubby screwdriver removes that and then a 14" ratchet and deep socket easily adjusts them, you can reach both adjusters quite easily. best put the car on full lock first for each side. I did mine one evening on a quiet industrial estate, pointed it at a big brick wall about 20m away. took no more than 10 mins total.
No small hatch on mine - no choice but to do as I said. Mine is a 2005 (2006 MY) 4200. I've an idea that the GS's had a hatch. What car do you have,please?
 

safrane

Member
Messages
16,914
If memory serves me right, the adjuster at the centre of the light changes the pitch up and down, the one at the far end moves the pattern from right to left
 

tonycharente

Member
Messages
182
If memory serves me right, the adjuster at the centre of the light changes the pitch up and down, the one at the far end moves the pattern from right to left
Yes, thank you, that matches my findings (except I didn't touch the one at the far end, so I can't be 100% certain)

CORRECTION CORRECTION CORRECTION
My above reply was wrong - please see the post I'll be making evening of 1st Feb 2022.
 
Last edited:

Zep

Moderator
Messages
9,330
There were two versions of the arch liner, early had a removable panel, later have a flap which is secured with Velcro which allows it to be pulled down for adjustment.
 

Attachments

  • DF238699-E0E3-4DF6-892C-8B17BC0EA214.jpeg
    DF238699-E0E3-4DF6-892C-8B17BC0EA214.jpeg
    49.8 KB · Views: 10
  • C9B562D7-7168-4D6F-9B1D-CF06ADB2AC3D.jpeg
    C9B562D7-7168-4D6F-9B1D-CF06ADB2AC3D.jpeg
    54.1 KB · Views: 12

Oneball

Member
Messages
11,133
Hello Oneball,
Thanks that's very helpful. In your photo it looks like both lamps are mounted on the same base, so both do get adjusted at once just as you suggest, thank you.

Your avatar looks to show a 3200 though? Do you have Xenons? Same as on a 4200?

headlight is from a 4200 but not Xenon. I’d imagine they work the same but could be wrong. Most cars with a combined headlight adjust all together and factory manuals often tell you levelling specs based on main beam.
 

tonycharente

Member
Messages
182
There were two versions of the arch liner, early had a removable panel, later have a flap which is secured with Velcro which allows it to be pulled down for adjustment.
Thanks Zep, that clarifies the situation - mine is too late to benefit from the removable flap. Maserati obvious felt they'd made access too easy... I've got both halves of the arch liner removed at present, so if I do decide I need to refine the adjustment I'll be able to do so the car on all four wheels (wheels on full lock). Not quite sure just how easy it would be to pull down the front half though, even unbolting/unscrewing it as it tucks into the wheel arch. I'll test it when I put both arch liners back in.
Thanks again.
 

Zep

Moderator
Messages
9,330
Thanks Zep, that clarifies the situation - mine is too late to benefit from the removable flap. Maserati obvious felt they'd made access too easy... I've got both halves of the arch liner removed at present, so if I do decide I need to refine the adjustment I'll be able to do so the car on all four wheels (wheels on full lock). Not quite sure just how easy it would be to pull down the front half though, even unbolting/unscrewing it as it tucks into the wheel arch. I'll test it when I put both arch liners back in.
Thanks again.

No problem. Just so you know, the bit I circled is the flap, secured by Velcro, which can be folded down without undoing any screws.
 

Attachments

  • 21C2BEC6-4C85-463C-B9C9-D03C4CEB3899.jpeg
    21C2BEC6-4C85-463C-B9C9-D03C4CEB3899.jpeg
    50.7 KB · Views: 9

tonycharente

Member
Messages
182
No problem. Just so you know, the bit I circled is the flap, secured by Velcro, which can be folded down without undoing any screws.
Thanks again Zep. I see much better what you mean now.
I'll test it when I put both arch liners back in.
Thanks again.
 

tonycharente

Member
Messages
182
If memory serves me right, the adjuster at the centre of the light changes the pitch up and down, the one at the far end moves the pattern from right to left
When I first replied to Safrane I said I'd done what he'd said, but I was wrong, sorry. I'd confused which screw was which. I discovered this because when I tried the car on the road at night I found the headlamps were pointing too much to the left. I therefore tried to correct this using the other screw, the one in the middle, but this just raised the height of the beams considerably - I'd used the wrong screw first time, pulling the beams to the left, and scarcely up at all, which is why I'd had to make a lot of turns of the screw.
So just to clear things up, what Safrane said was exactly right. In my case, for right hand side headlamps, it was the screw on the left (see my photos) that moved the beams left/right and the screw in the middle up/down. After several tries I've managed to get the settings to my liking (road better lit up with no flashes from on-coming traffic). Tomorrow I shall reinstall the wheel arch liners and then try the accessability just opening the flap as per Zep's excellent diagrams. I'll report back...
 

tonycharente

Member
Messages
182
"Tomorrow I shall reinstall the wheel arch liners and then try the accessability just opening the flap as per Zep's excellent diagrams. I'll report back..."

This afternoon I reinstalled the wheel arch liners so my car is all back together. Before I put the wheel back on I folded down the velco-attached flap, as per Zep's very helpful diagram. Access is certainly possible, although of course much harder than with the wheel arches out of the way. Trying via the flap would certainly be the way I'd try if I hadn't removed the wheel arch liners anyway in order to change the thermostat.

I would say though that knowing the nature and position of the adjustment screws would be very useful - the photos I posted earlier would help with this. As would not being 71 and rather stiff...
 

Zep

Moderator
Messages
9,330
"Tomorrow I shall reinstall the wheel arch liners and then try the accessability just opening the flap as per Zep's excellent diagrams. I'll report back..."

This afternoon I reinstalled the wheel arch liners so my car is all back together. Before I put the wheel back on I folded down the velco-attached flap, as per Zep's very helpful diagram. Access is certainly possible, although of course much harder than with the wheel arches out of the way. Trying via the flap would certainly be the way I'd try if I hadn't removed the wheel arch liners anyway in order to change the thermostat.

I would say though that knowing the nature and position of the adjustment screws would be very useful - the photos I posted earlier would help with this. As would not being 71 and rather stiff...

Don’t credit me Tony, I “borrowed” then from the internet. But glad it helped!