You are using an out of date browser. It may not display this or other websites correctly.
You should upgrade or use an alternative browser.
You should upgrade or use an alternative browser.
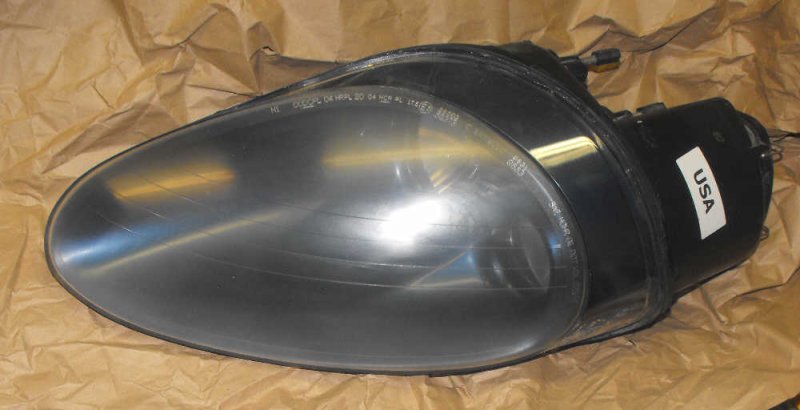
need help,2004 Coupe headlight removal, air box removal
- Thread starter k1coupe
- Start date
k1coupe
Junior Member
- Messages
- 99
The finest wet sand I got is 2000 grits, as for polishing after that I do not know what is best polish to use.Needs more polishing with finer and finer compounds is all
C
I will apply a UV protect clear coat before I re install
CatmanV2
Member
- Messages
- 48,969
The finest wet sand I got is 2000 grits, as for polishing after that I do not know what is best polish to use.
I will apply a UV protect clear coat before I re install
I'm no expert, but I think you need to go a lot finer than that. 5-6000 maybe. Then you want proper finishing compounds like (I think) 3M.
I can't recall who the detail and polishing experts are but I know @conaero knows more than I. Probably @Zep as well. If you put that on your car, I suspect you're going to be very disappointed as well as not being able to see at night. In the UK I'd be a bit surprised if it passed an MOT as the pattern edges must hazy as ****.
Or maybe I'm way of track
C
k1coupe
Junior Member
- Messages
- 99
The wet sands 2000 grits I have is 3M, I'll shop for finer grits
This car will be garaged till April that snow season is over, so plenty of time to clear the lens and correct the disgusting sticky parts. And when all is done I do the first test drive to find if trans and clutch are working good and if they are I got it made with a good priced car.
This car will be garaged till April that snow season is over, so plenty of time to clear the lens and correct the disgusting sticky parts. And when all is done I do the first test drive to find if trans and clutch are working good and if they are I got it made with a good priced car.
StickyPlastics
Junior Member
- Messages
- 70
2000 grit wet so the len goes dull like you have. Then use a buffer with g3 fine and a fine water mist. Takes about 5 mins to get it perfectly clear. Then ceramic coat to protect.This is what I got after wet sanding and polish, it's just an improvement but not clear as StickyPlastics photo
View attachment 77886
Sent from my SM-G973F using Tapatalk
CatmanV2
Member
- Messages
- 48,969
2000 grit wet so the len goes dull like you have. Then use a buffer with g3 fine and a fine water mist. Takes about 5 mins to get it perfectly clear. Then ceramic coat to protect.
Sent from my SM-G973F using Tapatalk
See! I knew someone would be along
C
As other have said- keep going.This is what I got after wet sanding and polish, it's just an improvement but not clear as StickyPlastics photo
View attachment 77886
A simple kit, like the one by AutoGlymm, will work for you from there...You need an electric drill but as you got them out the car, there's nothing to lose from going powered....
Some have even used toothpaste to get them back to clear !
Ceramics are a bit tricky to use by reputation. They can leave a smeared and dull/hazy finish from what Ive read....You do need something though.
I used Nanolex Si3d-headlight
StickyPlastics
Junior Member
- Messages
- 70
If you are in the UK and stuck. Post them up and will sort out for you.This is what I got after wet sanding and polish, it's just an improvement but not clear as StickyPlastics photo
View attachment 77886
Sent from my SM-G973F using Tapatalk
StickyPlastics
Junior Member
- Messages
- 70
Just mask round the headlamp. Stops you burning the paintwork and rubber sealAs other have said- keep going.
A simple kit, like the one by AutoGlymm, will work for you from there...You need an electric drill but as you got them out the car, there's nothing to lose from going powered....
Some have even used toothpaste to get them back to clear !
Ceramics are a bit tricky to use by reputation. They can leave a smeared and dull/hazy finish from what Ive read....You do need something though.
I used Nanolex Si3d-headlight
Sent from my SM-G973F using Tapatalk
k1coupe
Junior Member
- Messages
- 99
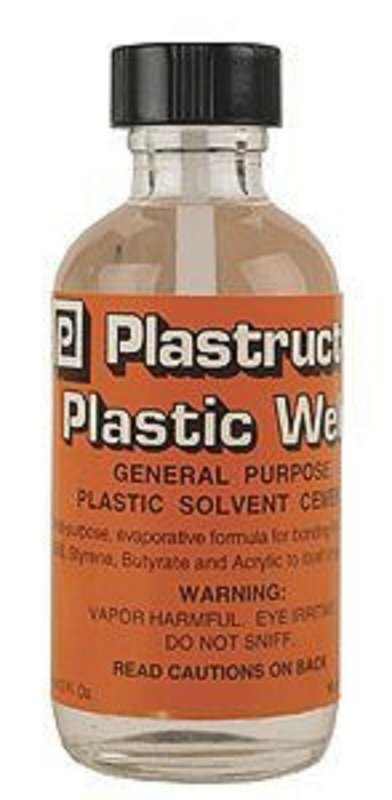
Regarding plastiweld, I had used different plastic weld before and it did not hold, broke easily, so I want to be sure this time I use something known to be OK.Ah it is quite a common problem I believe. If that is indeed from the headlight housing then it can be plastiwelded back on. A plastiwelder only costs about £50
Also the very top mount on the airbox tends to sheer and there are flex bush mounts from the airbox to the subframe which tend to seize then sheer also. Ultimate solution is new airbox and flex mounts or throw it in the bin and put a K&N onto the end of the intake instead
Is plastiweld you talk about is this:

It sells for about $5 on ebay, so I think you indicated something else

Plastic welding - Wikipedia
 en.wikipedia.org


