You are using an out of date browser. It may not display this or other websites correctly.
You should upgrade or use an alternative browser.
You should upgrade or use an alternative browser.
JT's 2001 Maserati 3200GT Rebuild! Story, Parts and Advice
- Thread starter JTop
- Start date
-
- Tags
- 3200gt maserati fire parts rebuild
MRichards
Member
- Messages
- 303
The Magneti Marelli throttle bodies are still available new if you know the right people. They are,of course,expensive.
I had mine converted cheaply & within 1 week by a firm who specialise in contactless conversions in Canada. They backed up their conversion with a test graph to show it conformed with Maserati specification. I also bought a Chinese contactless conversion kit which is still in the spares box.
The Bosch throttle pedal potentiometers are no longer available but a contactless substitute is readily available on this forum.
The Volvo throttle bodies can be adapted to work on the Maserati,also available on this forum.
The basic problem with both these items is long term wear of sliding components.
davy83
Member
- Messages
- 2,976
Throttle body is not a simple clean up job be careful there. If you get into trouble i can help out.It only gets better from here
I think..
Wickedly enough, as soon as I arrived home I had access to a mate's brand new hydraulic press to swap the bearings out of their metal guide shells.
I attempted to do this prior to leaving for my trip, in a vice and that was to no avail. The press however, after a dozen pumps abruptly gave way and there I knew I had false hope of magically removing it with the vice or with any other piece of equipment haha
View attachment 107417View attachment 107418
These Explorer bearings were cheaper to attain from Europe than anywhere locally in Australia, and I spent more than enough time hunting for the original SKF 633186A part just for the over extreme Dynamic capacity(C) that these are rated for. Again my understanding only contributes to the theoretical rotational life of the bearing. So a larger number would benefit to live a longer lifespan. But nobody has them sooooooooooooo
Bit of lithium grease and new ones pressed in for both housings. Might as well
July ->
Spent the month repairing my VW and bought another(as a quick project) as I've left it neglected for a little bit too long... This month was conclusion month for the engine shop too
Frank had stuck into getting everything ready for me and it definitely has gotten there. Block was cleaned and back to its former glory. Here he also finished up with the heads and had everything package up for me ready to go!
View attachment 107419View attachment 107420View attachment 107427
Crank was hot tanked and journals were polished and all dimensioned checked for wear(as good as out of factory! Checked this myself too, prior to handing it(might not have been worth doing anything if it wasn't) over and after getting it back from the shop check the clearance for the brand new bearings.)
Oil galleries were drilled out, and all hardened carbon grit was cleaned up(I posted a photo earlier of the camera view of this gunk) and new plugs installed via the "Ferrari" method.
View attachment 107428
Block was jet washed, degreased, cold tanked and bead blasted; unsure of Frank's specific order of these tasks
De-carboned all pistons and cleaning all ring landings - preparation for ceramic and teflon coatings.
Liners all prepped and set for power honing for new piston clearances
All pistons and rods then fully assembled, with a reset on piston rings (got brand new Nissan VQ25 rings that were a spot on match to the originals as some were already broken or snapped when trying to be removed)
Re-tapped all holes except head bolts, I ended up doing this.
Heads were stripped, cleaned with intake and exhaust ports bead blasted. Then passed through the sergi jig, corrosion welded and passed through the jig again
Then cleaned, both valve seats and valves refaced. Power honed the valve guides, reset the valve stem protrusion.
New valve stem seals(I got through Maserati, but they are just Elring seals... nothing fancy) Spring rates checked.
Finally re-shimmed to match specifications and finally doing a vacuum check to be sure the valves are not leaking!
The only thing that Frank was afraid of bead blasting, was the cam box, and I agree with him. Any beads damaging the cam surface and it's trouble. I would need to seal these tight and let Greg blast the exterior (another job to be done another day!) Or to leave it as evidence to the history of it :|
Next day; after a months worth of work! All the Hydroblasted bits were complete and ready for their next journey
View attachment 107421
Greg had some trouble with dismantling the brake master cylinder and mentioned if I can dismantle it, he'll gladly get it done. It was as simple as pushing the spring in and turning it upside down for the pin to fall out of the exchange ports. And back it went along with the throttle body(and few other smaller bits I forgot about). This. was a disgusting mess(which I still haven't finished, ugh) I'll explain this in the next post
View attachment 107422View attachment 107423
Anyway; here aresomeone pretty pictures of perfect looking parts
View attachment 107424
Photo Maximum; I'll continue seeing as I'm a tad bored today, lol
JTop
Junior Member
- Messages
- 48
Cheers PhilAs ever a Great read with aperitifs.
I don't see anything wrong with mine, apart from a few bits that I'd personally wish to get sorted. Why I'm not hunting for new, no point really.The Magneti Marelli throttle bodies are still available new if you know the right people. They are,of course,expensive.
I had mine converted cheaply & within 1 week by a firm who specialise in contactless conversions in Canada. They backed up their conversion with a test graph to show it conformed with Maserati specification. I also bought a Chinese contactless conversion kit which is still in the spares box.
The Bosch throttle pedal potentiometers are no longer available but a contactless substitute is readily available on this forum.
The Volvo throttle bodies can be adapted to work on the Maserati,also available on this forum.
The basic problem with both these items is long term wear of sliding components.
My one has the Sacer Chinese conversion, which someone has done prior. As to why I mentioned I was not the first one to open mine!
Will see once the electronics and all parts are plugged in. If there is anything else that's uh. broken haha
Cheers, once I'm up to it and can't get it right. Will do!Throttle body is not a simple clean up job be careful there. If you get into trouble i can help out.
AH, a week has passed and my *** hasn't had a good opportunity to sit down behind any PC... Jetlag sucks, and I'm still not affixed to the right timezone
So August was a busy month as we had a new Merc to sort out and get on the road asap. So I had some time to sit and clean the engine harness that I received earlier in the year, and progressively replace all the rubber boots, connector by connector. I'm still a long way off!, hopefully after the motor is assembled, I can mount it all onto the motor and tesa-tape and corrugate conduit everything perfectly.
September arrives and well.. I had the immediate urge to get it all finished! So away we go, from almost a perfect beginning that last occurred 21-22 years ago
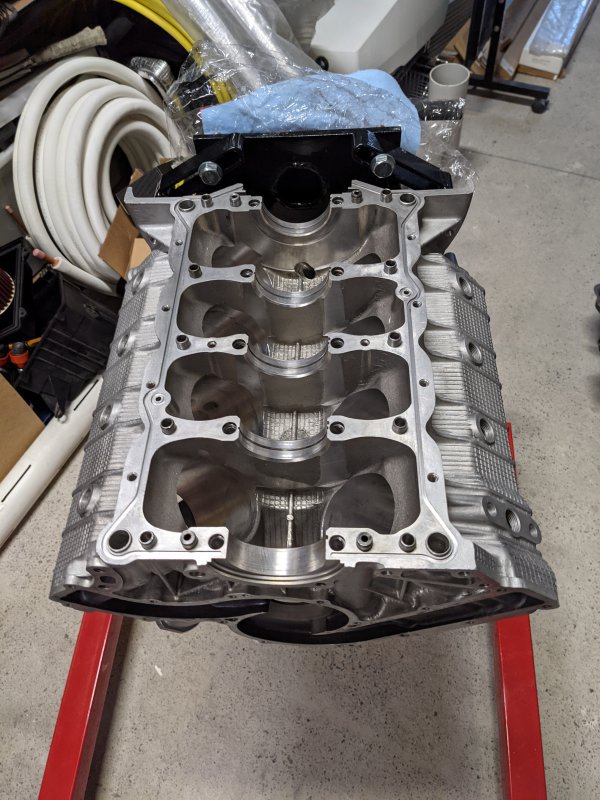
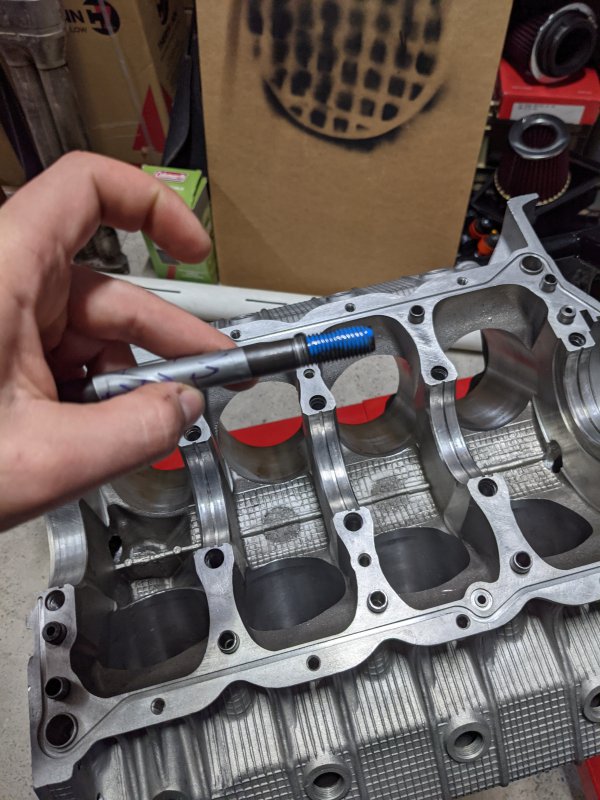
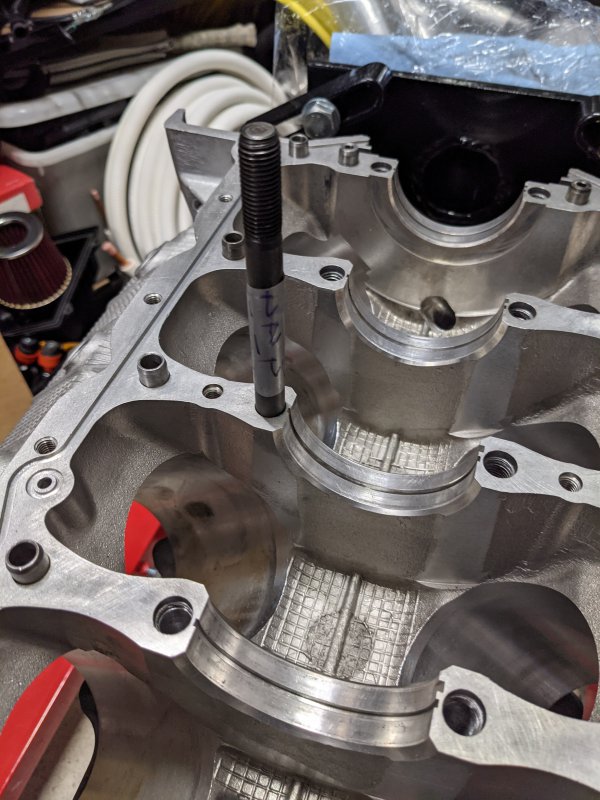
Loctite 242E was a fun experience to attain as nothing explains what the E is. Loctite Australia had to ask the USA branch for what E is, and to conclude. "E = Europe" so 242 it was!
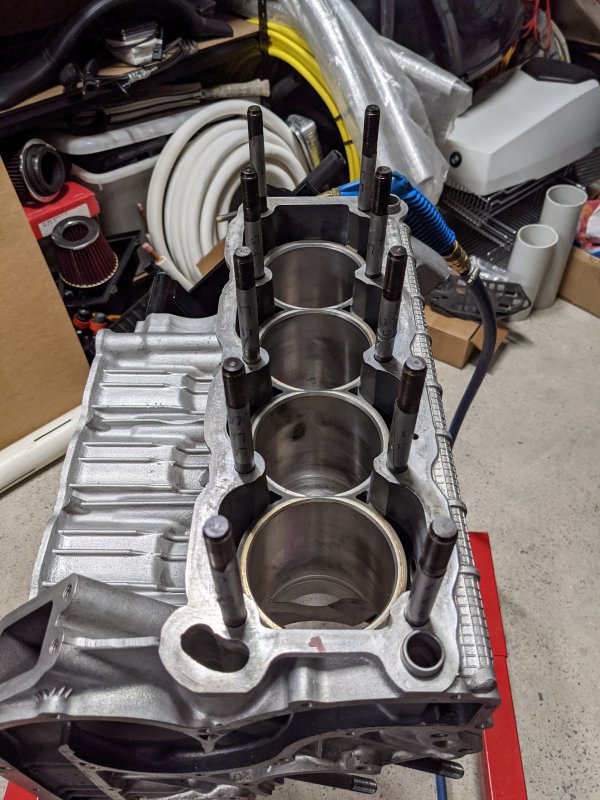
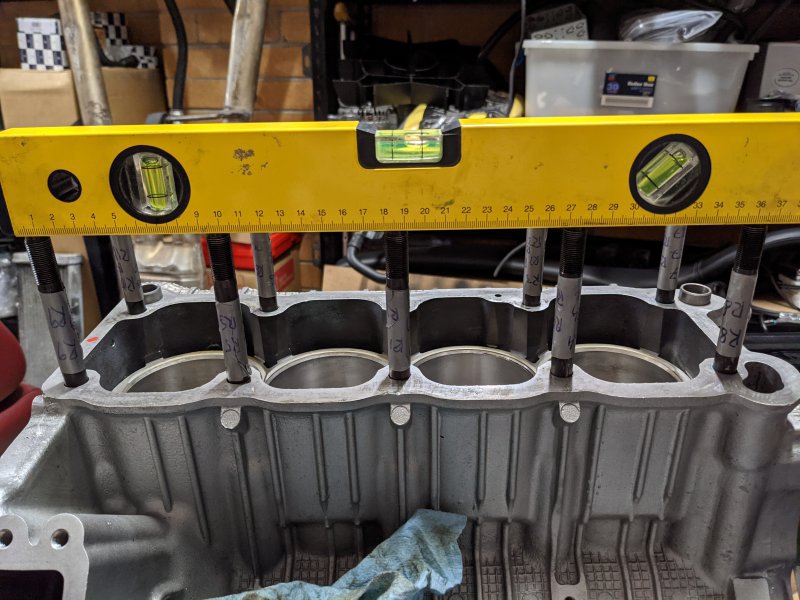
Got all the studs in about the same amount by hand, some required a little bit more persuasion than others with a double nut trick. But they're back in.
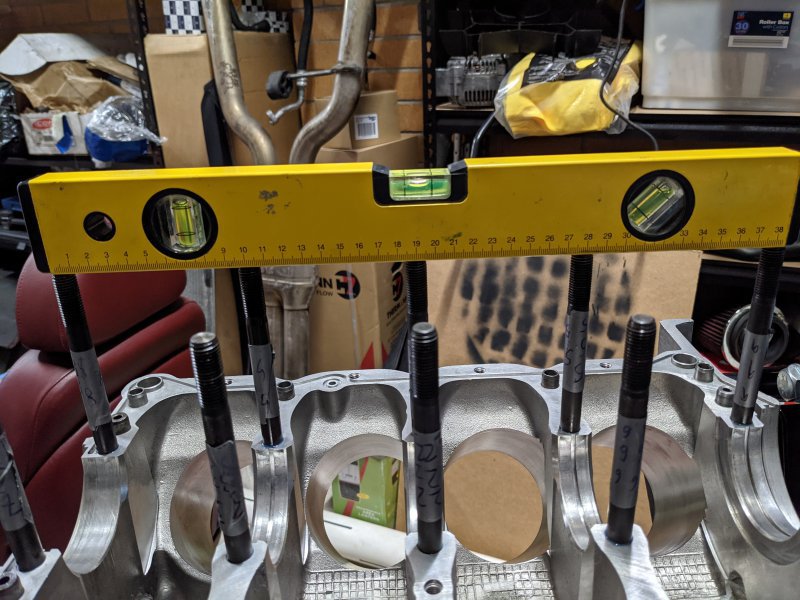
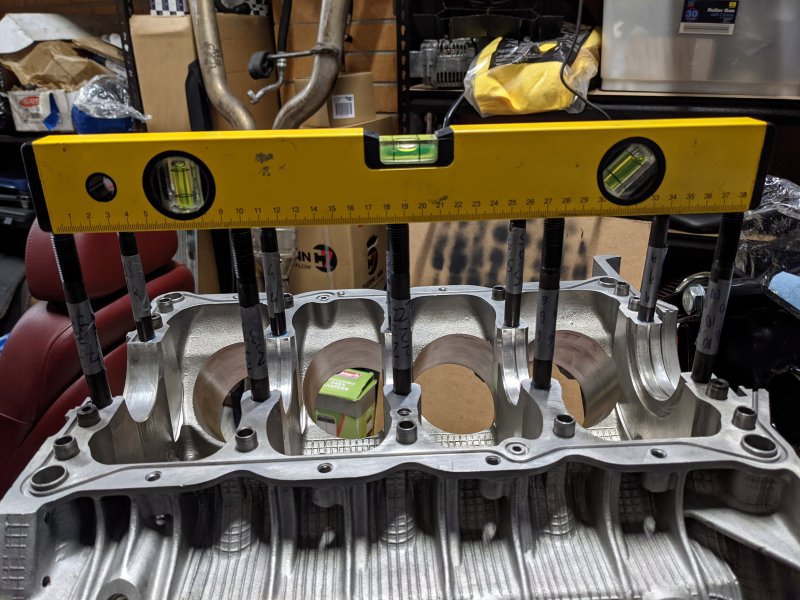
Mains then Head, then the coolant ports on the sides.
Which I uh, forgot to get plated at the moment of the photos.
This anyway prompted me to sort all the hardware, and get it all cleaned up and zinc plated once again!
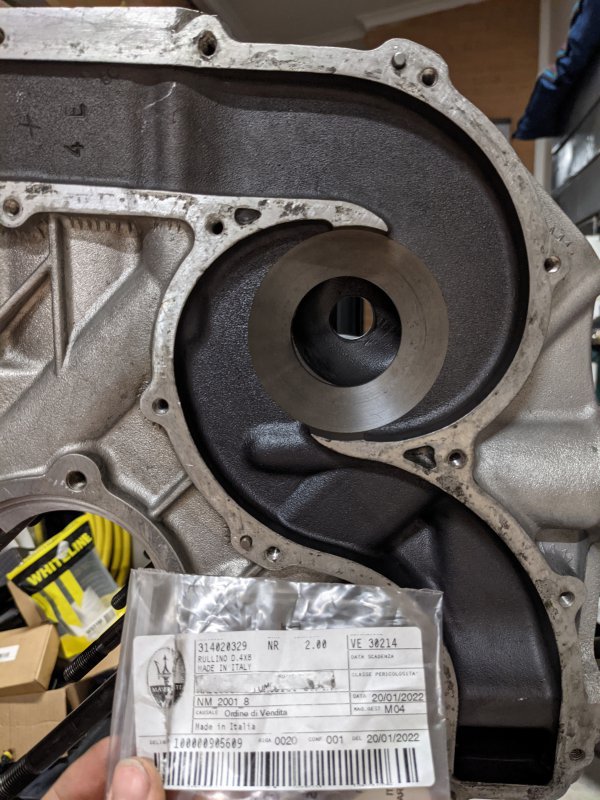
Fitting the most crucial waterpump parts; the dowels!
They were non existent, causing the bolts to rust and that was a nightmare! Never lose these when swapping a waterpump.
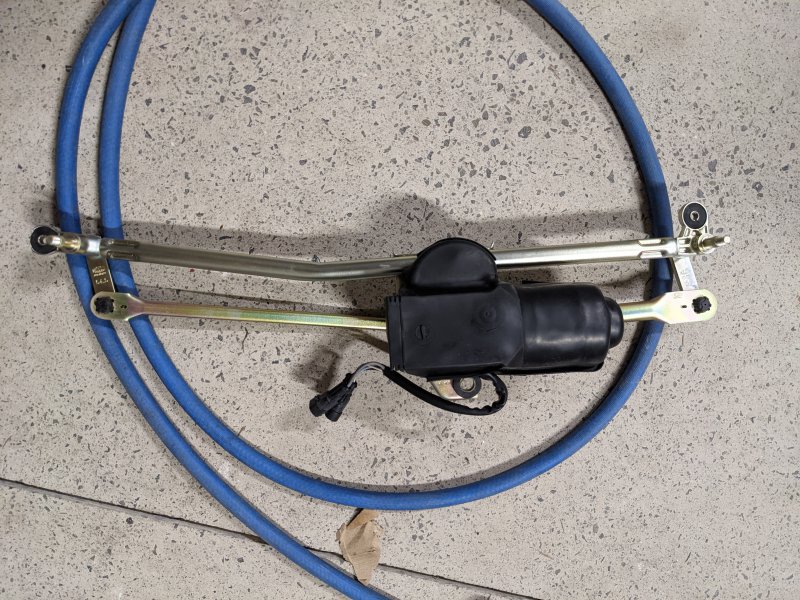
Rebuilt the entire Wiper mechanism, and reattached the motor to it. Need to find a photo of how it originally looked; white as powdered snow.
Next few days were all hardware related. Sorting. Organising and plating everything I needed for the next set of stages!
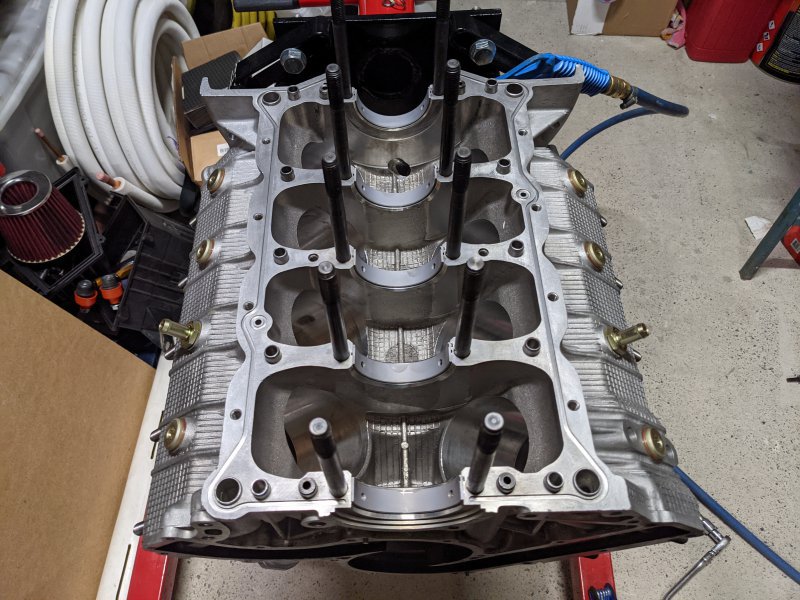
Loctite 971 not being available in Australia(legal reasons), prompted another question of what's next best. Loctite's response being, 577 compound.
Here all the threads were cleaned and all the coolant port fittings installed (with some fresh copper washers)
Brand new bearings in, fresh with no oil yet. ready for the important clearance checks
Photo MAX; I will continue tomorrow, public holiday gives me time to maybe sort out the rest of the wiring harness
And I find out today, turbos are not finished. main shaft sealing ring order gone wrong lmaooooo. he can finish one, but not the second. it has been an entire year!
JTop
Junior Member
- Messages
- 48
oh yes, forgot to mention it!Just a thought was it worth running a tap down the threads first to ensure totally clean and blowing the debris out with a air line ?
Possible old loctite in the threads.
Frank done the mains, but I ran it through once again to be sure they were clear
Frank couldn't do the heads, as he couldn't figure out the thread pitch. I managed to get only halfway down (not to damage the head surface), cleared up and blown out.
Took a solid 4-5hours of fenagling to get that sorted, and studs secured in properly.
JTop
Junior Member
- Messages
- 48
I say public holiday; and then I end up doing a full 12hour work day, YAY
OK so, I been doing Masa things. Sat in the engine bay for a silly few hours playing the fun game of, why the **** won't this come out.
TRW say they are clueless about their own product.
Which product am I talking about; well it's the steering rack! (yes, I fought hard removing one of the ends, using the correct tool sadface too )
I did sit for a couple hours searching for alternatives to the original TRW parts to get them ordered and on the way.
-> Hyundai Accent 2 is a doable method(I'll make my own inserts, except I need to take the hub off and press the existing ones out.. EVEN MORE WORK)
-> Fiat Stilo(which in a photograph, look to be identically close but anyone tried these?)
My method to check is insufficient as I can't get any technical data of these products anywhere. They either fit or don't and that's what's killer.
So Question to all; what's doable in 2022 for both Tie-Ends and Gaiter boots! I know TenCAR sell this stuff, but $120 for each Tie-End is well. a bit much for a $10 piece of steel. And really, a $5 piece of rubber. (says the idiot who paid 990 euro for 3 headgaskets (fun story which I'm yet to get to)) ANYWAY
And where I left off! Mid-September
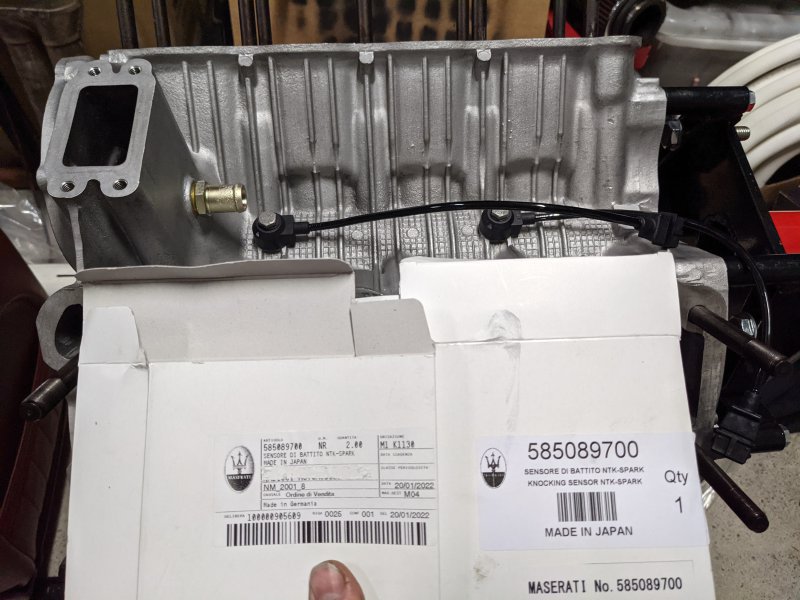
Knock sensors; down and torqued to 20nm("2.0 to 2.5 kgf.m") as specified by NTK, or the internet. same same at this point
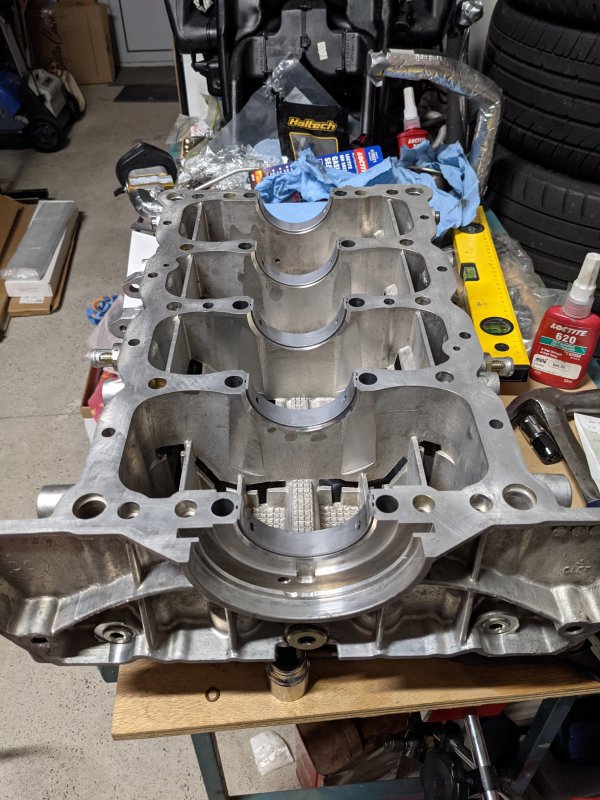
New bearings in dry, as well as the three drain plugs underneath! Loctite + copper washer(for the central duct only) and sealed. Tight!
And then we play important measurements!
Bottom on and all nuts torqued to spec, to make sure we've got enough oil clearance. Which on paper added up perfectly (I'll put all the data in a later post when I can be bothered typing lots of numbers
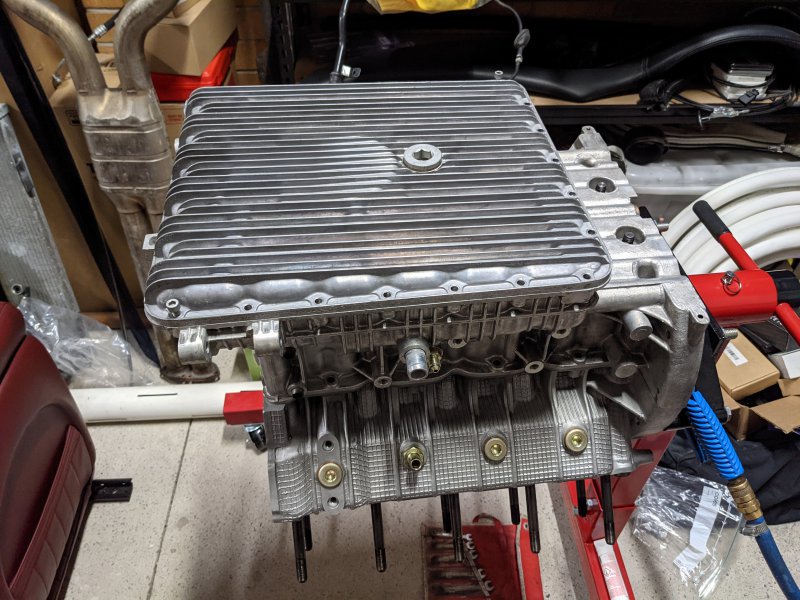
It was around 9pm and I think I called it a day by putting the sump cover on and towel over it all. NEXT DAY!
Bottom off, gloves on, oil out and 180degrees we go! followed by precarious surface preparations hehe
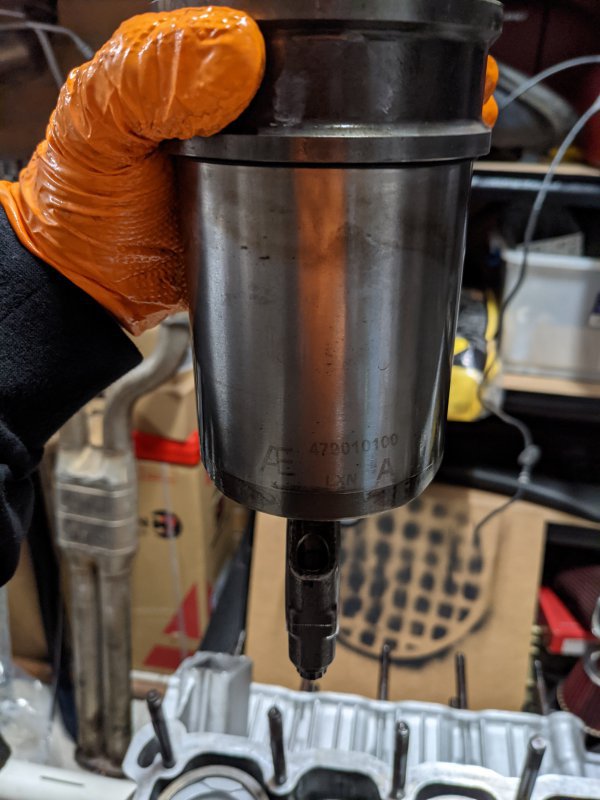
O-Ring onto the liner and no lubrication on the liner itself. Carefully oiled the cylinders and made sure to not get any on the chamfer or it would be game over dictated by the manual!!!!
I made fun videos of just sliding these in; might put it on YT or something, if people would like to see that?
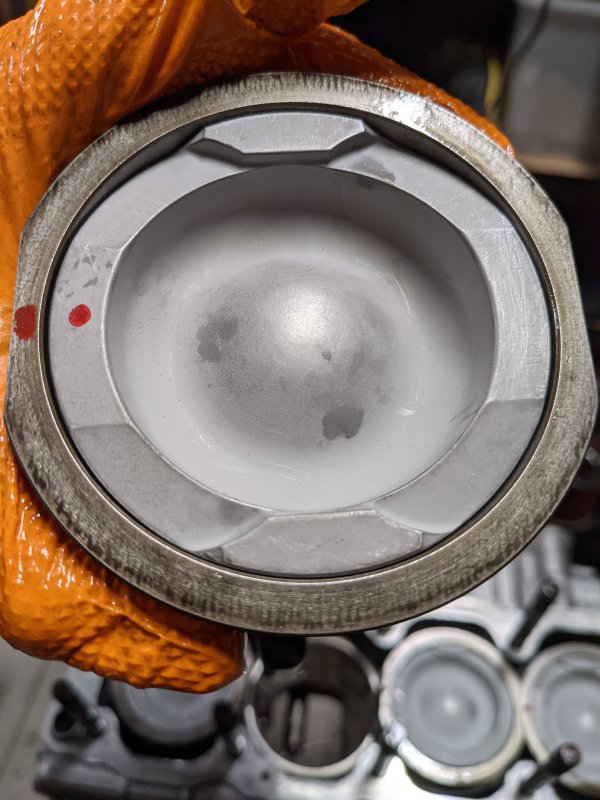
Installed everything; redone all the piston ring orientations so that they were perfect. Made sure the crown markings were facing the correct way both sides, conrod chamfer facing the correct way too and ta-da!
Soooo. I then realised a big problem. If I turn the block 180 degrees for the next step, I will lose my pistons and liners haha.........
Stepped out for a good two hours on break, for any excess oil to settle and run down and made cardboard plates to hold the liners in position so they would not fall out.
A treat that was!
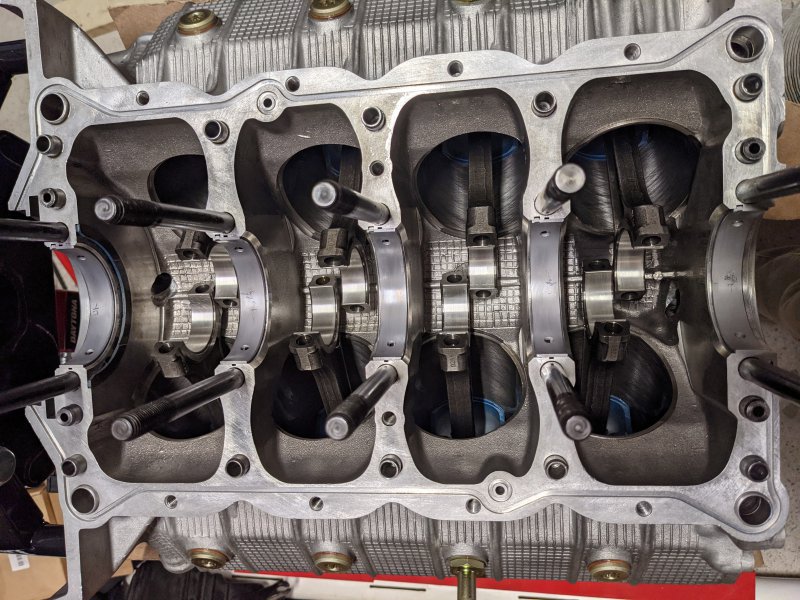
Caps off! Brand new bearings in. Caps On.?. and check the CLEARANCE because I was a little silly to do it earlier
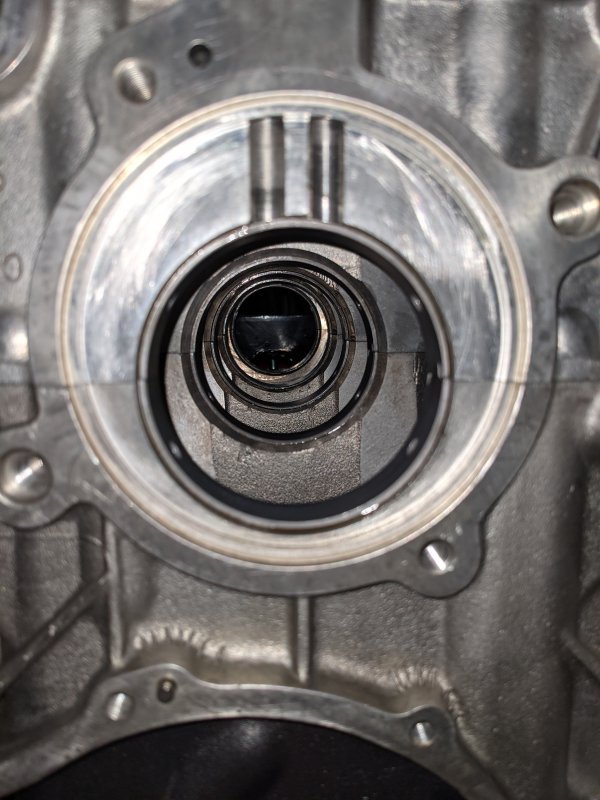
Caps off!! Lube on and crank time! END BEARINGS IN, with a little bit of grease(as seen in the photo above). Oil Seal on!
And then, only then. Finally laying the crank in, as demonstrated in Fig. 176, and then pushing all the pistons up, allowing the connecting rods to mate with the crank.
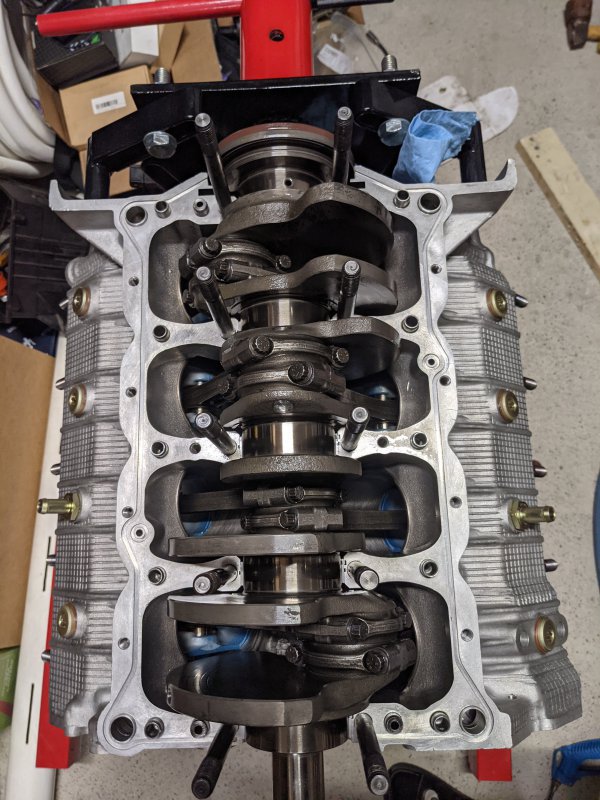
Conrod side gaps checked; and all passed their test!
Surfaces cleaned and prepped for application
And then I realised... New O-Ring seals, laying the gasket into the track and hang on...
It terminates into the oil seal. Off it comes for a perfect cut :|
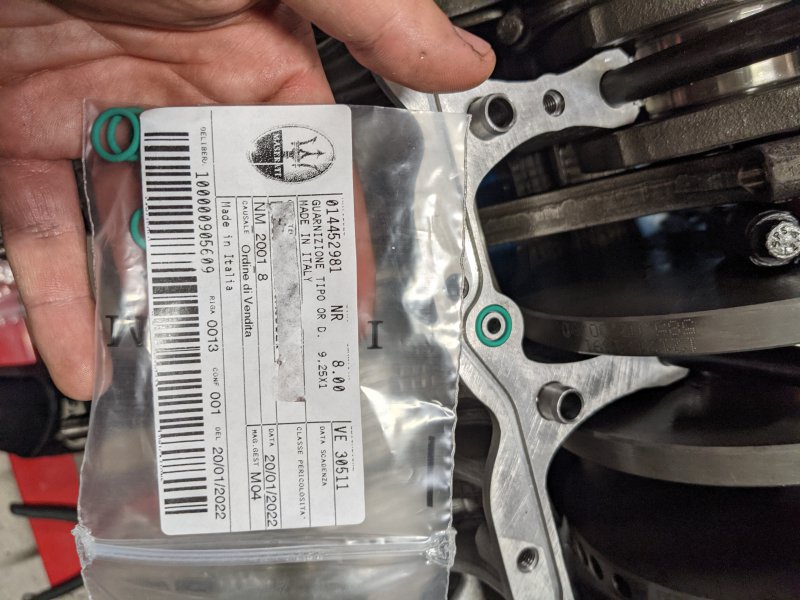
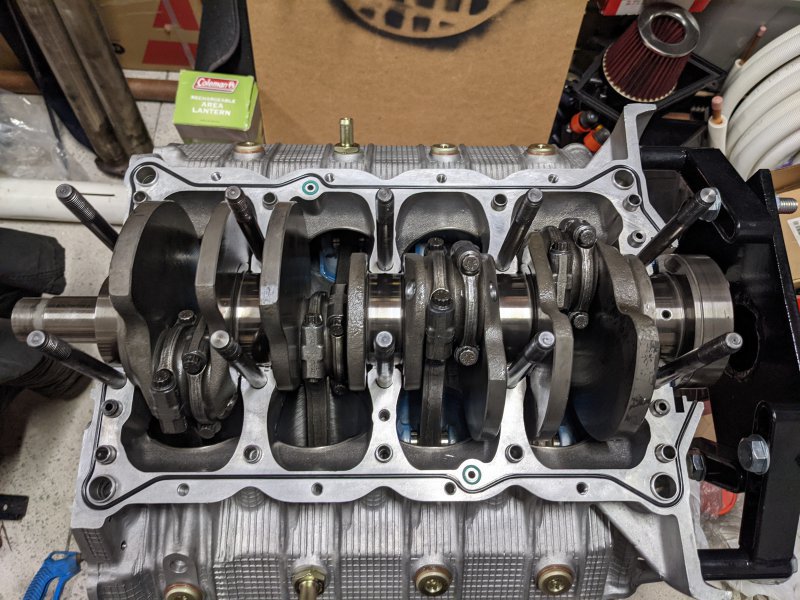
Photo limit again... I'd love 15 photos a post; would be phenomenal. or well.. I can just post and keep going
Hope I didn't miss anything
OK so, I been doing Masa things. Sat in the engine bay for a silly few hours playing the fun game of, why the **** won't this come out.
TRW say they are clueless about their own product.
Which product am I talking about; well it's the steering rack! (yes, I fought hard removing one of the ends, using the correct tool sadface too )
I did sit for a couple hours searching for alternatives to the original TRW parts to get them ordered and on the way.
-> Hyundai Accent 2 is a doable method(I'll make my own inserts, except I need to take the hub off and press the existing ones out.. EVEN MORE WORK)
-> Fiat Stilo(which in a photograph, look to be identically close but anyone tried these?)
My method to check is insufficient as I can't get any technical data of these products anywhere. They either fit or don't and that's what's killer.
So Question to all; what's doable in 2022 for both Tie-Ends and Gaiter boots! I know TenCAR sell this stuff, but $120 for each Tie-End is well. a bit much for a $10 piece of steel. And really, a $5 piece of rubber. (says the idiot who paid 990 euro for 3 headgaskets (fun story which I'm yet to get to))
And where I left off! Mid-September

Knock sensors; down and torqued to 20nm("2.0 to 2.5 kgf.m") as specified by NTK, or the internet. same same at this point

New bearings in dry, as well as the three drain plugs underneath! Loctite + copper washer(for the central duct only) and sealed. Tight!
And then we play important measurements!

Bottom on and all nuts torqued to spec, to make sure we've got enough oil clearance. Which on paper added up perfectly (I'll put all the data in a later post when I can be bothered typing lots of numbers

It was around 9pm and I think I called it a day by putting the sump cover on and towel over it all. NEXT DAY!
Bottom off, gloves on, oil out and 180degrees we go! followed by precarious surface preparations hehe


O-Ring onto the liner and no lubrication on the liner itself. Carefully oiled the cylinders and made sure to not get any on the chamfer or it would be game over dictated by the manual!!!!
I made fun videos of just sliding these in; might put it on YT or something, if people would like to see that?
Installed everything; redone all the piston ring orientations so that they were perfect. Made sure the crown markings were facing the correct way both sides, conrod chamfer facing the correct way too and ta-da!
Soooo. I then realised a big problem. If I turn the block 180 degrees for the next step, I will lose my pistons and liners haha.........
Stepped out for a good two hours on break, for any excess oil to settle and run down and made cardboard plates to hold the liners in position so they would not fall out.
A treat that was!

Caps off! Brand new bearings in. Caps On.?. and check the CLEARANCE because I was a little silly to do it earlier
Caps off!! Lube on and crank time! END BEARINGS IN, with a little bit of grease(as seen in the photo above). Oil Seal on!
And then, only then. Finally laying the crank in, as demonstrated in Fig. 176, and then pushing all the pistons up, allowing the connecting rods to mate with the crank.

Conrod side gaps checked; and all passed their test!
Surfaces cleaned and prepped for application
And then I realised... New O-Ring seals, laying the gasket into the track and hang on...
It terminates into the oil seal. Off it comes for a perfect cut :|


Photo limit again... I'd love 15 photos a post; would be phenomenal. or well.. I can just post and keep going
Hope I didn't miss anything
JTop
Junior Member
- Messages
- 48
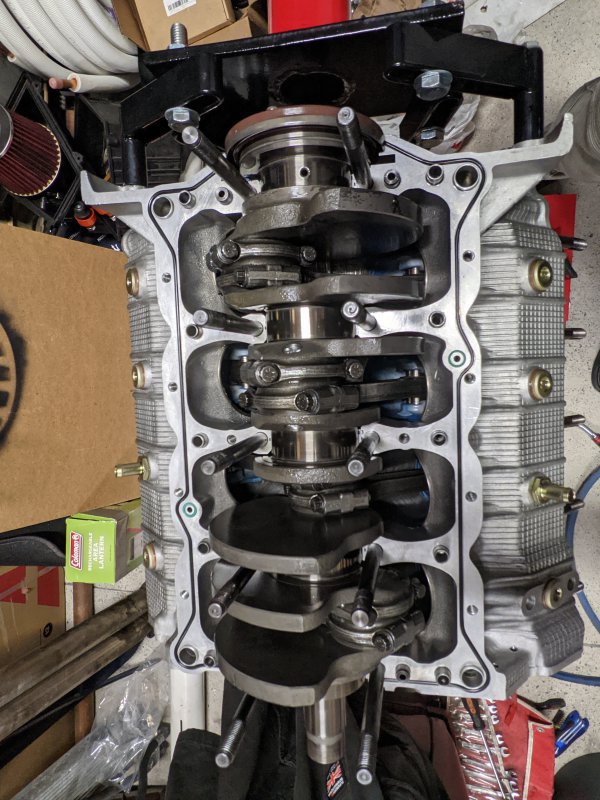
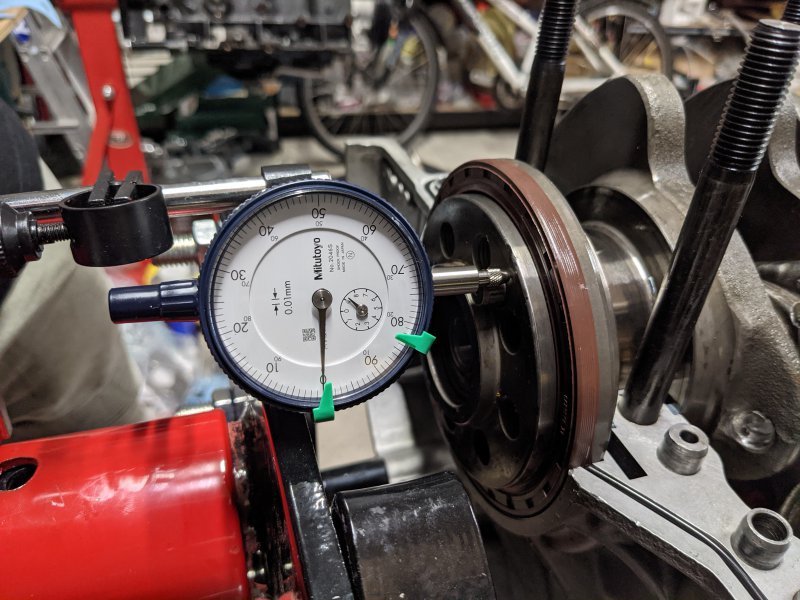
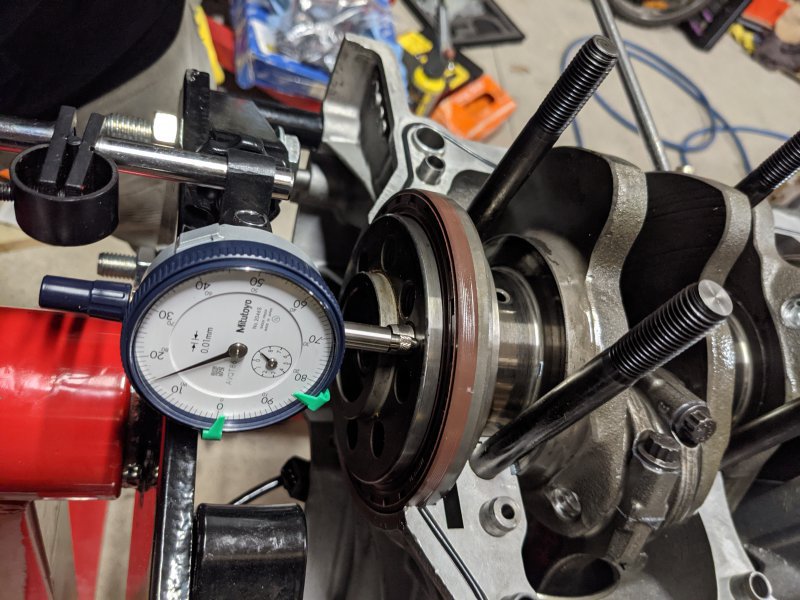
And a bit of end floating, and I called it a night at 3am
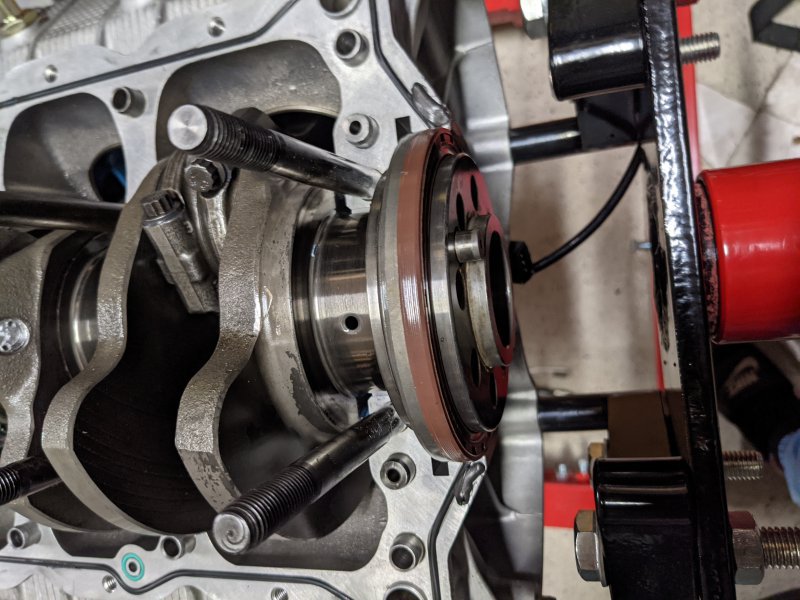
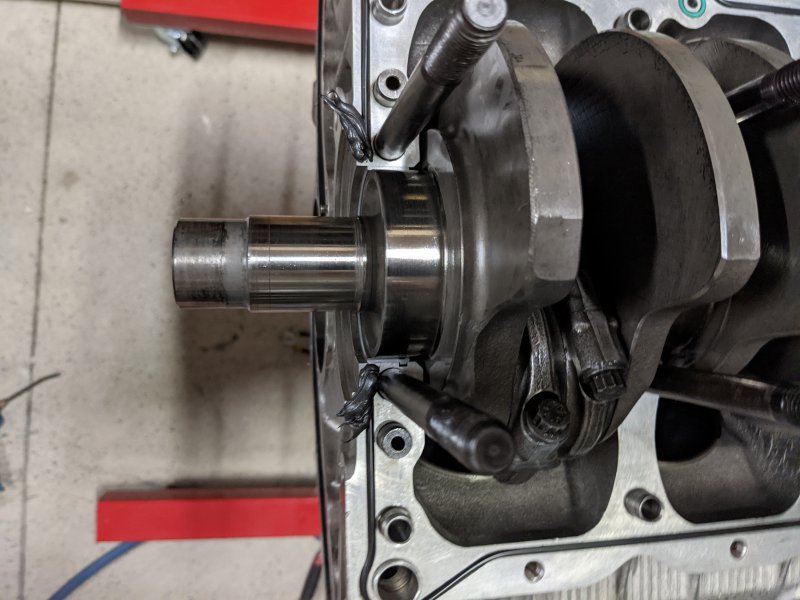
Monday Night, Fat Dabs of Silicone, following Fig. 183
Oil on each bearing and on goes the bottom end! With its half bearing washers of course.
Tightening process as illustrated in the manual, nuts and bolts. I kept everything the same position and orientation that I had when I pulled it all apart
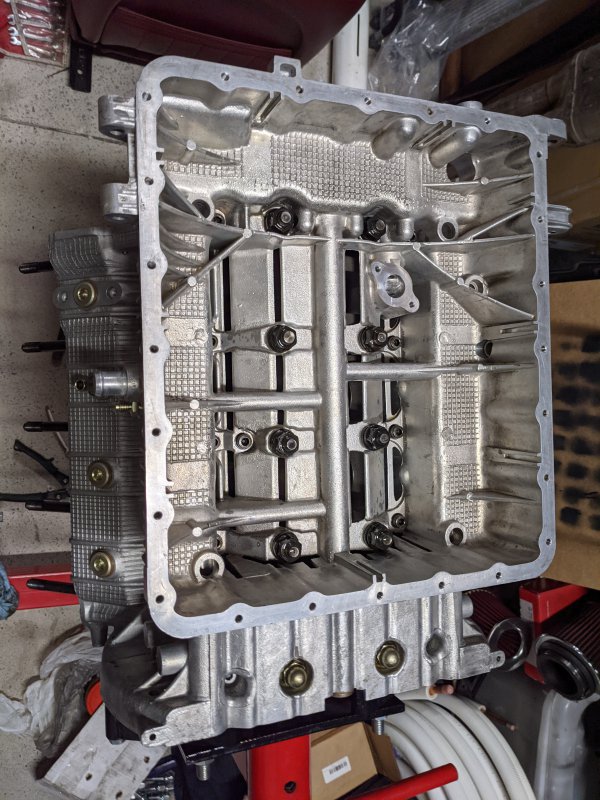
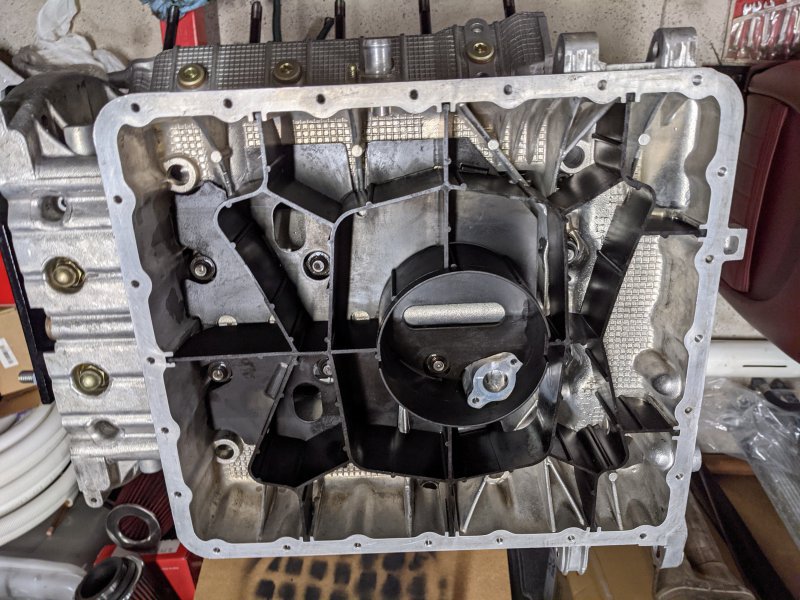
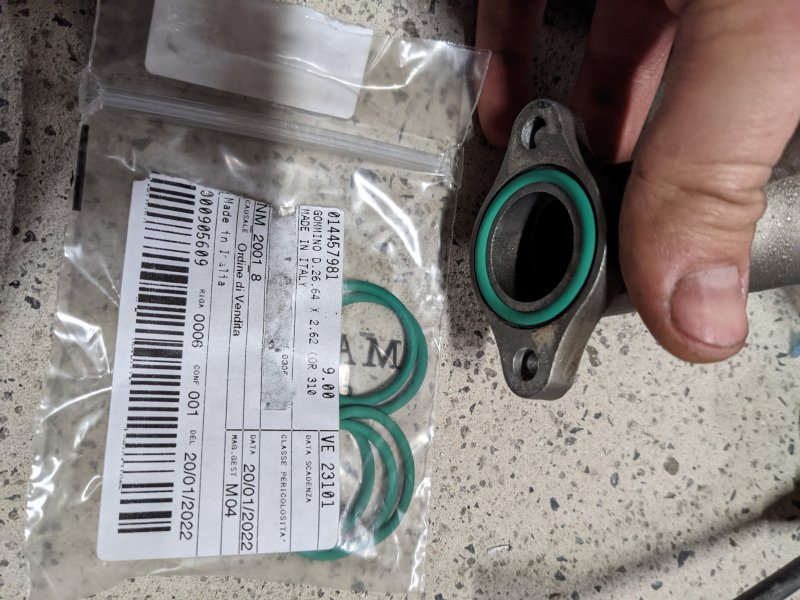
New O-Ring for the pickup and installed! Bottom end complete?
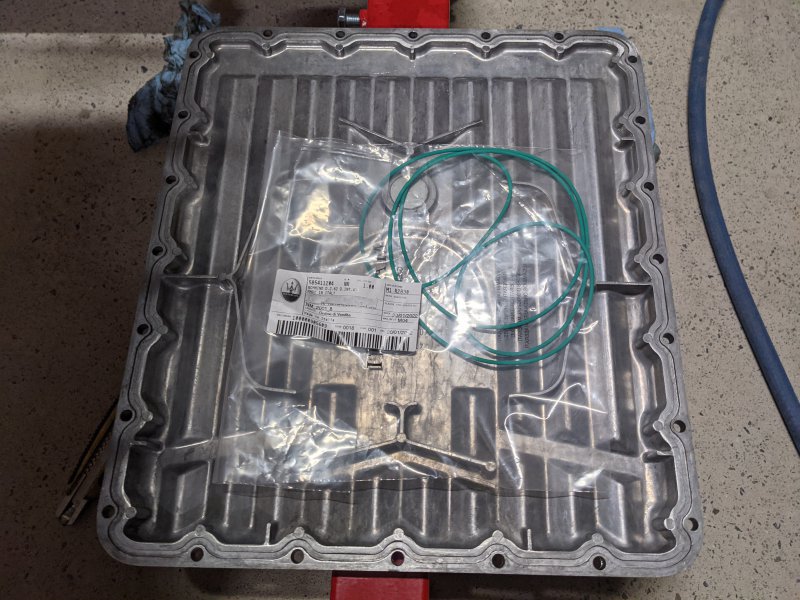
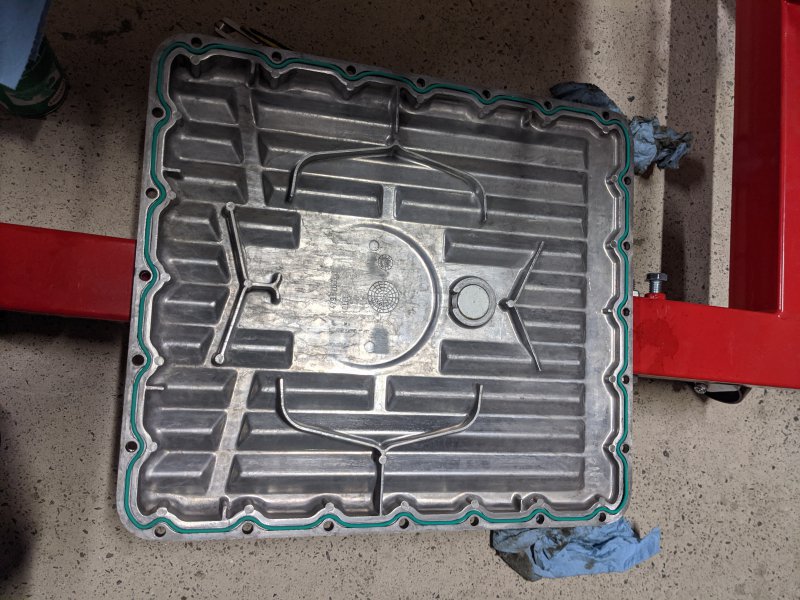
Sump cover on for the minute and I called it a midnight Monday! To work, today.... Tuesday haha
And to sort all the hardware for the next stage. Bags and bags of labelled nuts and bolts that were corroded or eaten or rusted(replaced).
I'm done for tonight. Cheerio
TenCAR
New Member
- Messages
- 13
So Question to all; what's doable in 2022 for both Tie-Ends and Gaiter boots! I know TenCAR sell this stuff, but $120 for each Tie-End is well. a bit much for a $10 piece of steel. And really, a $5 piece of rubber. (says the idiot who paid 990 euro for 3 headgaskets (fun story which I'm yet to get to))  ANYWAY
JTop - Hmm, our current Ebay auction show some like 65 USD (not 120) + delivery / each a piece of steel and a piece of rubber 3200/4200 ;-)
JTop - Hmm, our current Ebay auction show some like 65 USD (not 120) + delivery / each a piece of steel and a piece of rubber 3200/4200 ;-)
Frog3200
Junior Member
- Messages
- 55
Whaou I just caught up with this story. What a project! I almost envy you (almost...  ).
).
Could you tell us where you managed to source the bearings (main, big and end float schims) ? All in Italy as I understand but from whom? As they are quite scarce at the moment..
Finally no turbos refurbishing? You didn't managed to source the chras? I thought we could source some from the Subaru gt that also have the rhb turbocharger.
Congrats and thank you for sharing with photos!!
Lovley work and documunation!View attachment 108031View attachment 108032View attachment 108033
And a bit of end floating, and I called it a night at 3am(Monday morning, where I got up and went to work)
View attachment 108034View attachment 108035
Monday Night, Fat Dabs of Silicone, following Fig. 183
Oil on each bearing and on goes the bottom end! With its half bearing washers of course.
Tightening process as illustrated in the manual, nuts and bolts. I kept everything the same position and orientation that I had when I pulled it all apart
View attachment 108036View attachment 108037View attachment 108038
New O-Ring for the pickup and installed! Bottom end complete?
View attachment 108039View attachment 108041
Sump cover on for the minute and I called it a midnight Monday! To work, today.... Tuesday haha
And to sort all the hardware for the next stage. Bags and bags of labelled nuts and bolts that were corroded or eaten or rusted(replaced).
I'm done for tonight. Cheerio

