JT's 2001 Maserati 3200GT Rebuild! Story, Parts and Advice

JTop

Junior Member
Messages
47
Curving my procrastination of my university assignments, I'll do a quick update
Have gotten a few things done over the past few weeks over a day or two each week.

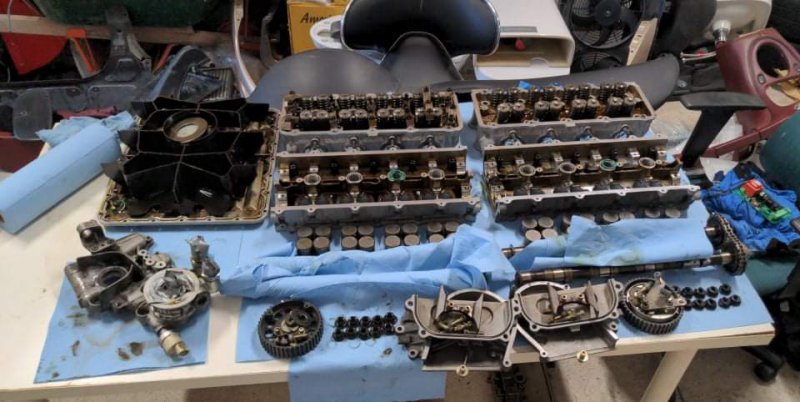
How one of the tables look like, full of parts to be cleaned :)
90891

ANYWAY
From last update, I did manage to remove the dowel in the crank, it was easier than I thought with a small punch and a light tap to that. Oil cover came off.
The two broken bolts in the waterpump had me furious... I had gotten both drilled through and well I made a rookie error on both..

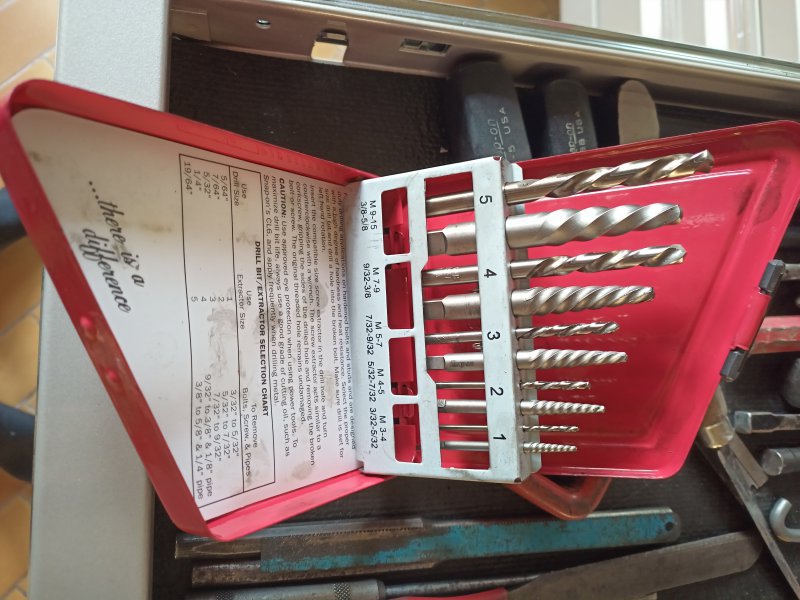
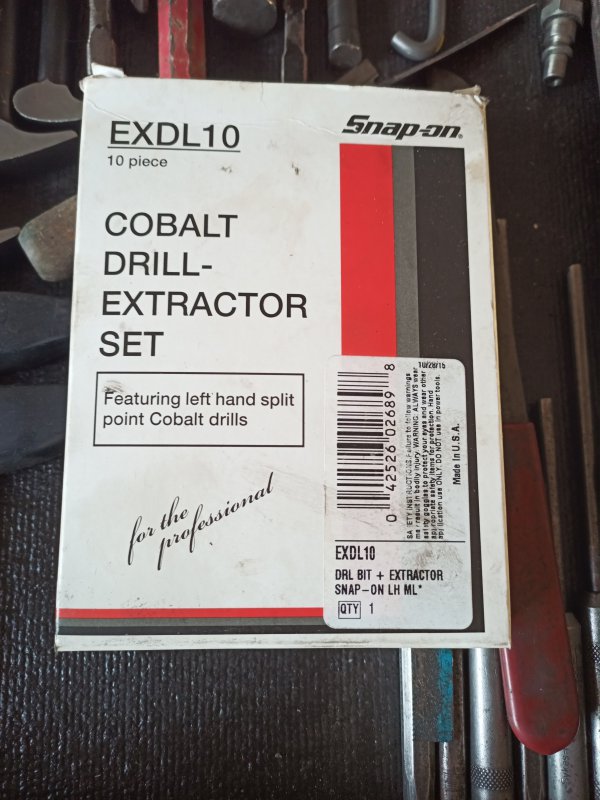
Given I had my father attempt to drill and extract one, tip of the extractor broke with no effort(I should have listened here) and after this he raged and given up, I attempted the other, SLOWLY but surely I managed to get through to the end of the bolt(touched some sort of antiseize, which didn't help for how long the car sat...) and I pumped it with Wurth Rost off and WD-40. Waited a good half hour and still got the left hand extractor snapped with barely any force applied... Honestly, it just broke after being inserted and not even 1/16 turned... Snapped clean. and I returned the kit and seen similar reviews online about it. $90 Sutton Screw extractor kit. Absolute junk... I would have spent $$$ for a good kit honestly... Like I need one in the off chance of this happening, more than happy to invest in it. Anyway... After this ordeal I left it for a few days pretty angry...

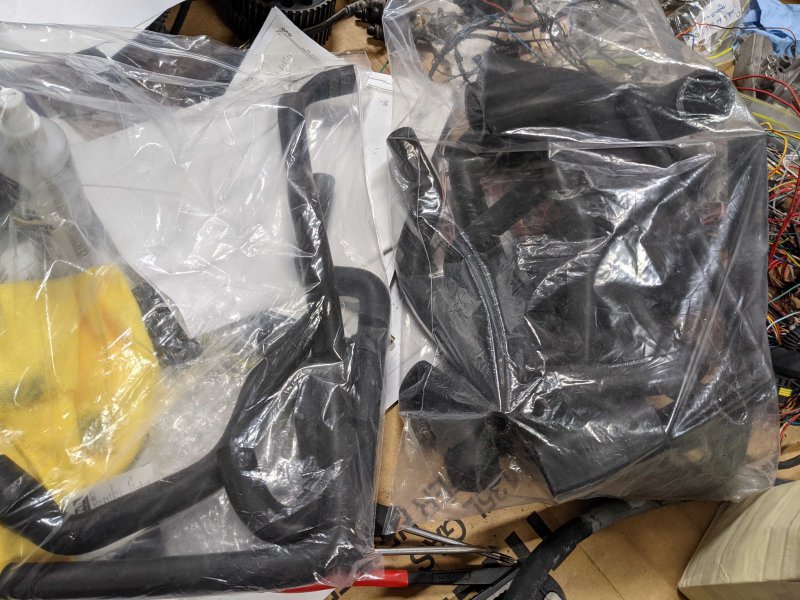
So anyway, I had things Hydroblasted and they look spectacular, pity once a bit of heat gets into these they'll look bland :confused: The new Fuel hoses are off to the side, need to take a photo of those too!
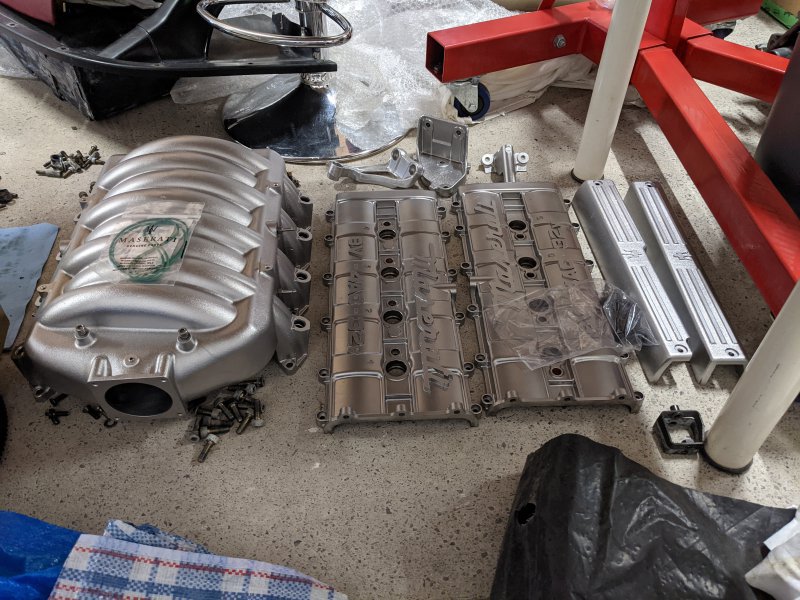
All these pieces need to be painted, still deciding if I go with the original look, red covers and Quarzo Dolomite for the coilpack and intake manifold covers... Maybe black, but that doesn't suit well as nicely.. No idea yet, why they are still sitting exactly where they are (GIVE ME SOME IDEAS?! :D)
I have another basket almost ready to go, just sorting the last few things.. then all the zinc coated pieces go to the next shop to be recoated! That reminds me :p
90883
If anyone knows how to dismantle the AC compressor clutch, and just the clutch, would be awesome because it definitely has the fire retardant in it given the alternator was flooded and I have that split and hopefully hydro blasted fresh!
I feel like I need a special tool that goes into the three small holes next to the shaft and then presses on the shaft to remove the cover, and well.. The wheel and the rest is easy from there from what I'd imagine.
9088490890
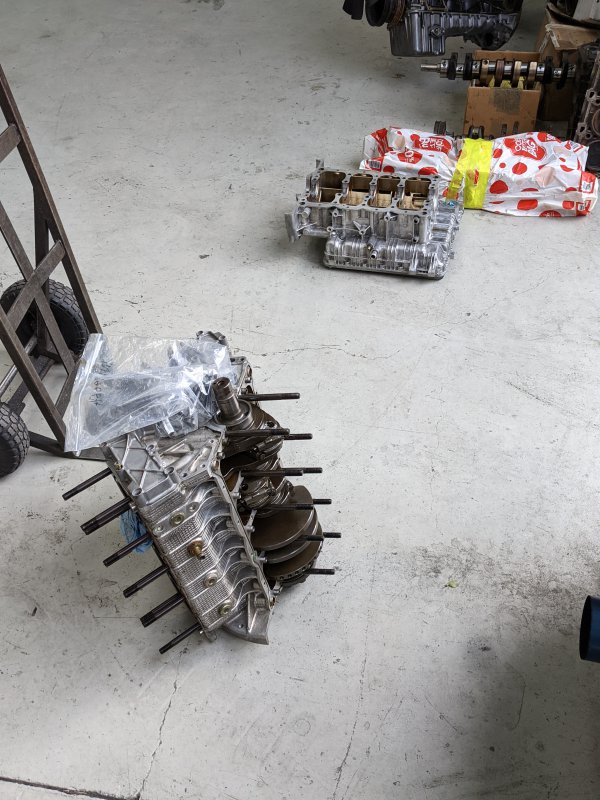
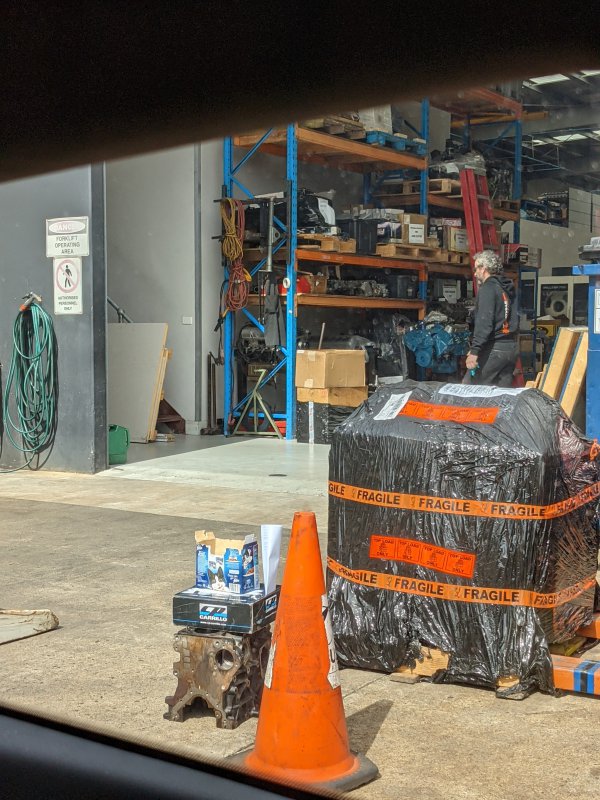
So I recently received the Carrillo pistons for my nugget VW Polo build and went to drop it off at Dandy Engines in Carrum Downs and well.. I asked if they could be able to extract the two bolts out. They said it's possible so I ran home after squeezing out the parking lot, loaded the block and all the lower end bits into the car with my brother(bloody heavy this thing) and drove back down just before they closed for the day. They then told me everything had to be removed from the rest of the block in order to extract the two bolts... I CAN'T BELIEVE IT FFS!!!! Anyway I said go for it, not much else I can do but with that check the specifications, hydroblast and get it together, I'll do the rest. So will see what that will cost... Just to remove two bolts because the water pump was missing its two locating dowels... I'M ANGRY AHHHHHHHHHHHHHHHHHHHHHHHHHHHHHHHHHHHHHHHHHHHHHHHHHHHHH

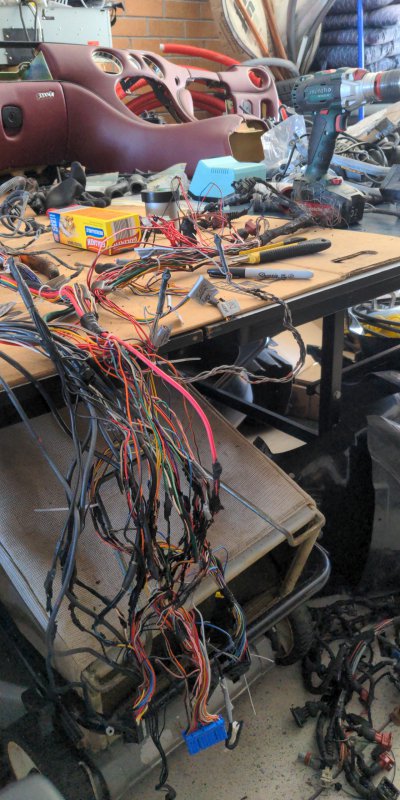
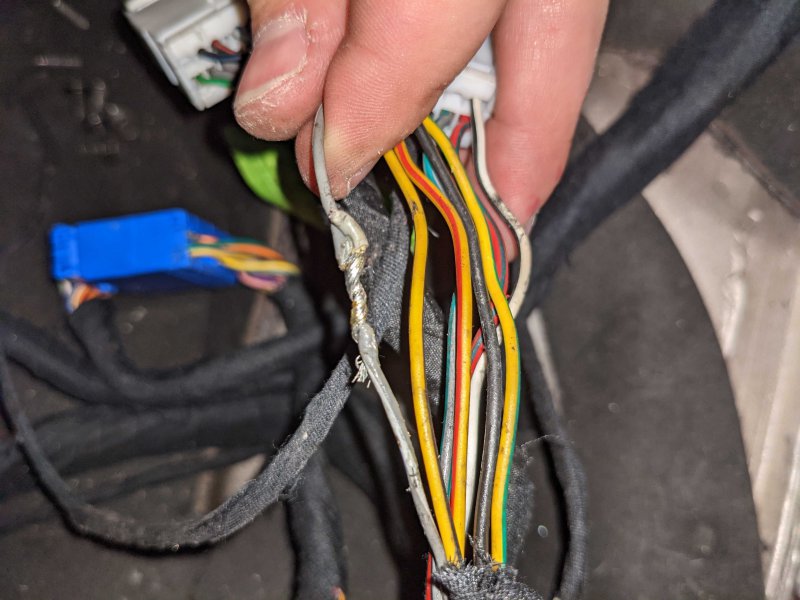
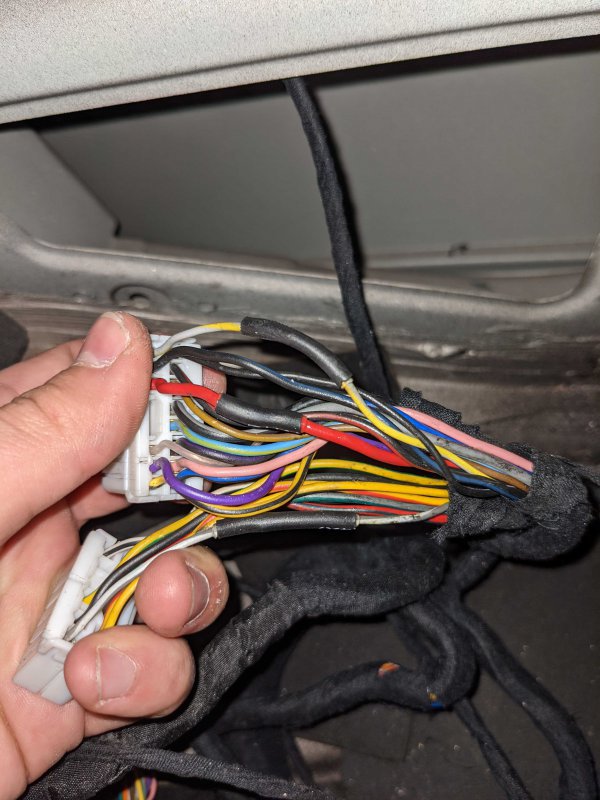
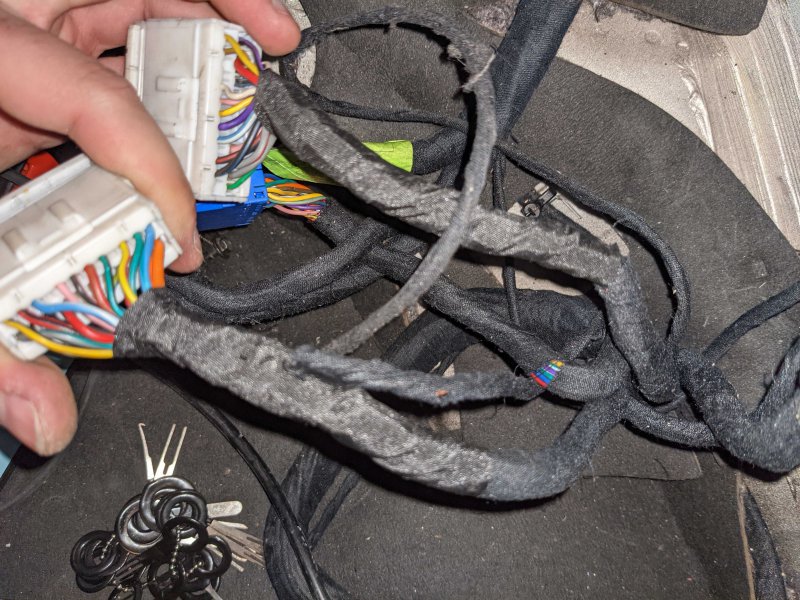
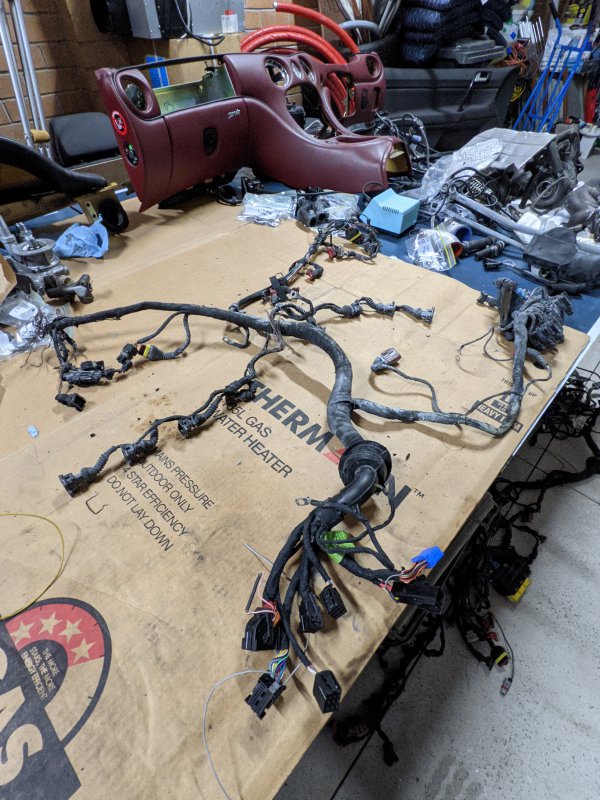
So with everything out, and the last bathroom vanity gone, I managed to get my TT table from out the back and open it up so I can get some work done. I spent quite a bit of time polishing parts, from the lower engine to all the accessories and small bits that had got some of the fire retardant on them. Stuff will get hydroblasted anyway, that's for the best condition. So I started on the wiring loom.. And well, after comparing plugs I believed it was possible to combine pre-facelift and facelift looms into one. and I'm almost right except there is one wire that was burnt... So I don't know the length on that.
9089290893
I only cut parts of the burnt side, given I'll be running the exact correct length from the ECU connector to their location. I thought, this might be a good idea to also make notes on all the specifications; from wire gauge, length, colour and crimp terminal pins. And well.. If anyone might need a loom made up, I can do one from complete scratch, given I can find ECU connectors, because they are really the only ones I don't know the name of/can find. Majority are just Narva and JPT connectors... Nothing explicitly fancy and still readily available!
Since I have both styles, should be ok to make them given there are no other alternatives to these two :p

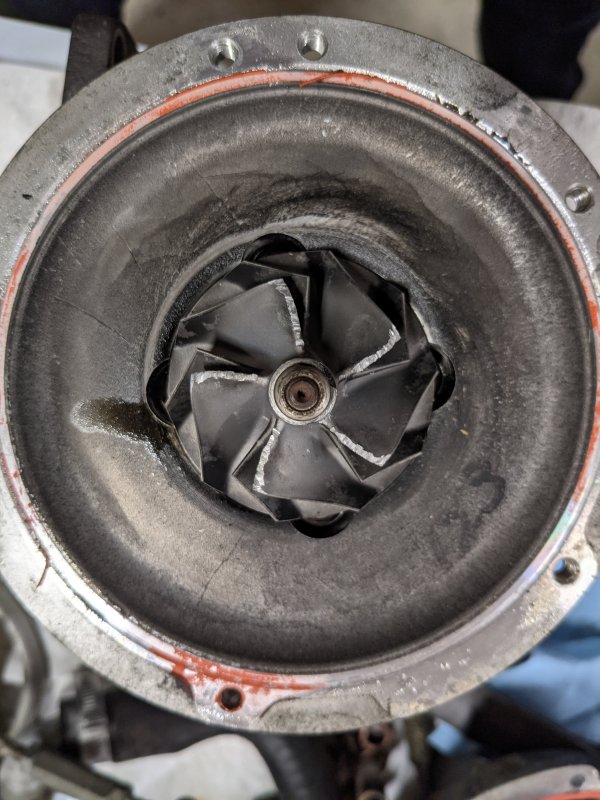
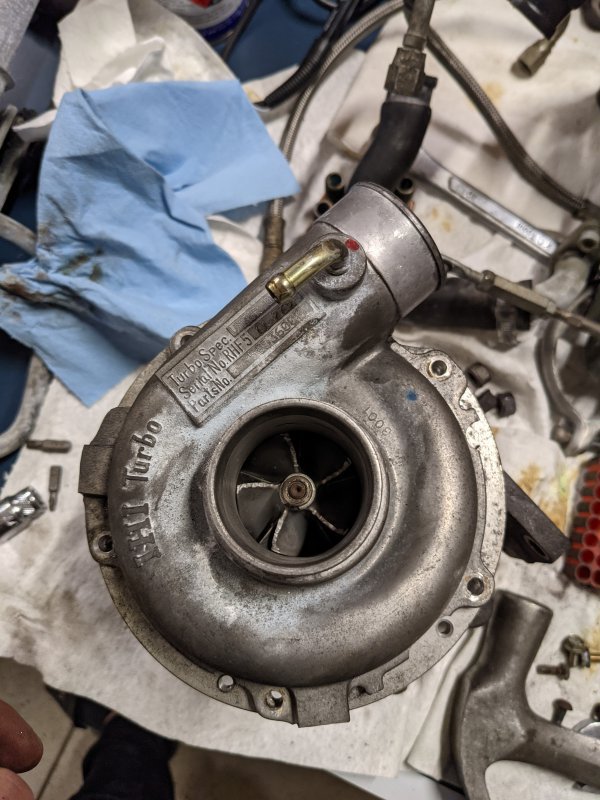
Anyway, in anticipation of the new turbo and to commence rebuilding, I dismantled the one that I might make a little statue out of haha
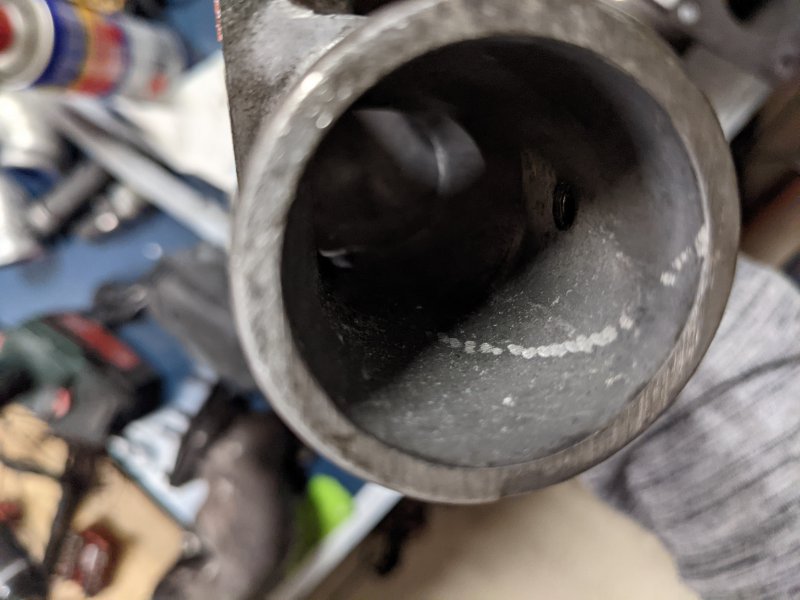
This is what happens when a rock or something touches a spinning compressor wheel, It must be stuck in the intercooler somewhere haha
9089590896
90898
I anyway want to have the turbo compressor side only, externally painted VHT or ceramic coated. Not sure which just yet, I've read about Calyx for coating too for there to be no fade/rust. Should look and function brilliantly :cool:

That's all for the moment, I'm thinking the 3D scanning of the vent might be the best, although I have contacted Italy and they have told me they can get a second hand one for me for 150€ and I'm just waiting for a photo of it.. Once I have it, I'll know if I will be getting a few of these made(or taking up that offer); if anyone needs either side vent let me know, I'll try get them made up then and cheaper than Eurospares 199£ for the LHS one and they don't have the RHS available anymore!
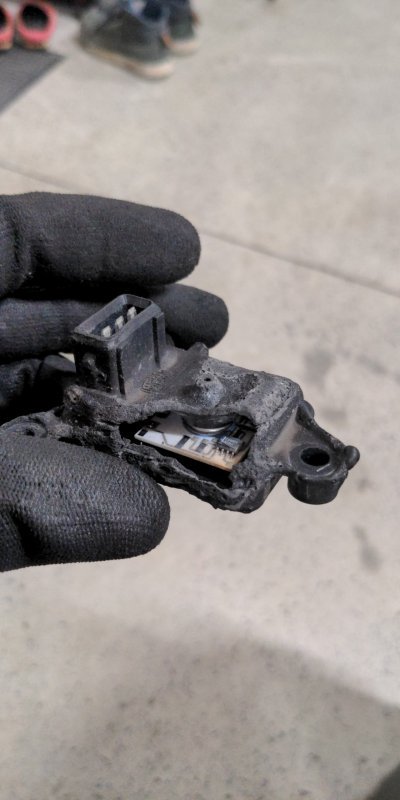
Here is a cool photo of what's left of the MAP sensor that was attached to the firewall
Cheers :)
90894
 
Last edited:
Oneball

Member
Messages
11,106
Great progress. I’ve never got on with easi-outs either. They always seem to break. Being rebuilding a 60s Corvette and everything on it is a coarse thread which is pretty unusual, I’ve only had one seized bolt. Pretty amazing really.
 

2b1ask1

Special case
Messages
20,260
Easi-outs are a complete waste of time unless there is a case of the head of a bolt being snapped off sideways and releasing an unbound thread flush with the top of the hole, in which case the EO might just manage to extract it before shattering! Even then there is a good chance of driving the remaining bolt into the hole when drilling the hole into it!

Better off getting left hand drills and taking it up in stages if the bolt is malleable. If not and especially if in aluminium, you are far better off puddle welding a nut onto the broken end, you often need repeated attempts but the weld won't stick to the ali and the heat of the weld often frees the bolt/stud anyway.

Besides the point, THis is a valiant effort you are undertaking my friend, kudos to you and keep at it :)
 

JTop

Junior Member
Messages
47
Great progress. I’ve never got on with easi-outs either. They always seem to break. Being rebuilding a 60s Corvette and everything on it is a coarse thread which is pretty unusual, I’ve only had one seized bolt. Pretty amazing really.
For the age, that's actually impressive... Back when it was built to last forever, not like our current Kleenex society where you use and throw away..
Everything else has been good on this engine, just these rusted waterpump bolts... No winning here

Easi-outs are a complete waste of time unless there is a case of the head of a bolt being snapped off sideways and releasing an unbound thread flush with the top of the hole, in which case the EO might just manage to extract it before shattering! Even then there is a good chance of driving the remaining bolt into the hole when drilling the hole into it!

Better off getting left hand drills and taking it up in stages if the bolt is malleable. If not and especially if in aluminium, you are far better off puddle welding a nut onto the broken end, you often need repeated attempts but the weld won't stick to the ali and the heat of the weld often frees the bolt/stud anyway.

Besides the point, THis is a valiant effort you are undertaking my friend, kudos to you and keep at it :)
We had one that had a bit of an end on it, tried gripping it and applying torque to get it off. Wouldn't budge. Tried welding a nut on it, and torque that off. Wouldn't budge. Broke the end off and ended up flush to the block.. Hence I drilled it all the way through to what was left of the antiseize.
I was using left hand cobalt bits and left hand easi-out? and well the easi-out became a impossible-out once it snapped off in the block... Both holes

Oh yes, there is always the option of over drilling and fitting a helicoil :)
That was also the next step and inserting a stud and do a nut on it, but the waterpump has all holes counterbored so there is no winning inserting a nut on that without further modification and then on the next pump, the same trouble too!
And the mill at work wouldn't be able to fit the block in, so I couldn't do it myself anyway :confused:

Thank you guys!!! :D
 

drellis

Member
Messages
801
It's took me until very recently to start buying decent tools, even though my dad was an engineer . Thr Chinese stuff was too cheap to pass up. Now I'm older I can't be bothered with the cheap stuff snapping, guessing due to high carbon steel
 

JTop

Junior Member
Messages
47
Where to begin...

I had a massive burnout on my part; trying to do multiple things all at the same time. Finished my engineering degree and awaiting confirmation to continue onto my masters part time as I signed on to work, full time(fund my addiction of cars).

So for the past two months; just been doing small jobs for the car; slowly slowly each weekend(still lots to clean). Hadn't had the time that I anticipated a while back; but it's good. Everything to keep me busy.

Few weeks after, I had transferred my map of the entire loom to an Excel sheet; the entire PINOUT(click that to view); it's not perfect as I haven't figured it all out. But that's the majority. I done this for another Aussie gent who was having issues with his 3200GT.

Parts have all arrived from the UK. Mart had been a legend, and got me everything I asked for; Turbo, upper dash trim piece as mine is in multiple pieces(didn't snap in transit!!), AC for parts, alternator for parts, a bag full of plastic trim pieces and injectors. Shipped it all off to me and it arrived in less than a week; so that was awesome!
New silicone hoses arrived from Roose Motorsport, and as I unpacked them I realised that they sent me one wrong set... I ordered the turbo to sump set and got the PCV set instead. As soon as I let them know about this, asking to exchange for the correct set as my PCV hoses are all good, they made those turbo to sump immediately and I received them in a weeks time. 11/10 for service and easy 10/10 for the quality of the parts.
93828

Meanwhile; the engine is still at the shop, getting the studs extracted and cleaned up, ready for reassembly. The shop finished my 1.8T block (now 1.9L :>) and I've gotten that back to start working on that.
I'm working everyday after work if I have a minute to do jobs for the car, I've been repairing the wiring loom in the trunk of the car as well as inside the cabin; as there was an upgraded sound system at one time in this car. Having extra wires soldered onto the speaker wires; which I now pulled off, extracted the solder with some wick and then used double insulated heat shrink to seal the exposed copper wire. I still have the radio to do; think I will sit and solder it all together after work this week. Or do the smart thing and terminate all the wires and put a connector on each end as I can't unplug the cables from this unit.
938309383193832
TESA TAPEEEEE, must repair all!!!!!
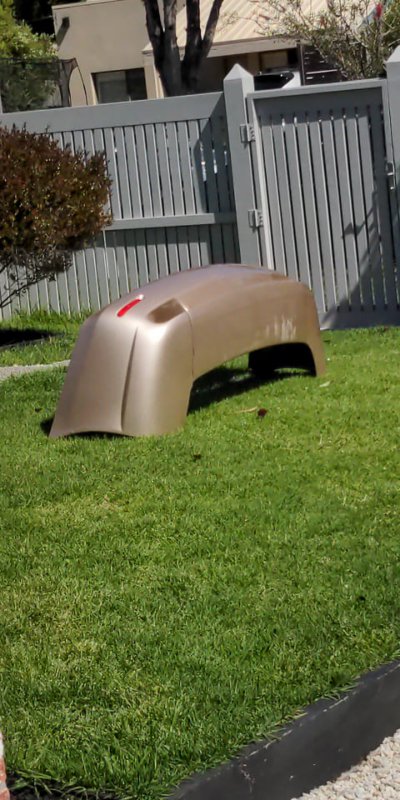
So with the trunk fully apart; I also dealt with the rear bar; as I had the opportunity to access all the bolts on each side. Took it off and gave it a good wash; mainly inside as it was filthy and had some black rocks glued underneath the exhaust tips. Am sad the previous owners have run over the guard stoppers and rashed the lower section of the bumper :( would be nice if that wasn't damaged but oh well.. Can't always win
9383793838
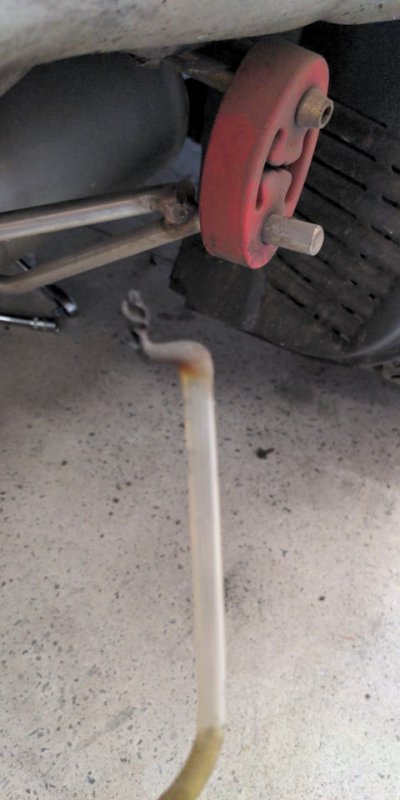
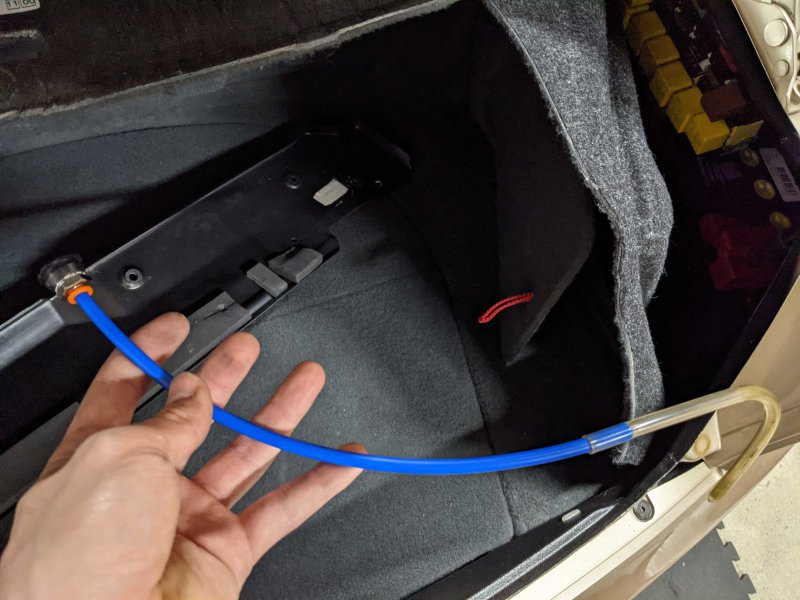
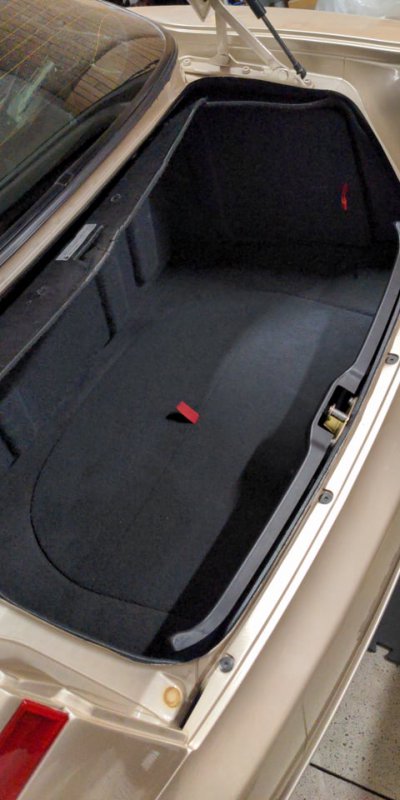
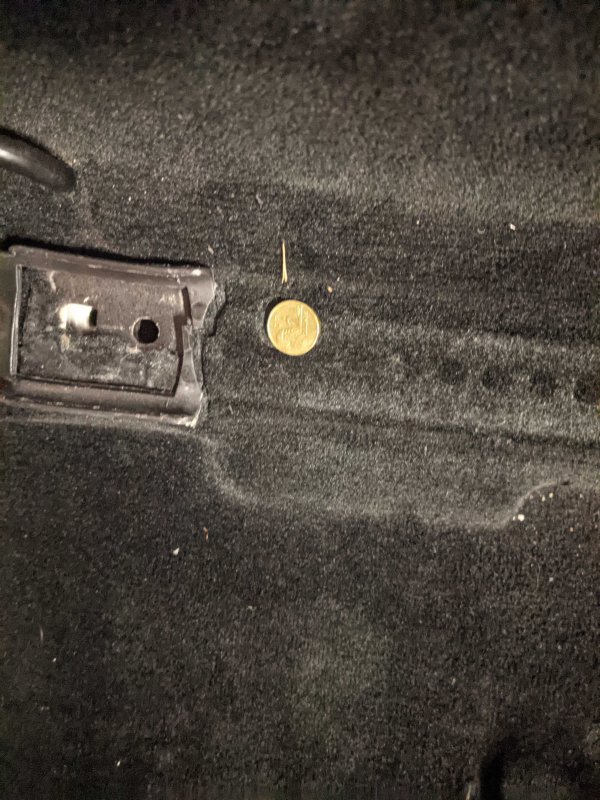
Also found out the battery drain hose was crisp and that I've got some Hurricane aftermarket mufflers in the rear; given the originals had died and caused a mess... With this; I created my own drain; with a pushlock style fitting and a rubber grommet that ended up being the perfect size for the hole(I guessed completely haha) So fitted that in. After I decided to get the rest of the trunk trims all in; that's pretty much all sorted! Got the Rubber trim back on today. I didn't put any sealant on the inside(albeit I believe I should, question is what; as I haven't done any research for that)
9383993840

But the main thing I did with the car is give it some power. And I discovered things!
Like my passenger side window opens and closes. My drivers side window doesn't budge.
My passenger side seat can move in all directions! My drivers side seat doesn't move at all

So the other job I have now, is really to pull that seat out to take the carpet out to wet vacuum it and have it nice and clean; seats also to clean and sanitise.
This also reminds me; Finally got the interior trims back from Blackmans; and everything is looking great! Finally revitalised and ready to go back into the car. Took a while; but Peter has done a phenomenal job in regluing all the pieces.

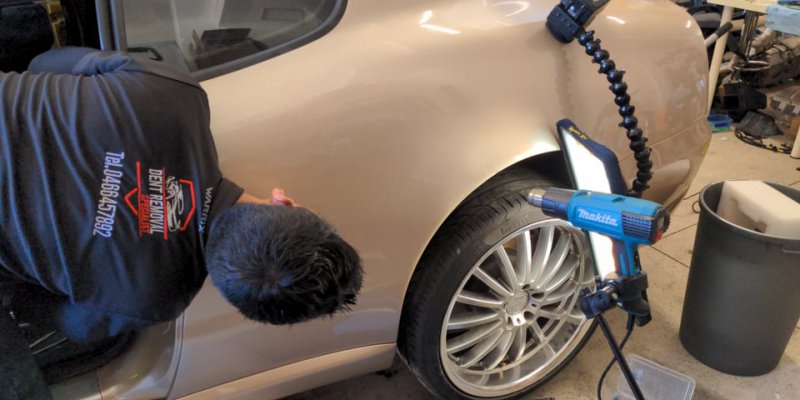
Anyway; today was the day I got a professional to deal with the rear quarter panel(the last person must have hit a pole for the damage to the wheel and panel) to be pulled out and corrected. Tum done an amazing job; anyone in Melbourne who needs a Paintless Dent Removal Specialist,
Give Tum a ring on 0466 458 892. He works on all fancy supercars, so albeit a challenge(as this section is double skinned, me with my mild OCD actually relieved that it's better) he done a pristine job for the difficulty that this was(I sat and watched..)
9383593836
Part 1 of 2. Maxed out the photos and I remembered I have a few more!
 
Last edited:
JTop

Junior Member
Messages
47
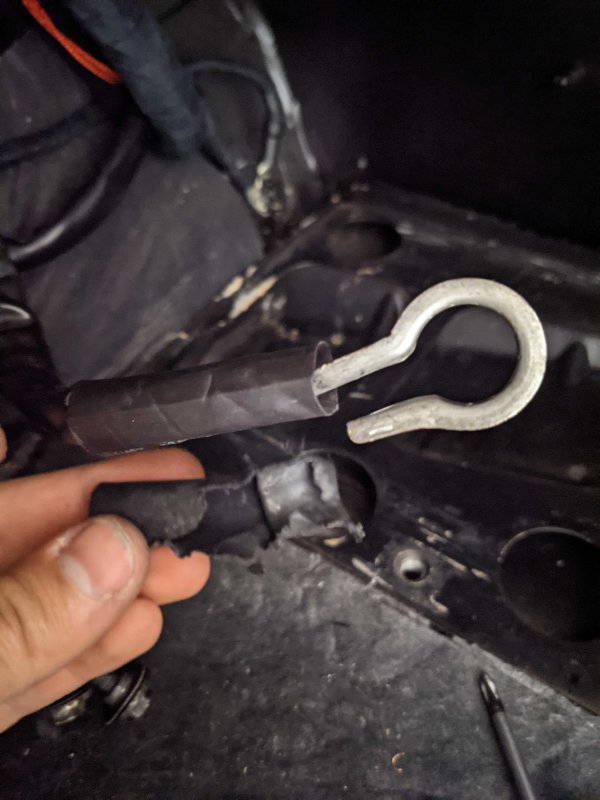
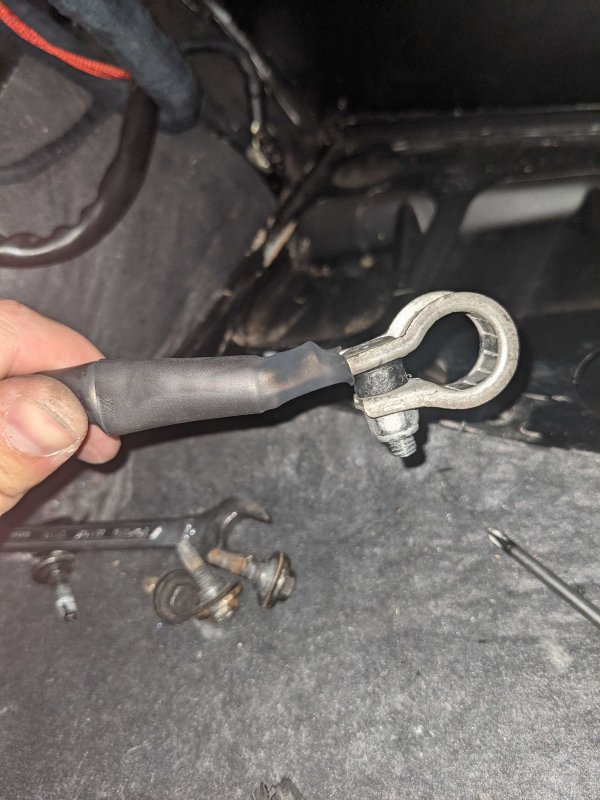
So the Trunk is done; and I got the battery on spot on; took a bit of fiddling to get the positive terminal on correctly.
Anyway; Negative terminal was neglected and damaged so I fitted new heatshrink on
9384193842

Car also started paying itself off; as I got the Passenger seat out to inspect the running mechanisms for comparison and understanding of the system(mainly for the drivers side, so I can move it with some power)
93843
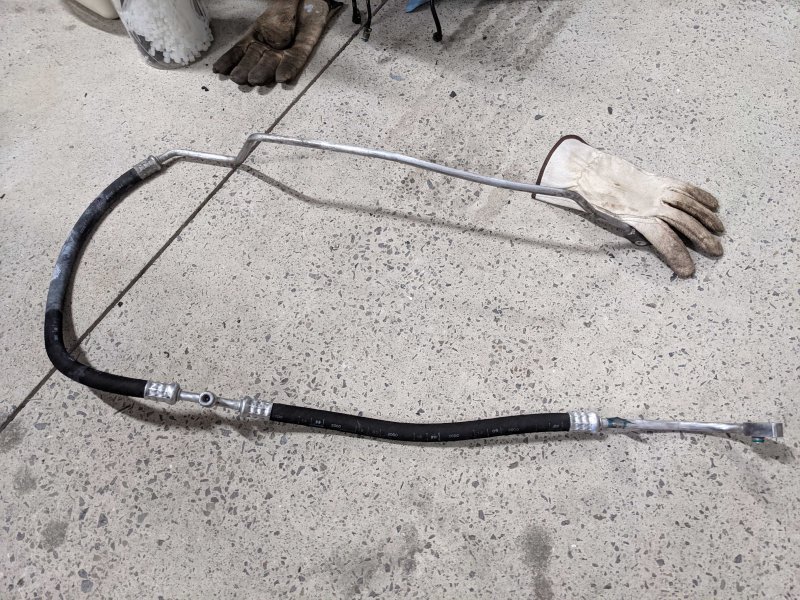
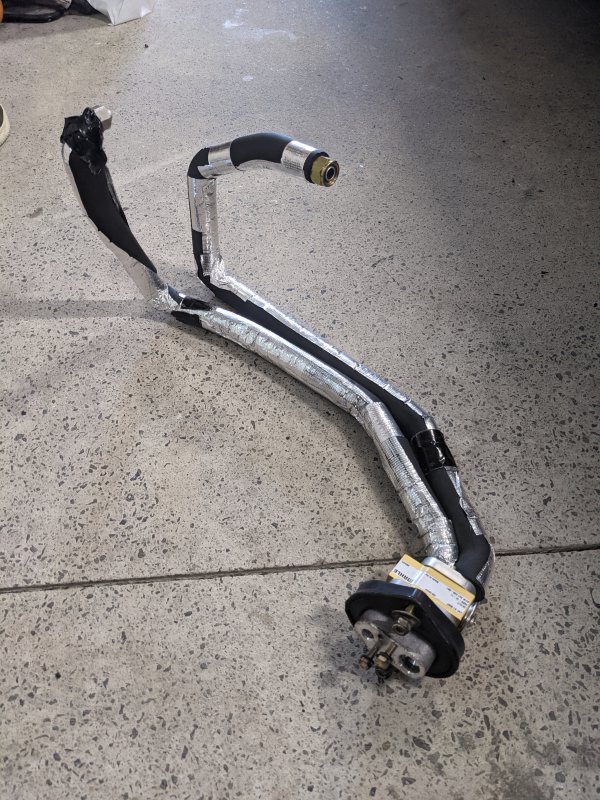
And really; I've been doing a lot of cleaning and polishing; so done both AC lines as they were white...
93844
Top is not yet done and the lower section was cleaned up! I'll go hunt for new O-Rings to suit each end; make sure they seal when I reinstall the lines.
With this; I also installed the very first part I've bought! Honestly I thought ordered longer ones that sit along the rear firewall; ended up being a little piece to replace my squished and damaged one.
938459384693847

Did lots of cleaning; heaps to do and will update as I get through things. Might be best
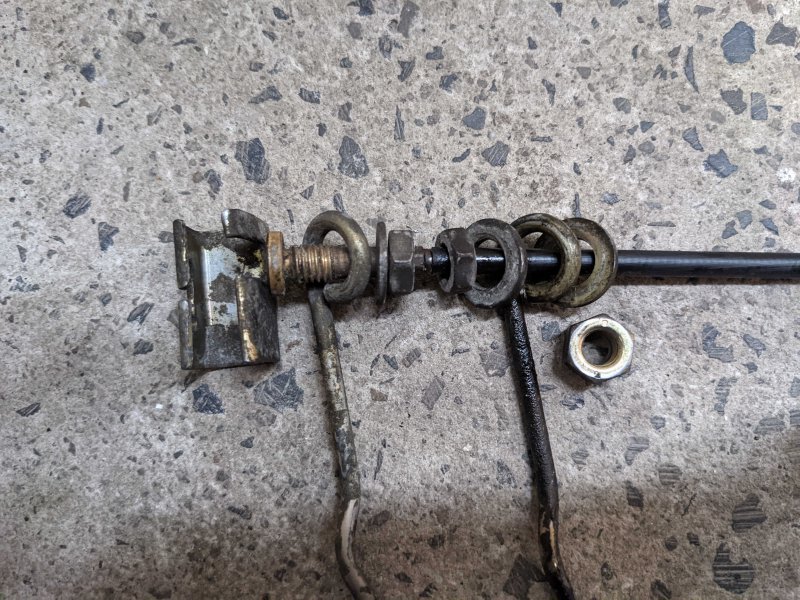
Oh and if anyone needs the order for their bonnet latch; here's a photo. I've cleaned up most of the parts; takes time to slowly brush them all up. The ones plated in zinc will be redone completely! Hydroblasted and recoated.
93848

This week; aim is:
Powdercoating the intake manifold, cam covers and all those. Been sitting under a table for too long
Heads; removing all the valves and getting those hydroblasted and prepped; ready to be reassembled back on the block.
Seat out, cleaning interior before assembling the rear section together again
Radio, sorting out the connections and fixing the mess made by a "professional shop" (most probably lol)
Order the 633186A timing bearings from one of the 20 Alibaba shops... that have replied over the past month(I just zoned out)
That's all I'll do; will update again next weekend! Cheers all
Enjoy your morning/evenings :)
 

philw696

Member
Messages
25,371
What a Great write up and looking forward to the next installment.
Bon Courage from France.
 

davy83

Member
Messages
2,821
Wow you really OD'd on the brave pills there. Respect for tackling such an enormous job. I suspect you have had a lot of advice along the way here, but a few things I would make sure of when rebuilding the car, just to save time in the future. Check the suspension arms for casting cracks, and check the ball joints for play, these do wear out and cause problems eventually. If the ball joints are ok consider splitting them and putting good quality silicone based covers on the, as this prolongs the life of the ball joints a lot. replace all the hoses with silicone, especially the little ones under the plenum as these leak and destroy the knock sensors which are not waterproof. consider putting the converted Bosch starter and new knock sensors in when you rebuild as these will go eventually and are a royal pain to get into. I am a little biased but I would also consider upgraded throttle body and contactless pedal sensor (both of which I make www.maserati3200.net ) as these make the car much better behaved.
When rebuilding around the turbos remember that you cannot access this area once its all back in place so anything around the turbos replace with new. If you have to go back in there its engine out or drop the subframe.
When rebuilding the AC fluid circuit fit a new dryer unit even if the old one looks ok, this makes the AC a lot better, and will save time in the future.
Also check your wheels are round as the wheels are made of cheese and get bent easily.
looking forward to updates, and once again good job sir!!!
 

BennyD

Sea Urchin Pate
Messages
15,006
Whilst I shudder at your choice of subject, I greatly admire your work ethic and technical processes. I really do hope you eventually end up with a 3200 that is as bug-free as it is possible to get so, from me, all the best and good luck for the rest of the project.
 

JTop

Junior Member
Messages
47
Wow... Been 4 months since I've checked the thread.
Had a crazy burnout session where I was mentally just gone. I have been trying to sort everything out, do everything, have a holiday and I just hit a crazy brick wall.
I had a solid break from doing much, I just liaised to get parts ordered and payed for; which has also been a complete mess... I will explain later this week..

What a Great write up and looking forward to the next installment.
Bon Courage from France.
Thank you Phil :)
Excellent stuff. You will have some car at the end.
At this stage; I'm hopeful but not certain hahaha Thank you

Wow you really OD'd on the brave pills there. Respect for tackling such an enormous job. I suspect you have had a lot of advice along the way here, but a few things I would make sure of when rebuilding the car, just to save time in the future. Check the suspension arms for casting cracks, and check the ball joints for play, these do wear out and cause problems eventually. If the ball joints are ok consider splitting them and putting good quality silicone based covers on the, as this prolongs the life of the ball joints a lot. replace all the hoses with silicone, especially the little ones under the plenum as these leak and destroy the knock sensors which are not waterproof. consider putting the converted Bosch starter and new knock sensors in when you rebuild as these will go eventually and are a royal pain to get into. I am a little biased but I would also consider upgraded throttle body and contactless pedal sensor (both of which I make www.maserati3200.net ) as these make the car much better behaved.
When rebuilding around the turbos remember that you cannot access this area once its all back in place so anything around the turbos replace with new. If you have to go back in there its engine out or drop the subframe.
When rebuilding the AC fluid circuit fit a new dryer unit even if the old one looks ok, this makes the AC a lot better, and will save time in the future.
Also check your wheels are round as the wheels are made of cheese and get bent easily.
looking forward to updates, and once again good job sir!!!
I've had all the wheels off; and yes; rear boots have perished, but the ball joints seem O.K. have purchased these: "CLICK ME: BWM ball joint boots" but I am yet to have a weekend to install them. Just a job sitting, waiting to happen. Fronts all seemed fine, but I didn't look close enough, I will soon enough.
I have all Roose Motorsport silicone hoses, brand new Knock sensors(I have 3 actually...). The starter motor is still good; have tested and I'm happy with it.
My throttle body however is a little rattled up, the cables are damaged so I will see what I will do with that eventually. I will contact you when I come to that point!
Turbos are being refurbished and ceramic coated(along with the manifolds and all.. will be nice :) )
I have replaced all the AC parts; I will get to this today. Pretty interesting actually
Wheels are some custom things, I am eyeballing a set of original ones on FB(good to note, as I will check), but I've got two massive bills coming from the engine and turbo shop...
Thank you! :)

Great to see such progress being made. Well done.
It was made up to a point; I'm determined to have this all complete by September-October this year! All based on the setbacks that will come with trying to progress through this all!

Whilst I shudder at your choice of subject, I greatly admire your work ethic and technical processes. I really do hope you eventually end up with a 3200 that is as bug-free as it is possible to get so, from me, all the best and good luck for the rest of the project.
That will be my hope too; I am testing as many sensors as I can on the workbench, comparing them to what the manual specifies. That is the only hope of making sure I'm not putting something faulty back in.
Thank you :)


PXL_20211205_025448702.MP.jpg

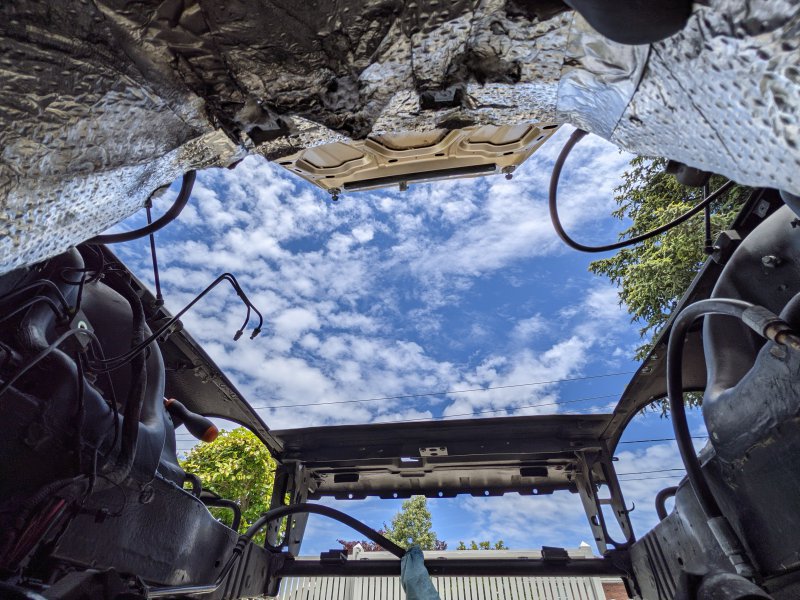
What the engine sees each time it's opened up haha
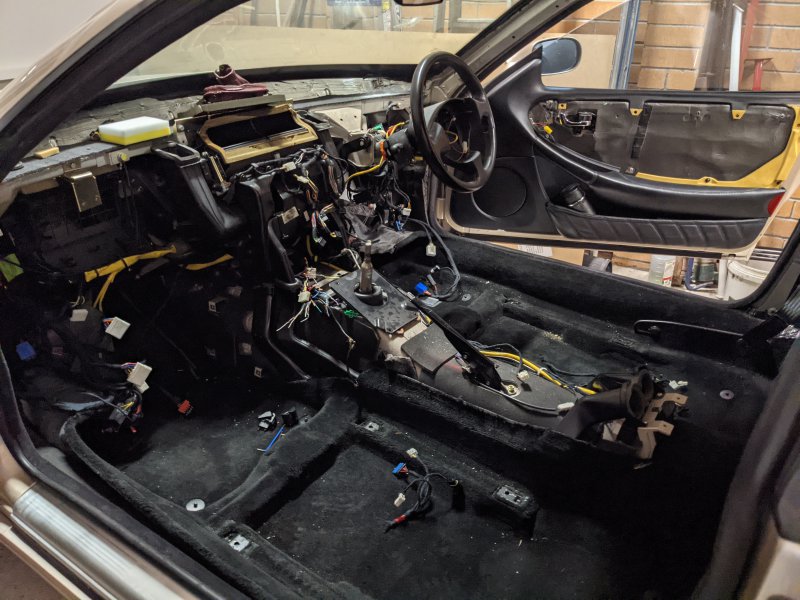
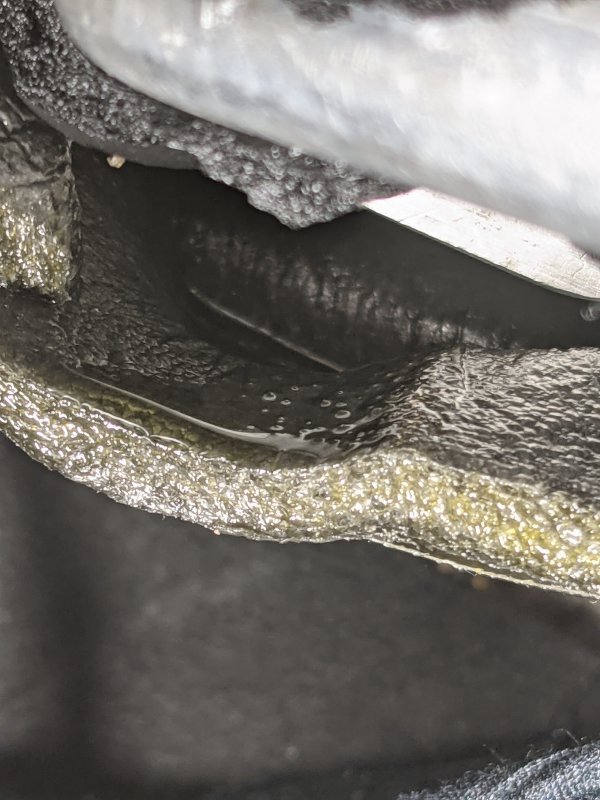
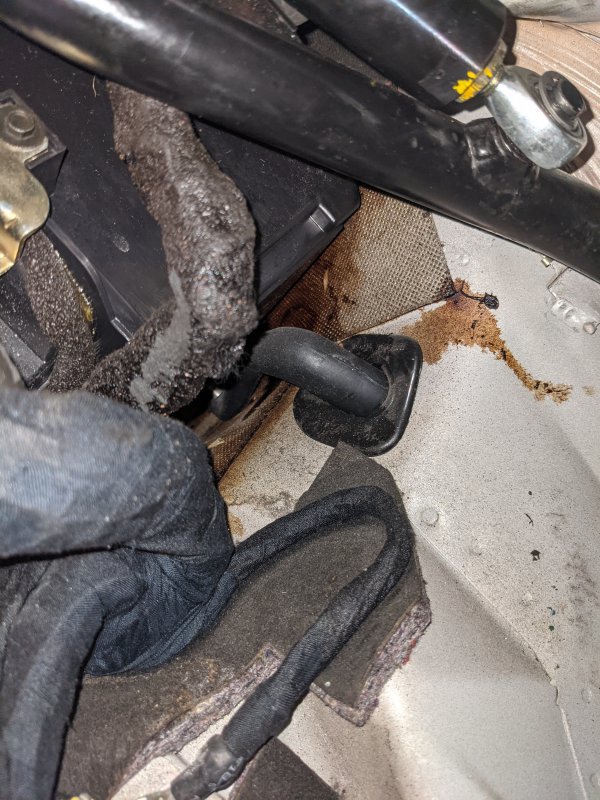
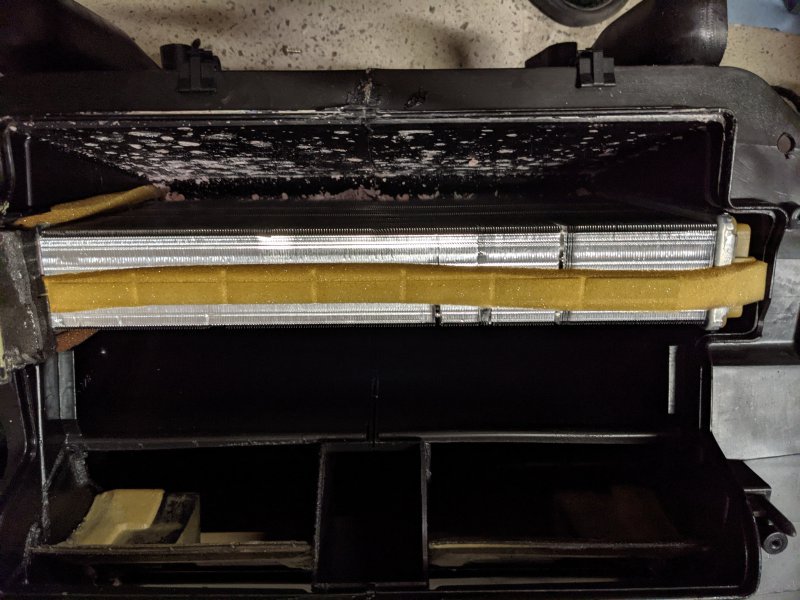
Got the interior out and cleaned up the engine bay in early December and that was about it. And I noticed.. Under the heater core, looks a bit wet.. and I then touched what I figured to be the expansion valve and it was soaked! So I took it all out and..
PXL_20211201_105100790.MP.jpg
PXL_20211204_092105125.jpg

PXL_20220218_101639866.MP.jpg
97672
Expansion valve was wrapped up by someone!

That's red coolant... it all made sense. Head gaskets eroded, heater core gave way... Coolant+AC fluid is what the cabin smelt like this entire time!
PXL_20220308_065731853.MP.jpg

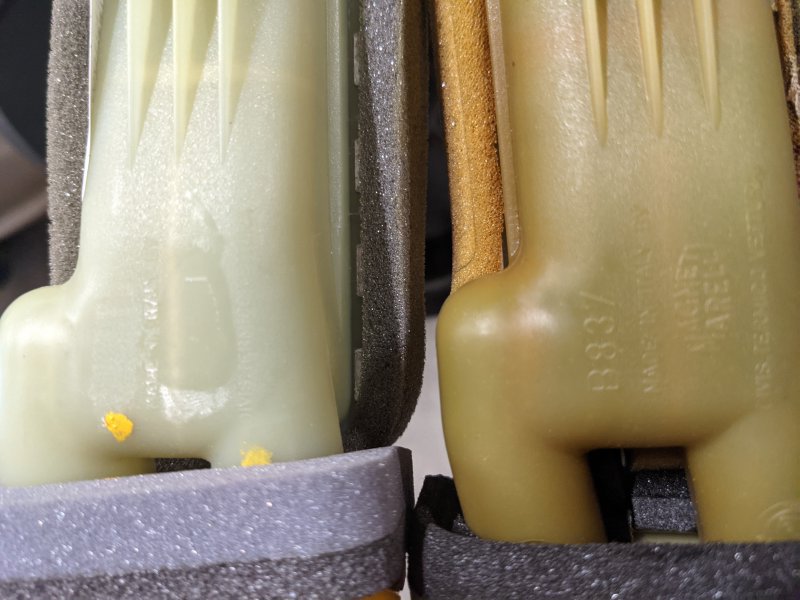
This one is my favourite. Can still see the edge of the Magneti Marelli logo
Anyway parts!
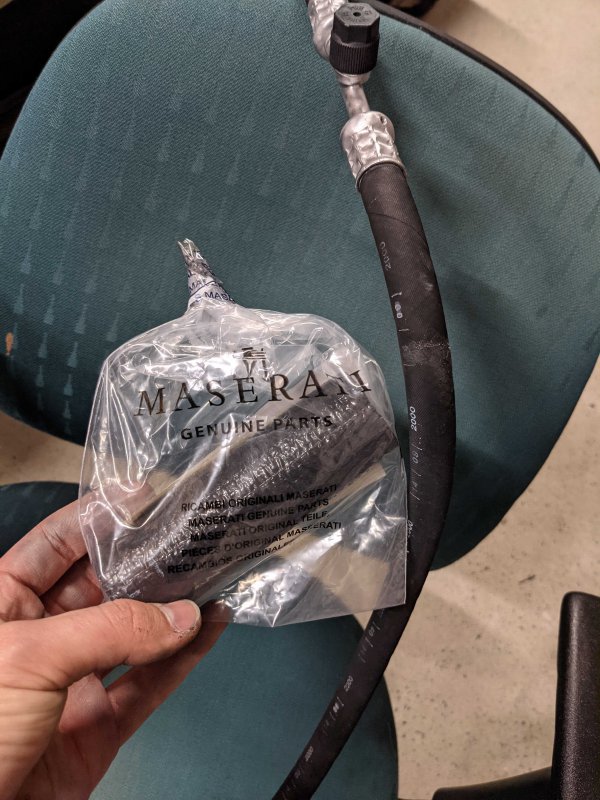
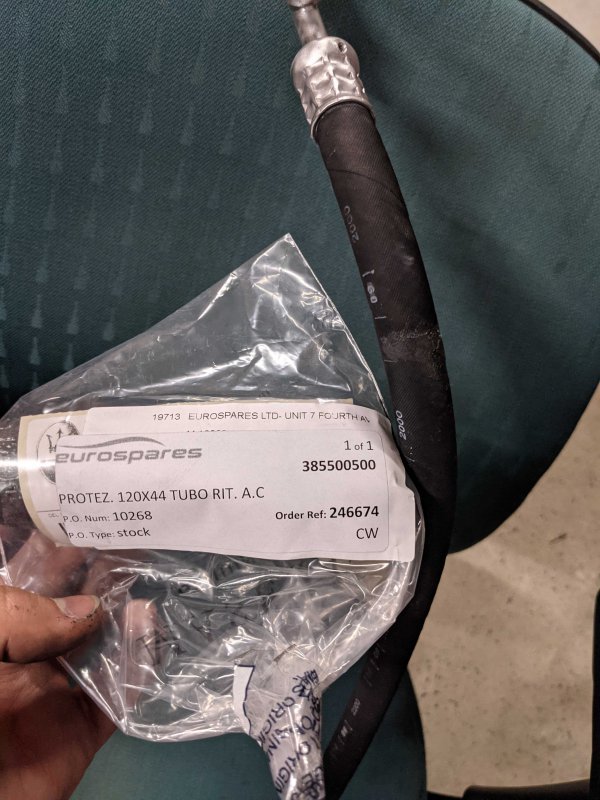
AC Dryer: DENSO DFD09001 - €15
Expansion Valve: MAHLE ORIGINAL AVE 91 000P - €37
Heater core: DENSO DRR01001 - €51
O-Rings -> All are Wurth-Denso except the vitons. Those are just standards, I couldn't find anything specific
"Click Me, Wurth Catalogue of O-Rings"
HNBR(from the catalogue above)
#8 - 5x
5/8" - 4x
1/2"- 2x
No.8 - 1x
No.10 - 1x
Sanden Standard Nitrile(also in the catalogue - these are the ones that are on the AC pump itself):
TX Valve Capillary - 1x
TR Discharge - 1x
Vitons(close if not, exact replicas)
13x1.5mm D75- 1x (brown)
0.15.6x1.78mm D75 - 2x (brown)
7.65-1.78 D75 - 3x (brown)

The #8 were the most expensive($6.40aud a piece), I found all locally. Had them in 2 days.

Went digging further too;
Alternator is: DAN2036 - €342 for it, not super cheap but if need be, obtainable!
ACPump is Sanden-Denso SD7V16 - there is a Valeo one for €198... Not bad

PXL_20220308_080538965.MP.jpg
97669
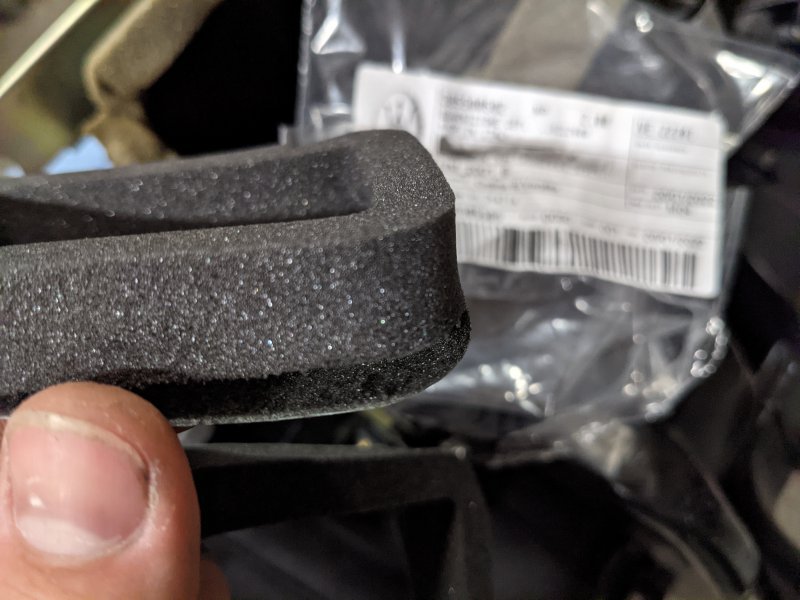
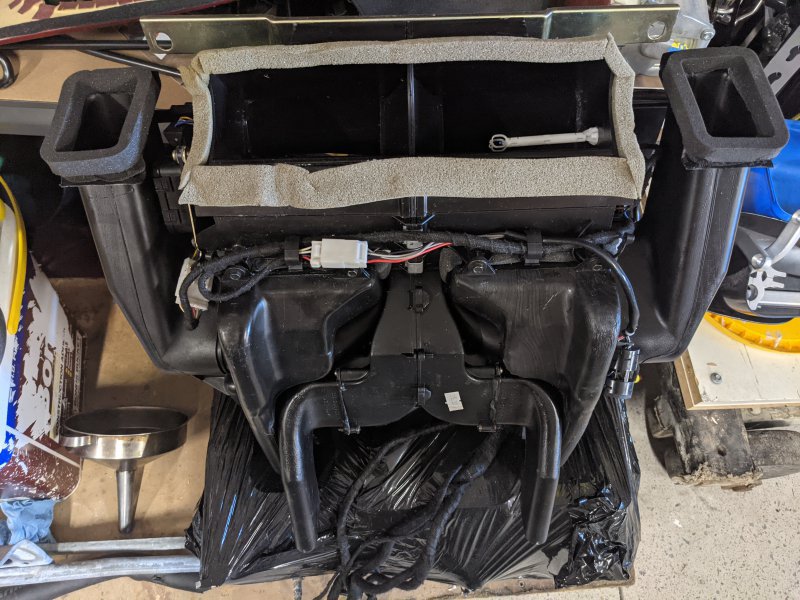
Brand new gaskets for the heater unit. And honestly, all of their glue have split from the foam... SO yeah, that's what happens with 20 years of storage
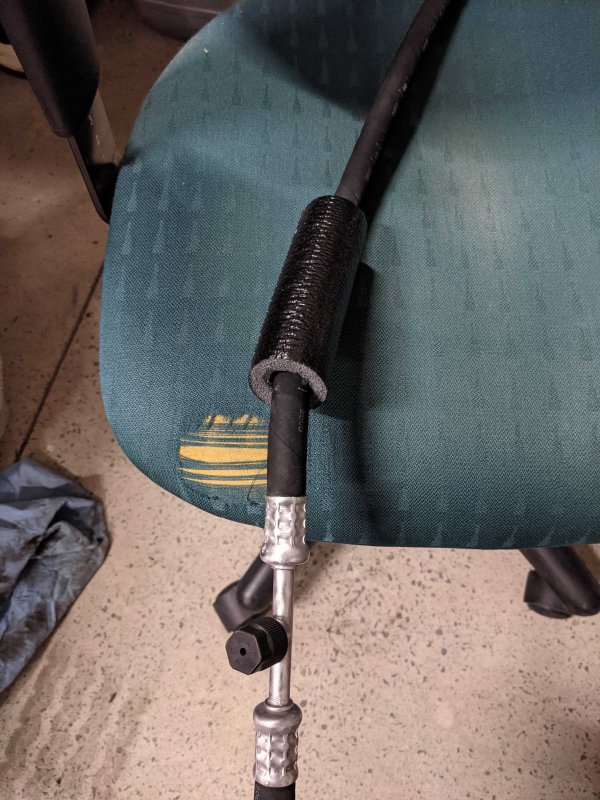
I left my father to redo what was left of the armaflex. for how much he cared, he's done such a wonderful job that it burns the insides of my eyes. it'll survive
I am anyway missing the bracket bracing piece to support both hoses, but I don't think it's important.
PXL_20220314_055525997.MP.jpg


PXL_20211206_112349310.MP.jpg

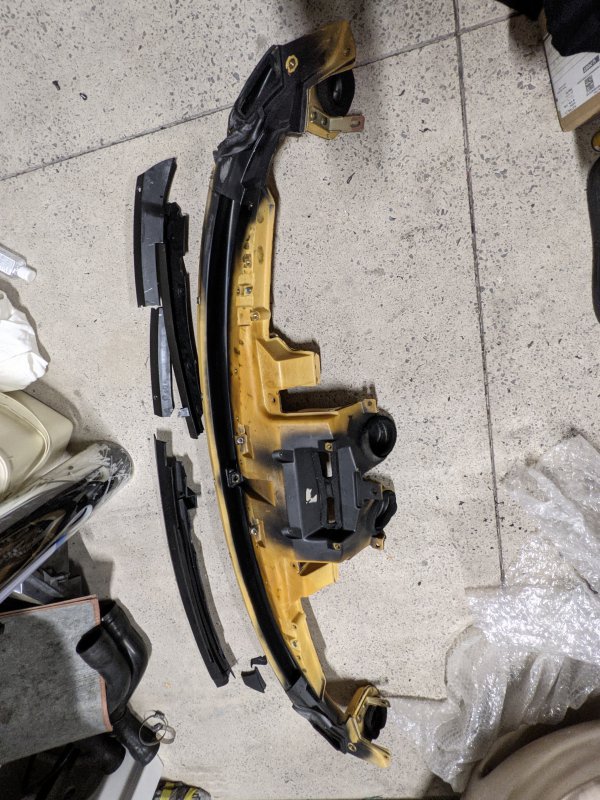
New one of these, looking a lot better. shame my one was in pieces, no manufacturer designed anything for the Aussie sun, now it's a bit different.


I have removed the brake booster too; looks like the original unit(even though the original for sales post mentions it has been replaced! hahahaha) I will see how that goes, then the bay can be ready for a refresh, getting a fresh coat of black paint.

I am at the photo cap and well, can't upload most of my photos without reformatting them to be of a smaller size, I am lazy
Next post will be in regards to the engine and parts that I have ordered to be able to complete the job! I have the correct wiring loom arriving from Germany. I will attempt to recreate it with my original burnt loom(as this is what has been my current reference!) as a spare in case this one does fail me.
 

Attachments

  • PXL_20211205_025448702.MP.jpg
    PXL_20211205_025448702.MP.jpg
    134.5 KB · Views: 5
  • PXL_20211204_092105125.jpg
    PXL_20211204_092105125.jpg
    123.4 KB · Views: 5
  • PXL_20211206_112349310.MP.jpg
    PXL_20211206_112349310.MP.jpg
    132.1 KB · Views: 4
  • PXL_20211201_105100790.MP.jpg
    PXL_20211201_105100790.MP.jpg
    107.7 KB · Views: 4
  • PXL_20220218_101639866.MP.jpg
    PXL_20220218_101639866.MP.jpg
    89.4 KB · Views: 4
  • PXL_20220308_065731853.MP.jpg
    PXL_20220308_065731853.MP.jpg
    75.5 KB · Views: 4
  • PXL_20220308_080538965.MP.jpg
    PXL_20220308_080538965.MP.jpg
    72.6 KB · Views: 6
  • PXL_20220314_055525997.MP.jpg
    PXL_20220314_055525997.MP.jpg
    147.5 KB · Views: 6

BL330

Member
Messages
1,121
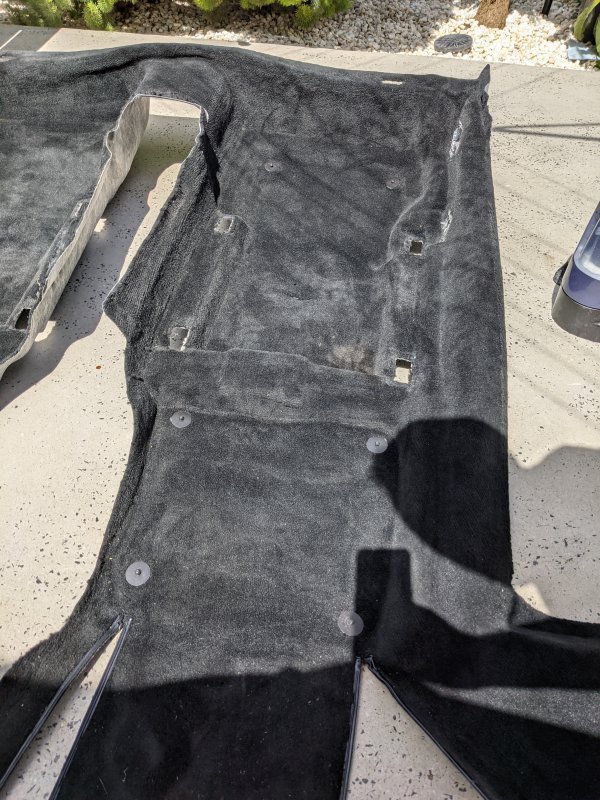
Seeing as you are being so thorough, I would recommend before re-installing the interior, removing the carpets to clean up the heater matrix leak ( and over flow pipe leak ) with a carpet cleaner - you can hire from Bunnings.
Secondly with carpets removed from the car, paint them with black carpet paint from SuperCheap Autos. They come up amazing.
 

alfatwo

Member
Messages
5,517
Seeing as you are being so thorough, I would recommend before re-installing the interior, removing the carpets to clean up the heater matrix leak ( and over flow pipe leak ) with a carpet cleaner - you can hire from Bunnings.
Secondly with carpets removed from the car, paint them with black carpet paint from SuperCheap Autos. They come up amazing.
I've done that before when I used to restore old classic Fiat 500's, it works a treat!

Dave
 

JTop

Junior Member
Messages
47
Seeing as you are being so thorough, I would recommend before re-installing the interior, removing the carpets to clean up the heater matrix leak ( and over flow pipe leak ) with a carpet cleaner - you can hire from Bunnings.
Secondly with carpets removed from the car, paint them with black carpet paint from SuperCheap Autos. They come up amazing.
Already onto it! There was spilt coffee in the passenger side footwell and just under the seat(a spot that is permanent), carpet's been shampooed and wet vacuumed and is just sitting vertically in the garage. I make sure to do this with all my vehicles, no matter. It's just the cleanliness aspect.
The sound deadening bottoms also absorbed the coffee, have got those spotless.

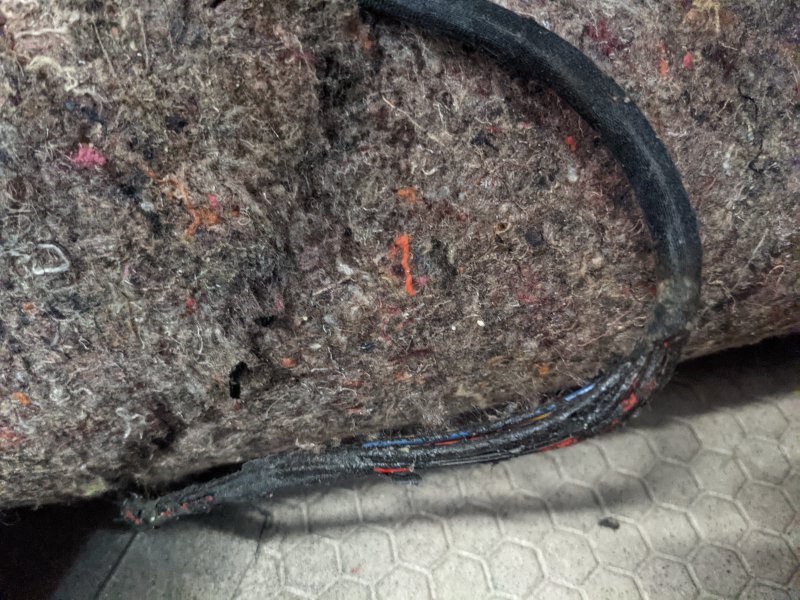
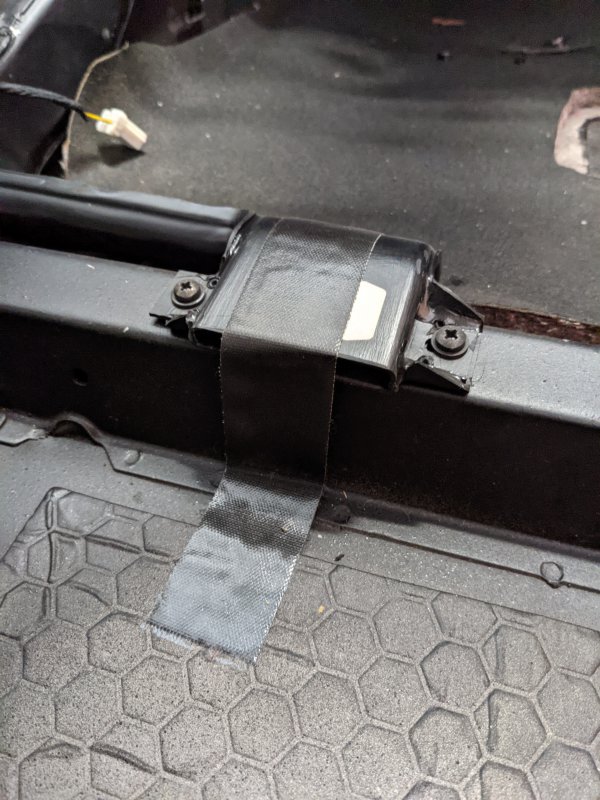
There is a section of the loom that had its Tesa tape melt-dissolve? Really interesting.9773597736

I've never painted carpet, so I'd actually be interested in doing that. Might give it a go, I've found some refinisher, might do that.
Most of the carpet did not have all the original plastic removed, so some sections are as clean as they were 20 years ago!

I had a great laugh at this one: :D
97737
 

rs48635

Member
Messages
3,181
How is it going ? Did you get the engine back in? Interested in at all, but especially if you removed the rear chains from cam sprockets to replace the (plastic guides).
Good luck!!
 

JTop

Junior Member
Messages
47
How is it going ? Did you get the engine back in? Interested in at all, but especially if you removed the rear chains from cam sprockets to replace the (plastic guides).
Good luck!!

Its going so great that I've done almost nothing for two months...
While I am here quickly; **edit quickly was an understatement haha.
->Heads are fully apart, so chains are off and so is the plastic guide. Replacement is always an option, just need to find - discover the shop to remake them. I can make the guides myself, they're straight forward - 3D scan and print(which I am still yet to sit down and do for all the other parts I need done :O ), but the chains are out of my skillset.

Got an email earlier this afternoon. Crank has been cleaned and resealed - all good to go. So is the upper half of the block(all cleaned)
Shop said two oil rings are broken(which is pretty amazing since I handed them the liners with the pistons still in them...)
Anyway, once all are refurbished-recoated. then sit and find aftermarket. It was a struggle to get things, I've tried almost every single shop in the business, that claims to have something available and then they don't :)

Like the engine bay wiring loom is coming from Germany(finally the correct one!). But to get it to Australia, have had to send it to our friend in Germany, before he sent it to us.
I have received one box out of the two, so I have a spare interior wiring harness(that needs a bit of work to get it perfect again)

Turbo shop has sent the manifolds for ceramic coating; waiting to hear back once these are all ready, this was a solid 6 weeks ago.
And then I have also got the intake manifold, throttle cover, rocker covers and coil covers all repainted to match factory colours as closely as possible. Will see how they turn out next week!

Then the issues when trying to source items from Europe:

I have received parts from the Maserati factory's archive via another middleman company, but after their original quote for the items I ordered, they then specified that I had to order minimum quantity. I then asked them to remove all the minimum quantity items and instead they charged me what I had ordered, BUT ended up sending me the full quantity of items! And they refunded all the items they could not find/supply.
So now I have spare parts which I did not pay for - gaskets, knock sensor, and few other bits and pieces; which I'm willing to send to others for free(pay postage), as that is how I received them. What else am I going to do with 10 oil dipstick base seals. I only need 1 haha

I have received shells from Italy after a long while. Fun story here; especially when you specifically ask in fluent Italian:
"Sono questi ricambi genuini o no? - ARE THE PARTS GENUINE?
and the response
"Sono tutti originali e misura standard ( no maggiorati) - "Yeah yeah yeah, yes yes yes"
I PAYED the amount and then I asked the same question as the promise of having it sent the same week did not happen. And the response told me everything
"Biella originali Maserati" White original replicas. So no idea. Anyway, that's how you throw $2880 in the bin :)
And oh, we have them here in stock, ready. And then I waited a month and a half (6 weeks) for them to "arrive" and then be sent. Like come on... Never again.

Not genuine even. Mains are aftermarket, but are labelled for the Quattroporte, 479020201. I will wait for someone to tell me they are different spec :)
And then Kolbenschmidt for the big ends. I payed 300euro more than I should have for them. As it goes, you only learn once you dig your own hole. And I done this by buying an Italian, not in Europe.

And prior to this guy, another shop took payment. went M.I.A. no response at all and then finally came to the conclusion that they can not supply and sent me a full refund. I will not talk names, I hate drama.

There is one more story here, but it is not done just yet.

You can only be as courteous until the end. Like what is wrong with people? Its so easy, yet everyone makes it so hard.
As soon as you send funds, everyone pisses on you. Like I've got a simple request, change/cancel something because that's a normal thing to happen with the process as it drags on for months.
OH and when the shop changes things and doesn't ask for any confirmation. That one is my favourite!!
If you can't; just don't. Its simple.

This entire project is living off hopes and dreams right now, not much else.
 
Last edited: