
You are using an out of date browser. It may not display this or other websites correctly.
You should upgrade or use an alternative browser.
You should upgrade or use an alternative browser.
My Oceanic Blue GTS
- Thread starter markiii
- Start date


Gazcw
Member
- Messages
- 7,814
I got your coat for you.oddly I've never been a fan of red calipers, looks a bit like its trying too hard to my eye
")
.jpg")
lozcb
Member
- Messages
- 12,586
You obviously dont like getting that tail out occasionally then , thats half the funThe delights of Maserati spec! The 4.7 MC GTS came with the paddles your's has and the 4.7 Auto GTS (and 4.2) came with a smaller paddle that I think is more substantial but obviously harder to use when in a corner. Mind I was taught never to change gear with any steering lock on. These are great cars and hugely overlooked by many.
MarkMas
Chief pedant
- Messages
- 9,059

I've always seen this colour called "Blu Oceano" rather than "Oceanic Blue" on the forum and everywhere else really. I'm now trying to decide if it is rather odd for this thread title to translate the official colour name into English, or rather silly for us mostly to use the Italian. Or neither, and people should just do what they like.
Scaf
Member
- Messages
- 6,652
There will be at least two people on here that might care, but for the rest of us it’s a rather lovely blue MaseratiView attachment 124805
I've always seen this colour called "Blu Oceano" rather than "Oceanic Blue" on the forum and everywhere else really. I'm now trying to decide if it is rather odd for this thread title to translate the official colour name into English, or rather silly for us mostly to use the Italian. Or neither, and people should just do what they like.
Brendan
Member
- Messages
- 1,248
Nero Carbonio sounds so much better than, well, black. I bet 'a turd on a blanket' sounds nice in Italian!There will be at least two people on here that might care, but for the rest of us it’s a rather lovely blue Maserati
MarkMas
Chief pedant
- Messages
- 9,059
Nero Carbonio sounds so much better than, well, black. I bet 'a turd on a blanket' sounds nice in Italian!

First Job of the day Change the Wipers
Just replaced my blades
having read this thread I was aware its not necessarily straightforward.
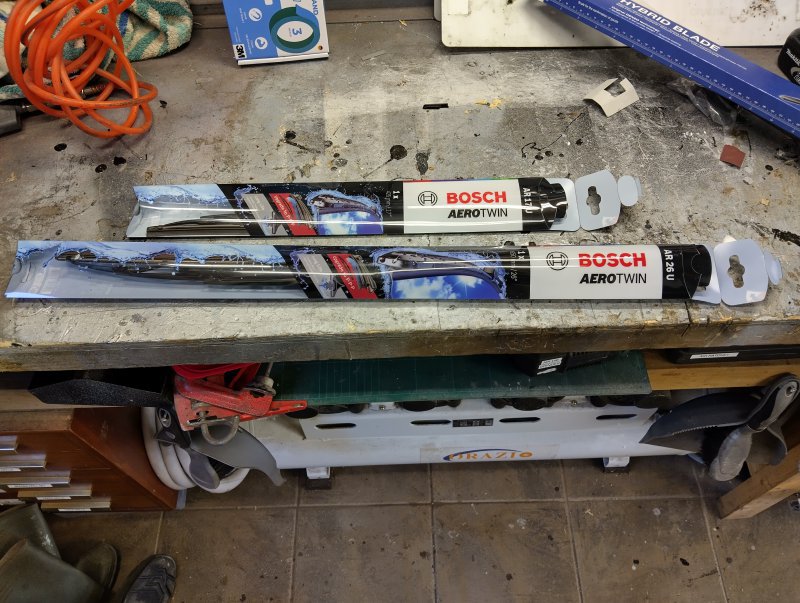
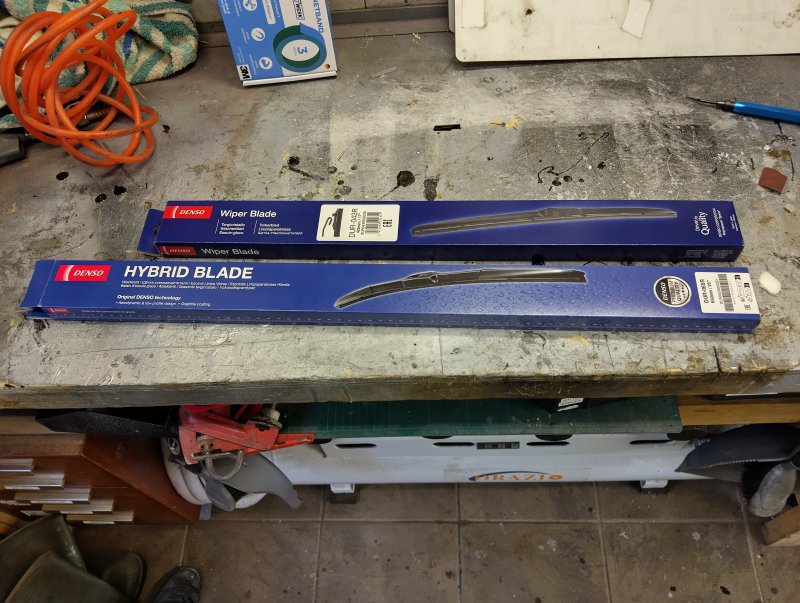
I like the Bosch Aerotwins as I use them on my other cars. However conscious it might not be simple I ordered both those and the Denso Hybrids from Eurocarparts on the basis I'd return the one I didn't like/couldn't fit.
Part Details
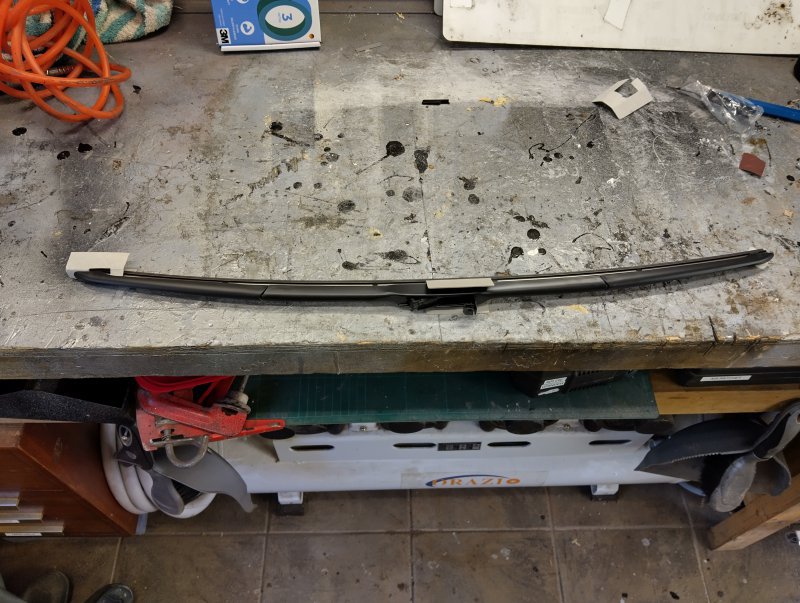
The Denso are described as a Hybrid, I now see what they mean as they are a traditional blade with a plastic aero screen in front (see pic)
Not too my personal taste so I though I'd persevere with the Bosch.
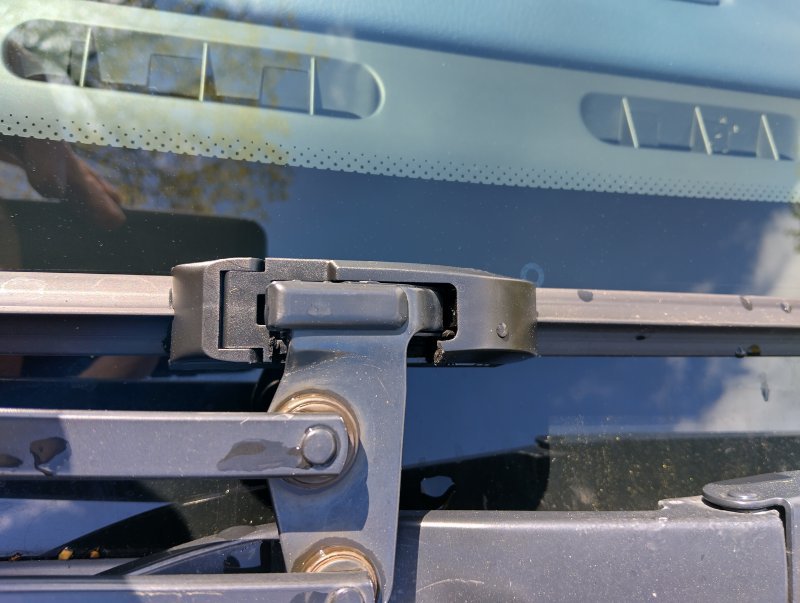
As per earlier comments in this thread, the 17U on the passenger side is very easy to fit. The drivers wiper need the trick with pushing the clip halfway onto the arm before assembly or the hook won't clear the Bosch clip. However as per Goldsax post above the closing cap does need cutting on one side or it fouls the arm mounting.
I was initially a bit dubious about this but on closer inspection it doesn't affect the locking of the closing cap and in my tests so far there doesn't appear to be any danger of anything coming adrift.
Just replaced my blades
having read this thread I was aware its not necessarily straightforward.
I like the Bosch Aerotwins as I use them on my other cars. However conscious it might not be simple I ordered both those and the Denso Hybrids from Eurocarparts on the basis I'd return the one I didn't like/couldn't fit.
Part Details
Product Code | Description | Price |
| 485778260 | Bosch Aerotwin Retrofit Single Flat Wiper Blade AR26U | £14.49 |
| 485778266 | Denso Hybrid Wiper Blade 26 Inch | £18.49 |
| 485778176 | Denso Hybrid Blade 17 Inch | £13.99 |
| 485778170 | Bosch Aerotwin Retrofit Single Flat Wiper Blade AR17U | £14.49 |
The Denso are described as a Hybrid, I now see what they mean as they are a traditional blade with a plastic aero screen in front (see pic)
Not too my personal taste so I though I'd persevere with the Bosch.
As per earlier comments in this thread, the 17U on the passenger side is very easy to fit. The drivers wiper need the trick with pushing the clip halfway onto the arm before assembly or the hook won't clear the Bosch clip. However as per Goldsax post above the closing cap does need cutting on one side or it fouls the arm mounting.
I was initially a bit dubious about this but on closer inspection it doesn't affect the locking of the closing cap and in my tests so far there doesn't appear to be any danger of anything coming adrift.
Attachments
Last edited:
Seems to be a morning for parts arriving.
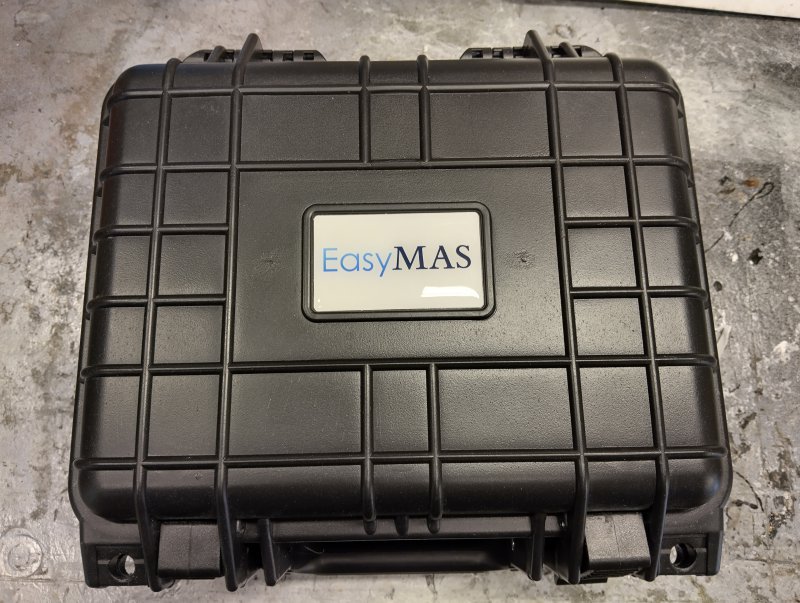
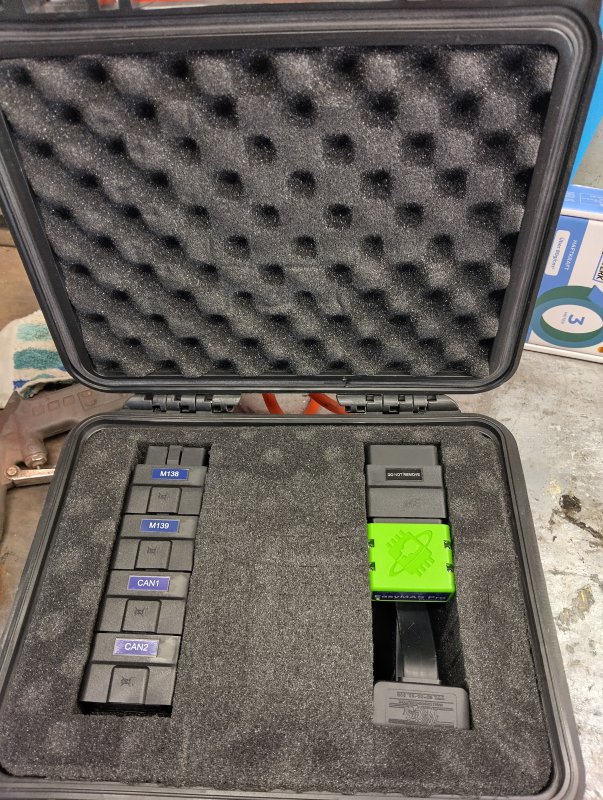
First up EasyMAS arrived this morning
if the quality of the product is as impressive as the case it comes in I should be well impressed.
I have zero idea what I'm doing with it yet, but I'm in Welwyn Herts if anyone nearby needs any codes pulling!
First up EasyMAS arrived this morning
if the quality of the product is as impressive as the case it comes in I should be well impressed.
I have zero idea what I'm doing with it yet, but I'm in Welwyn Herts if anyone nearby needs any codes pulling!
Attachments
Second job of the day, fit some pedals
full fitting thread here https://www.sportsmaserati.com/index.php?threads/ultimate-pedals.38533/
Very happy with the end result

full fitting thread here https://www.sportsmaserati.com/index.php?threads/ultimate-pedals.38533/
Very happy with the end result
CatmanV2
Member
- Messages
- 49,007
Second job of the day, fit some pedals
full fitting thread here https://www.sportsmaserati.com/index.php?threads/ultimate-pedals.38533/
Very happy with the end result
View attachment 126253
I rate them very highly indeed!
C
This weekends job replace the droplinks
I've been plagued by an intermittent squeak for the last few weeks which as with all intermittent noises has proved a royal PITA to locate.
I had hope that stopping the battery moving around would solve the issue, alas whilst it certainly must have been contributing it wasn't the sole cause. Post battery fix it changed in character somewhat but persisted. It also seemed to occasionally move around. That could of cause be an an acoustic trick or simply that post battery contribution I could now hear other sounds which had been masked,,
My appointment at Center Gravity was looming so I figured if they can't find it at least it's not suspension related.
Pete as expected managed to work the usual magic on the handling but would he find the noise?
First test drive - hmm sounds like your front droplinks need doing - physical inspection back at base, yep that looks like where the occasional front noise is coming from!
Of course the rear squeak decided to go quiet during the test drive as is always the way, bugger, let's hope the inspection is more successful.
Having exhausted suspension related movement as the cause we turned to exhaust related movement, and discovered a totally corroded through exhaust clamp on the nearside backbox coupling, It doesn't look great in the picture but the topside of the clamp had totally rotted away. When moved by hand it made an absolutely horrible squeak. Lovely let's get that changed

We couldn't get the droplinks same day so I added them to my DIY list. Pete recommended the SUPerformance links as both better built and cheaper than the OEM.
Upon speaking to both SU and my local Maser dealer parts department they both new the part numbers without even looking. This suggests they are a pretty common replacement item.
It seems the droplinks are different left to right as they have a 90 degree offset in the 2 joints. Surprisingly however front and rear are diagonally interchangeable.
Hence
Front Right and Rear Left are the same.
Front Left and Rear Right are the same.
162619 is Rear Left/Front Right (Superseded by 259572)
162620 is Rear Right/ Front Left (Superseded by 259573)
These are the same parts used on the Ferrari F430
SU only list theirs under the original part numbers https://www.superformance.co.uk/granturismo/suspension.html
Not only were the SU ones better and cheaper but it seems they are only 30 mins down the road from me, decision made!
.jpg")

Images are the stock items, I neglected to take a picture of the SU ones but for reference the obvious differences are
OEM do not have a Hex key insert in the rod end SU do
OEM have that plastic spoke design on the tops. SU are plain metal
OEM have only 2 flats on the nut and need a 17mm spanner, SU have 4 flats and need a 16mm spanner.
Since we weren't getting any noises from the rears at CG I could have just done the front but I figured if the fronts are toast the rears probably aren't far behind so decided to do all 4 whilst I was at it.
If you have a lift or in my case a pit, access to all four droplinks is fairly straightforward, fiddly but doable. Albeit my normal spanners were too long to get any movement before hitting the lower arms. Something a couple of cheap spanners and my bandsaw soon resolved. ( I so wish I'd bought that years ago). I don't think I'd want to attempt this with just a jack as not only would doing the job lying down be a serious pain, you will need both sides of the car at the same height to keep load off the ARB itself.
Getting the new ones on is made significantly easier by the SU replacements having 4 rather 2 flats and the Hex insert in the end!
I hadn't really been looking forward to this job if I'm honest as whilst I'm used to doing my own maintenance my history with droplinks has often resulted in them, being seized and requiring cutting off. So much so that my default approach is usually to cut them off and save time. The old ones after all are only headed for the bin.
The Maser ones however whilst simply going through the ARB and secured with a nut, go into captive holes on the lower arms. meaning if you snap a stud or strip a thread you are in a hole world of hurt. I'm not entirely sure access to drill them out would be possible without removing the arm from the car.
As it was I was hoping that copious use of Plusgas and Freeze release would allow me to avoid any such pain. In this regard the rear droplinks are easier than the front as whilst in both cases they are captive threads, the fronts are blind. The rears at least are an open hole allowing you to see that end of the stud and apply lubricant to both ends.


As it happens all 4 were surprisingly easy coming out with a modicum of effort and leaving pristine clean threads in their wake. For a 13 year old car either thats a lot of luck or they have been changed more often that the service history would suggest!
Comparing the old to the new was like night and day. New were as you'd expect fairly stiff and not easy to move by hand. All four of the old ones had the integrity of a spoon in hot custard.
A brief test drive between doing front and back showed a much tighter feeling quieter car. This was to be expected but surprised me as I'd evidently attributed certain noises to the "chatty" nature of our suspension.
The annoying squeak from the rear has yet to return although as it was always surface dependant I'm not counting my chickens on that score just yet.
So to summarise, it's not a hard DIY job (if it goes as smoothly as mine did). It's certainly a one man job however... there is one point at which you will be grateful for a second pair of hands. When winding out the old links you can simply spin the whole link (as they are floppy enough you can turn the other end away from anything in its way). Threading in the new ones doesn't have that luxury as they are much tighter.
That means you're trying to balance the new on a single turn of the thread whilst using the spanner flat to wind it in. Thats not so easy when you're trying to avoid cross threading. A second pair of hands there is definitely useful.
Oh and the difference is well worth changing them.
I've been plagued by an intermittent squeak for the last few weeks which as with all intermittent noises has proved a royal PITA to locate.
I had hope that stopping the battery moving around would solve the issue, alas whilst it certainly must have been contributing it wasn't the sole cause. Post battery fix it changed in character somewhat but persisted. It also seemed to occasionally move around. That could of cause be an an acoustic trick or simply that post battery contribution I could now hear other sounds which had been masked,,
My appointment at Center Gravity was looming so I figured if they can't find it at least it's not suspension related.
Pete as expected managed to work the usual magic on the handling but would he find the noise?
First test drive - hmm sounds like your front droplinks need doing - physical inspection back at base, yep that looks like where the occasional front noise is coming from!
Of course the rear squeak decided to go quiet during the test drive as is always the way, bugger, let's hope the inspection is more successful.
Having exhausted suspension related movement as the cause we turned to exhaust related movement, and discovered a totally corroded through exhaust clamp on the nearside backbox coupling, It doesn't look great in the picture but the topside of the clamp had totally rotted away. When moved by hand it made an absolutely horrible squeak. Lovely let's get that changed
We couldn't get the droplinks same day so I added them to my DIY list. Pete recommended the SUPerformance links as both better built and cheaper than the OEM.
Upon speaking to both SU and my local Maser dealer parts department they both new the part numbers without even looking. This suggests they are a pretty common replacement item.
It seems the droplinks are different left to right as they have a 90 degree offset in the 2 joints. Surprisingly however front and rear are diagonally interchangeable.
Hence
Front Right and Rear Left are the same.
Front Left and Rear Right are the same.
162619 is Rear Left/Front Right (Superseded by 259572)
162620 is Rear Right/ Front Left (Superseded by 259573)
These are the same parts used on the Ferrari F430
SU only list theirs under the original part numbers https://www.superformance.co.uk/granturismo/suspension.html
Not only were the SU ones better and cheaper but it seems they are only 30 mins down the road from me, decision made!
Images are the stock items, I neglected to take a picture of the SU ones but for reference the obvious differences are
OEM do not have a Hex key insert in the rod end SU do
OEM have that plastic spoke design on the tops. SU are plain metal
OEM have only 2 flats on the nut and need a 17mm spanner, SU have 4 flats and need a 16mm spanner.
Since we weren't getting any noises from the rears at CG I could have just done the front but I figured if the fronts are toast the rears probably aren't far behind so decided to do all 4 whilst I was at it.
If you have a lift or in my case a pit, access to all four droplinks is fairly straightforward, fiddly but doable. Albeit my normal spanners were too long to get any movement before hitting the lower arms. Something a couple of cheap spanners and my bandsaw soon resolved. ( I so wish I'd bought that years ago). I don't think I'd want to attempt this with just a jack as not only would doing the job lying down be a serious pain, you will need both sides of the car at the same height to keep load off the ARB itself.
Getting the new ones on is made significantly easier by the SU replacements having 4 rather 2 flats and the Hex insert in the end!
I hadn't really been looking forward to this job if I'm honest as whilst I'm used to doing my own maintenance my history with droplinks has often resulted in them, being seized and requiring cutting off. So much so that my default approach is usually to cut them off and save time. The old ones after all are only headed for the bin.
The Maser ones however whilst simply going through the ARB and secured with a nut, go into captive holes on the lower arms. meaning if you snap a stud or strip a thread you are in a hole world of hurt. I'm not entirely sure access to drill them out would be possible without removing the arm from the car.
As it was I was hoping that copious use of Plusgas and Freeze release would allow me to avoid any such pain. In this regard the rear droplinks are easier than the front as whilst in both cases they are captive threads, the fronts are blind. The rears at least are an open hole allowing you to see that end of the stud and apply lubricant to both ends.
As it happens all 4 were surprisingly easy coming out with a modicum of effort and leaving pristine clean threads in their wake. For a 13 year old car either thats a lot of luck or they have been changed more often that the service history would suggest!
Comparing the old to the new was like night and day. New were as you'd expect fairly stiff and not easy to move by hand. All four of the old ones had the integrity of a spoon in hot custard.
A brief test drive between doing front and back showed a much tighter feeling quieter car. This was to be expected but surprised me as I'd evidently attributed certain noises to the "chatty" nature of our suspension.
The annoying squeak from the rear has yet to return although as it was always surface dependant I'm not counting my chickens on that score just yet.
So to summarise, it's not a hard DIY job (if it goes as smoothly as mine did). It's certainly a one man job however... there is one point at which you will be grateful for a second pair of hands. When winding out the old links you can simply spin the whole link (as they are floppy enough you can turn the other end away from anything in its way). Threading in the new ones doesn't have that luxury as they are much tighter.
That means you're trying to balance the new on a single turn of the thread whilst using the spanner flat to wind it in. Thats not so easy when you're trying to avoid cross threading. A second pair of hands there is definitely useful.
Oh and the difference is well worth changing them.