Gransport front bumper removal?

tomoshea

Junior Member
Messages
91
Hoping someone has the procedure here..
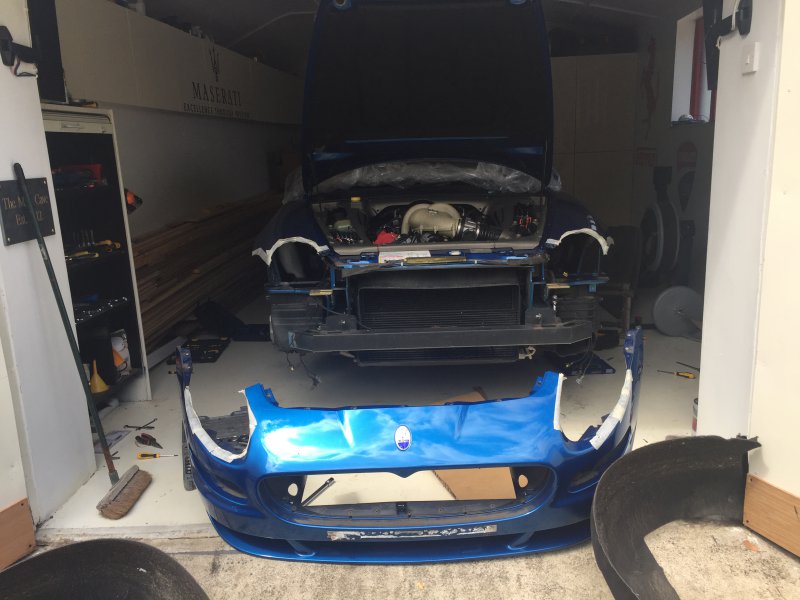
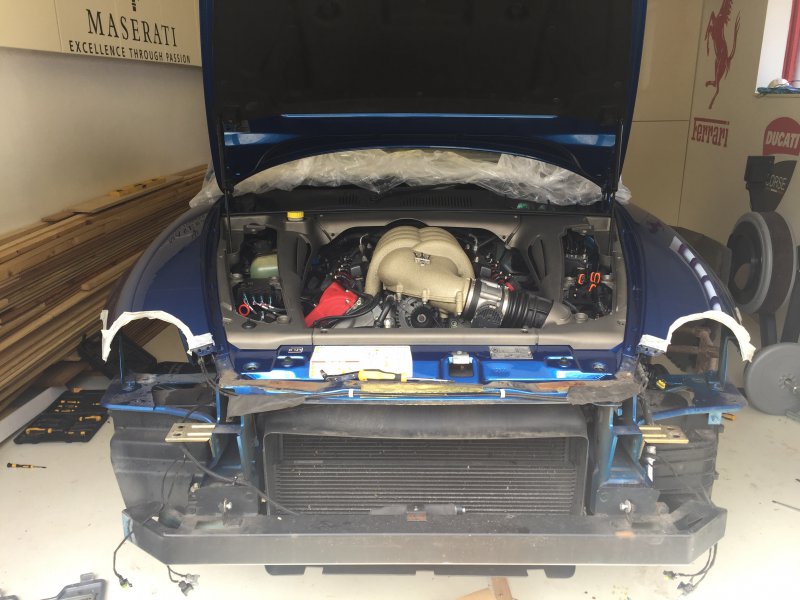
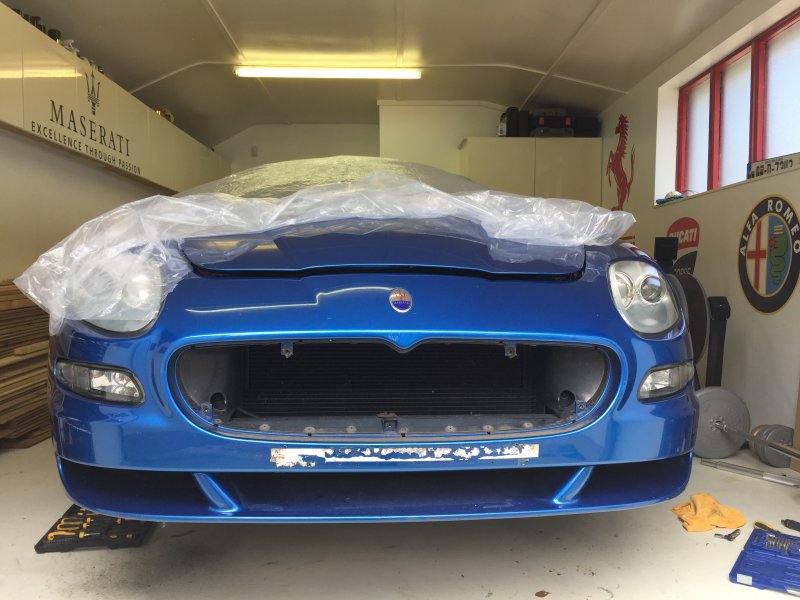
Started removing the front bumper on my 90th anniversary for a respray for stone chips... beginning to regret it.

I have seen the thread for front bumper removal on 4200, but the gransport type bumper and front config appears to be different. Few photos attached.

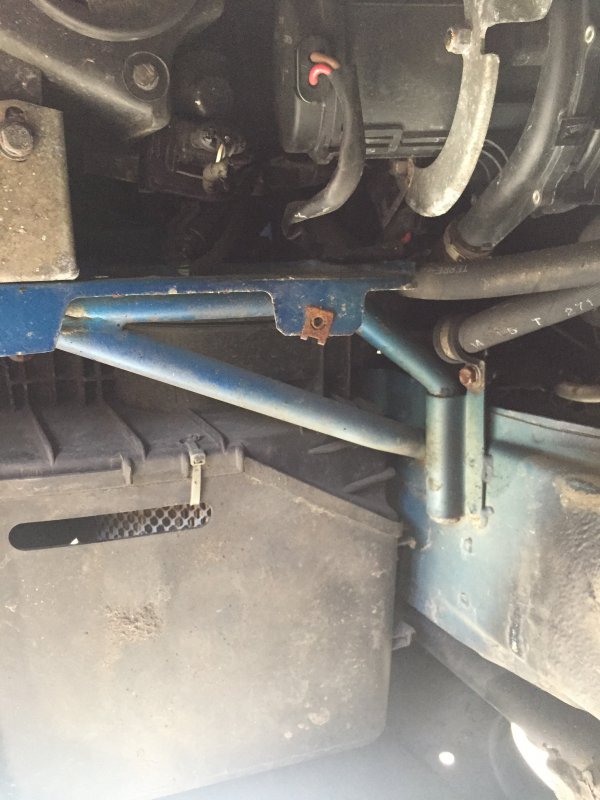
Do you remove the bumper side light cluster from the rear or do you remove them once the bumper is pulled out from the front( like Alfa spider)

Can’t see anyway to access anything that is retaining the bumper side light cluster- air filter box in lower left and oil sump in the the lower right...

Any knack to removing the headlight cluster..

Insights greatly appreciated...
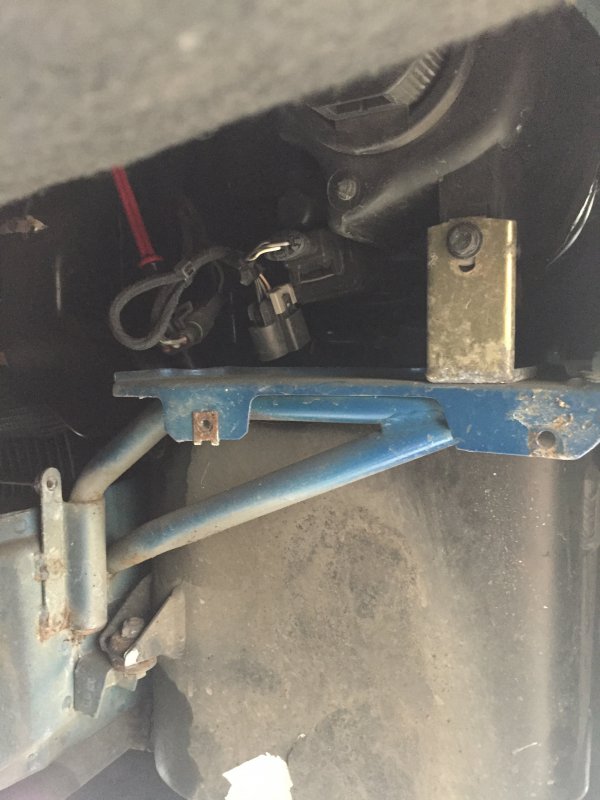
 

Attachments

  • 475CF8E4-2BF9-4324-AD8A-D3DDC59CD424.jpeg
    475CF8E4-2BF9-4324-AD8A-D3DDC59CD424.jpeg
    1.9 MB · Views: 30
  • 68DCEBEA-8794-4D5B-A26F-1363F0FFEC29.jpeg
    68DCEBEA-8794-4D5B-A26F-1363F0FFEC29.jpeg
    1.1 MB · Views: 31
  • D78EC7A2-62A5-479A-9E39-0CF13C09D1AD.jpeg
    D78EC7A2-62A5-479A-9E39-0CF13C09D1AD.jpeg
    1.1 MB · Views: 31
Last edited:

dickygrace

www.richardgracecars.co.uk
Messages
7,342
I don’t know how to do it, but I know the people that do know always say it’s a nightmare job. Let the paintshop or Ken Plant sort it out.
 

tulit

Member
Messages
110
Just did this during the week.

Yes you need to remove the side marker lights first. There’s one bolt you can get from under the car. Once that’s out you need to push the side marker light out. I used a socket extension to push it gently from behind. I’ve seen suggestions of using a suction cup - I tried that and it was useless for me.

Once the side marker light is out you can get to the last bolt on the headlight.

The passenger side is much easier so I’d start there to get a hang of it.

If you want send me a PM I can try and walk you through it over the phone as it’s fresh in my mind.


Sent from my iPhone using Tapatalk
 

tomoshea

Junior Member
Messages
91
Just did this during the week.

Yes you need to remove the side marker lights first. There’s one bolt you can get from under the car. Once that’s out you need to push the side marker light out. I used a socket extension to push it gently from behind. I’ve seen suggestions of using a suction cup - I tried that and it was useless for me.

Once the side marker light is out you can get to the last bolt on the headlight.

The passenger side is much easier so I’d start there to get a hang of it.

If you want send me a PM I can try and walk you through it over the phone as it’s fresh in my mind.


Sent from my iPhone using Tapatalk
Thanks for the reply, will PM you.
 

dickygrace

www.richardgracecars.co.uk
Messages
7,342
It isn’t getting them off that’s the issue, it’s aligning them correctly when fitting them back.
 

Swedish Paul

Member
Messages
1,811
I know a body guy, he got a fixed price on replacing bumpers on a 430. Says it took at least twice as long as paid for as they are custom fit for each car. They aren’t mass produced. I’ll set fire to mine first if I am ever confronted with having to take a bumper off....
 

tomoshea

Junior Member
Messages
91
It isn’t getting them off that’s the issue, it’s aligning them correctly when fitting them back.
Cheers, the car isn’t going to be on the road this year, so time isn’t an issue for me, just a few small jobs to get this one back to 10/10 since I bought it a few years ago,bumper, 1 side skirt and wheels refinished is all that is left.

If it’s like the 360 bumper it will be a PITA especially getting the seals around the light to fit correctly on refitment.
 

jasst

Member
Messages
2,319
Make sure you put masking tape on the wing where the bumper joins it, and all around the headlights before you try to get them out, otherwise you will scratch your paintwork, (don't ask me how I know :rolleyes:)
 

tulit

Member
Messages
110
NOTE- I said passenger side above, but probably should say driver side (I'm LHD, you're RHD) :)
 

tulit

Member
Messages
110
It isn’t getting them off that’s the issue, it’s aligning them correctly when fitting them back.

The trick seems to be leave EVERYTHING loose until the last possible moments. Start from the center and work your way outwards as you start adding hardware back. Also be sure to carefully check and record how many shims are under each of the top attachment points. They can get funky and half stick to things and fall off later.


Sent from my iPhone using Tapatalk
 

BennyD

Sea Urchin Pate
Messages
15,006
A telegraph pole, a ratchet strap and a sharp reverse acceleration is all it takes. Forget all the spanner bolloxcs; that takes far too long. You’re welcome.
 

tomoshea

Junior Member
Messages
91
Bumper off...no scratching, shearing, breaking or blood... all nuts and bolts in surprisingly good condition for location, age and Northern Europe climate...

That thread is spot on...

Thanks all.

Now for side skirt... fun no doubt..
 

Attachments

  • 9C9AD586-9460-42ED-AD6B-B7AD16940A02.jpeg
    9C9AD586-9460-42ED-AD6B-B7AD16940A02.jpeg
    1.9 MB · Views: 26
  • 85B8709C-B288-4D07-9AF7-E03CA641EC32.jpeg
    85B8709C-B288-4D07-9AF7-E03CA641EC32.jpeg
    1.9 MB · Views: 23
Last edited: