conaero
Forum Owner
- Messages
- 34,630
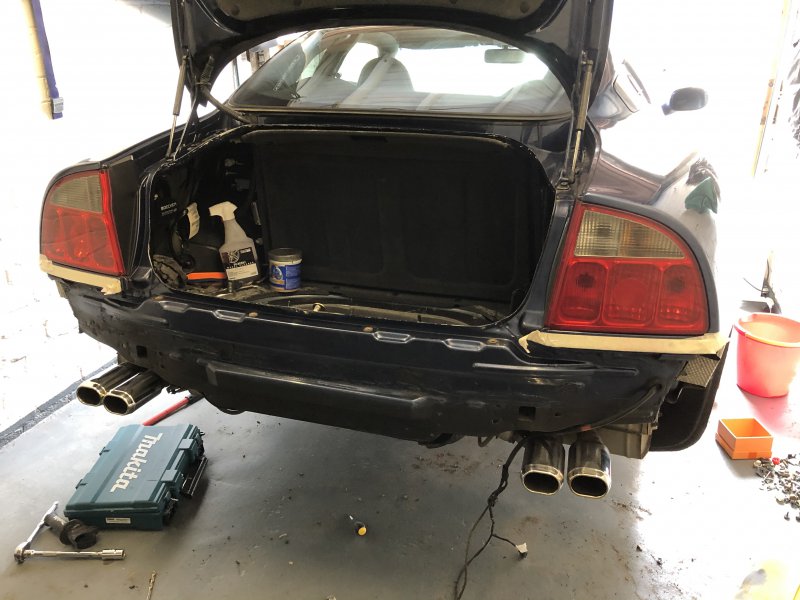
Rear Bumper:
Est time: 2-3hrs
1. Jack up the rear of the car and remove the wheels
2. Undo the lower screw from the arch liners where it meets the lower edge of the rear bumper
3. Remove the boot weather seal, boot floor and side panels
2. Remove the battery
3. Remove the amp behind the battery (if you have one)
3. Remove the bumper under tray
4. Undo the 2 17mm bolts from the underside of the car
5. Undo the screws that go along the top centre edge of the bumper where it meets the boot opening
6. Undo the 3 screws on each side from inside the boot where the bumper fixes to the rear wings
7. Mask up the rear wings where the bumper meets them on the side with thick bodyshop tape (you will thank me later)
8. Remove the bumper rewards from the car taking note to remove any electrical connections to reverse sensors if applicable.
Pics to follow...