Headlight Refurb

lambertius

Banned
Messages
341
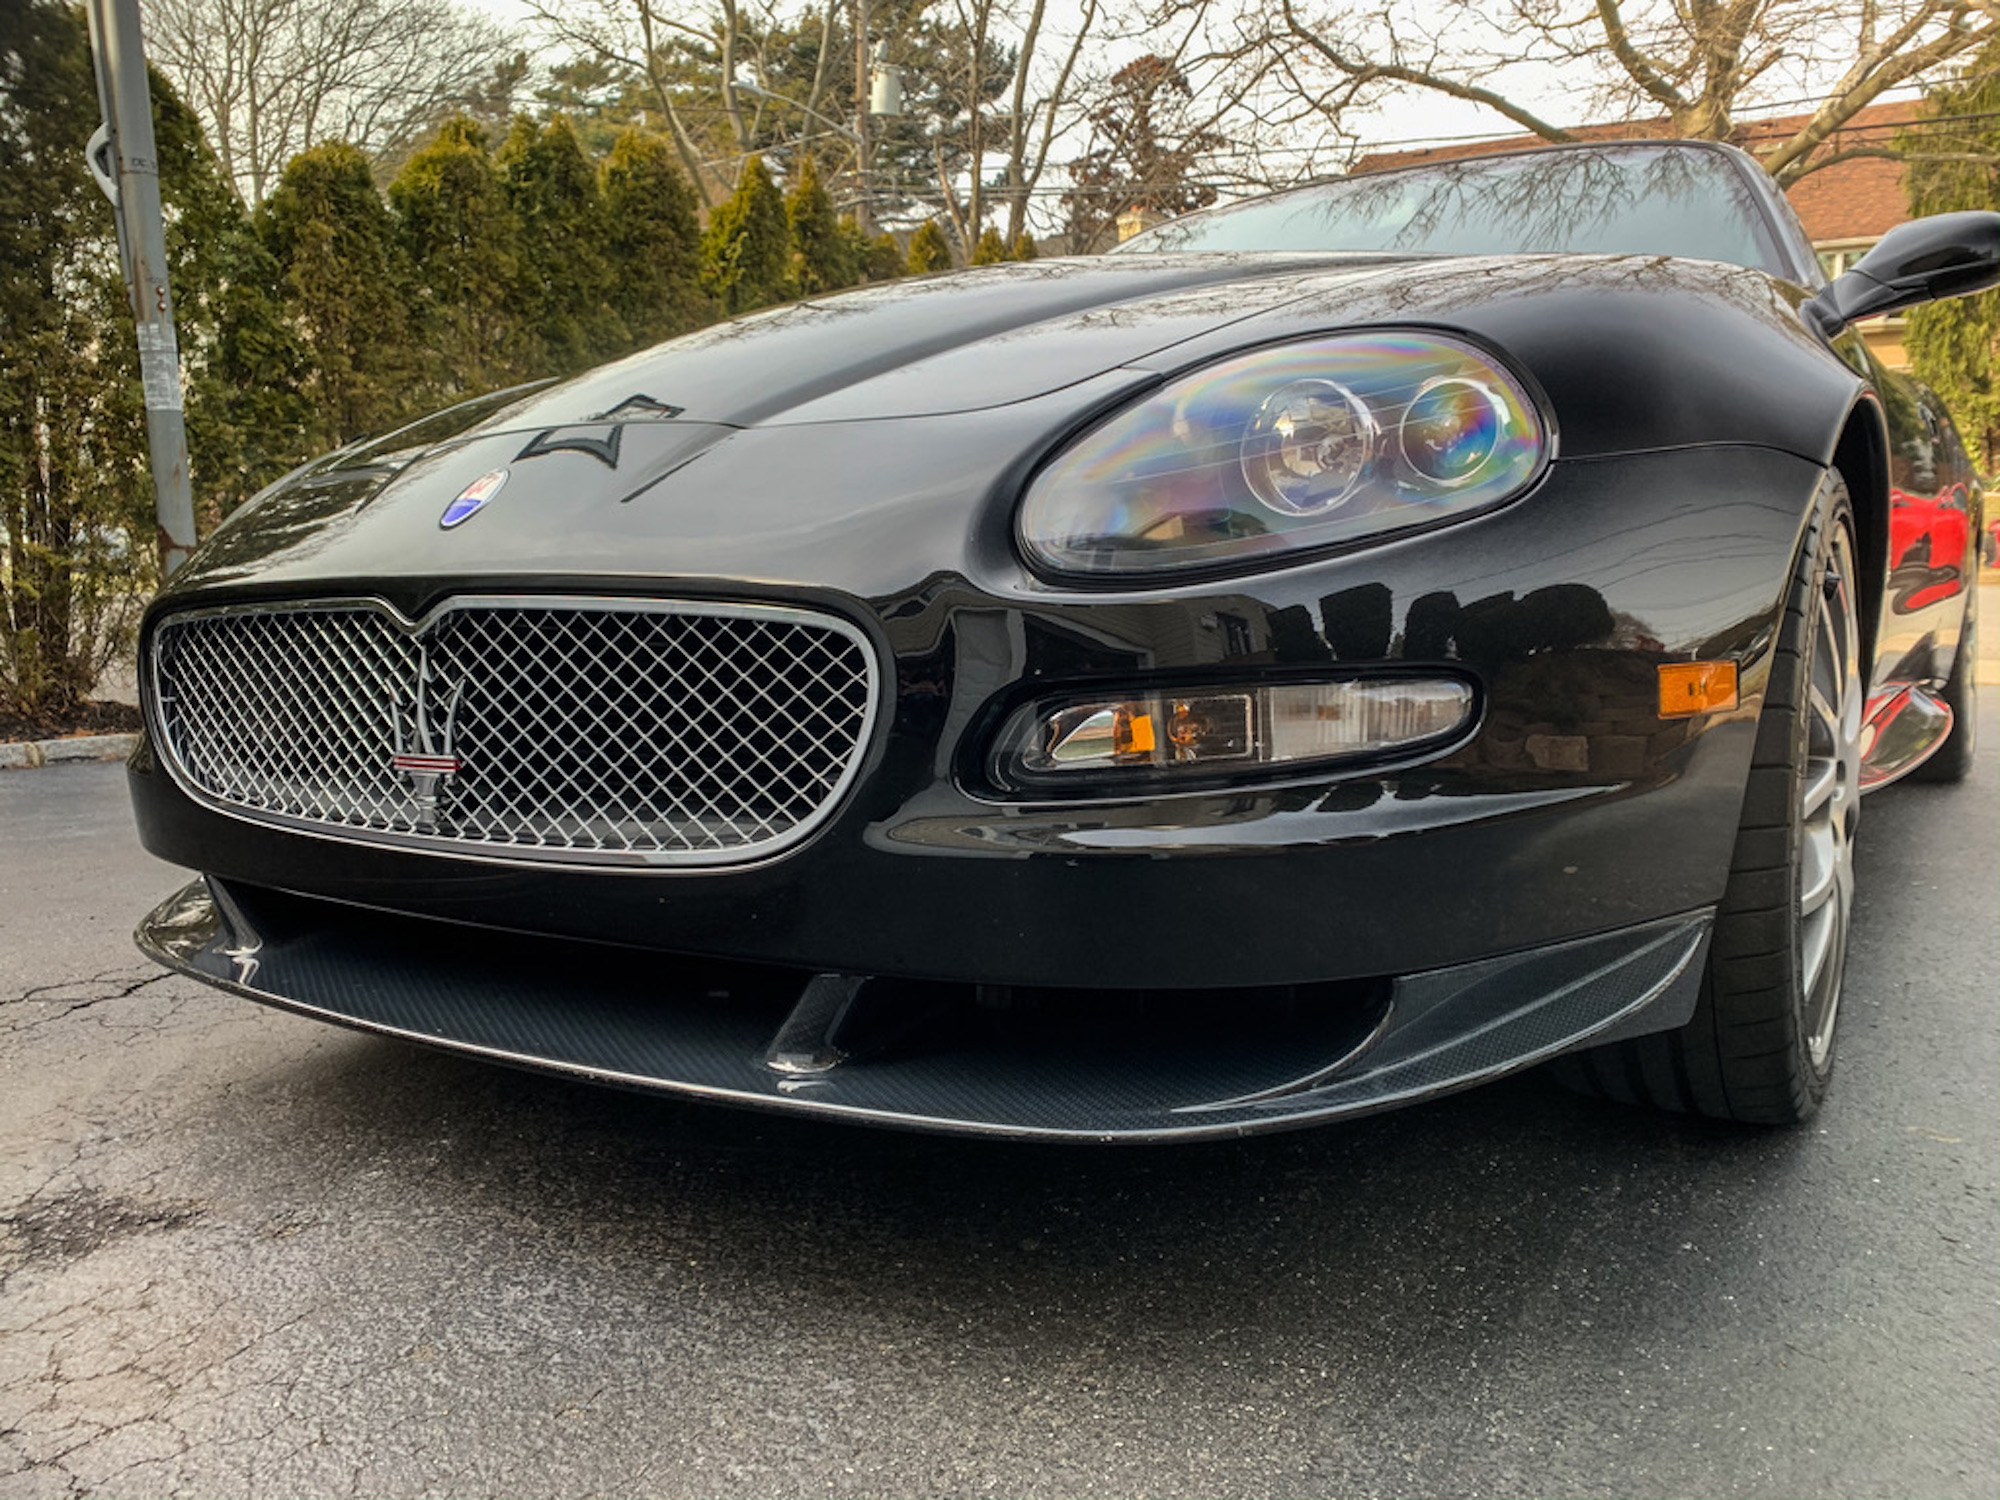
So one of the mysteries of my car is that it had the wrong headlights. There has never been any indication as to why, the car is currently in the body shop and is completely dismantled and there is absolutely no evidence that it has been in an accident. So far my best guess is that they were replaced for compliance reasons. If the original headlights were badly degraded they would've needed to be done, but I've got no records of it so who knows.

In the interests of getting it right, I wanted to get the inserts done as well as restore the lenses. I followed the below guide to open the lenses but with a few notable points:

1 - You cannot open these headlights in the oven. The sealant is silicone based and not a type of butyl rubber. This means the only way to open the headlights is to physically remove the sealant.
2 - The first one took me over an hour, the second one took 15 minutes. It is a lot easier than meets the eye but takes a bit of patience and practice. If someone wants to refurbish their headlights, I'd be happy to separate them for you so I can film the process so long as you cover the postage.

https://www.maseratilife.com/threads/headlight-polishing-inside-and-out.16291/

70406
70407

I'll post my results once it is all done. I'm not 100% sure what I'll do with the inserts. I'm thinking of going body colour, but I've also found some carbon fibre inserts. I like the idea of the CF inserts to match with the CF rear lip but I'm never really a fan of buying from an unknown retailer online. I thought about hydro dipping, but the original paint is super flaky so I would need to clean it all off to be sure.

70408

What do you think brains trust?
 

safrane

Member
Messages
16,828
I understood there were some 'specials' ordered by the Auz importer that had different coloured headlight bezels to match the 90th Anniversary models. Could yours be one of those?
 

safrane

Member
Messages
16,828
Pps there is a great write up on this process on Maserati life, including how to clean the projector lenses.
 

lambertius

Banned
Messages
341
I understood there were some 'specials' ordered by the Auz importer that had different coloured headlight bezels to match the 90th Anniversary models. Could yours be one of those?

Nope, mine is a Gransport, wrong year and was an EU import.

I'm easily swayed by peer pressure. So I may get them hydro dipped if I can find someone with a good reputation and price in Perth.
 

lambertius

Banned
Messages
341
So I decided to wrap my headlight lenses in gladwrap until they're installed. Mother of God, what a job! The first photo doesn't do it justice because I had already made a first attempt at sanding and polishing when I was considering selling the car. With the lenses off I decided to really commit to it, but the sunburn was just so extreme. I ended up needing to go down to 100 grit paper on the driver's side (it must've spent a lot of time facing North for whatever reason) and I reckon I must've taken off close to 1mm of plastic by hand to get out all the cracks and yellowing. Because I needed such a harsh paper to start with, I spent two days working up from 100 to 8000 grit, and it took hours to remove the the sanding marks below 1500 grit. The passenger side wasn't as bad, I was able to start with 1200 grit, but still took a few hours to really get it clear. This is absolutely one of the least enjoyable jobs I've done on a car as it kind of mixes the worst thing about cleaning and polishing into one ordeal. Its like cleaning glass, so you need to be really pedantic about fingerprints and streaks, especially on the inside of the lens, and because it is plastic you need to be careful about what kind of towel you use to clean off the polish residue as it will mar the plastic. I ended up needing to use a polish solvent and an ultra plush microfibre towel and nitrile gloves to get the lenses clean without marring them in the process. I've put less effort getting ready to work in a clean room! They're as close to new as any piece of old plastic will ever be. I've coated them with ceramic coating as well, inside and out, while the opportunity is available and I'll put an anti-fog coating inside the lens before assembly.

I did enquire about a place that used to sell CF inserts for the headlights, but they're NLA, and I haven't been able to find someone in the Perth Area who has responded for hydrodipping so they'll go in as body colour. I thought about sending them off to be cloned in China, but the seat backs were only received today after being shipped ~ 3 months ago and I really don't want to go that long without headlights...

70668
 

BL330

Member
Messages
1,121
Huge effort. I'm leaving the polishing up to my paint guy.
I had him polish and replace one lens after the great Kangaroo incident of 2019.
He swore he would not do another one, but I promised to remove the lens for him. Huge job in itself. Had to cut off the channel.
The mismatch of clarity was doing my OCD in.
Should get the car back next week.
 

lambertius

Banned
Messages
341
Oof, yeah it isn't a fun job. The plastic seems like some kind of acrylic rather than a polycarbonate and just degrades woefully. I'll be putting a Clear Protection Film over the top of mine at the end.

As for splitting the headlights - it is definitely possible to do it without needing to cut into anything but it takes a bit of practice or someone showing you. It took me an hour to split the first headlight, less than 15 minutes for the second one once I worked out how to do it. I used a hooked Awl to get into the gap between the housing and the lens, then split the top of the housing about 1/3 of the total way around. That was enough of a gap to get my hands in and split the rest of it without needing to cut the silicone. This made it a lot easier to separate and to clean out the silicone as it came out mostly as a single piece.

If someone has a headlight hanging around (even damaged) I'll film the process to help others in the future.
 

Twinspark

Member
Messages
460
A guide would be great, the lens on my black car have got to that hideous p*ss colour/malaria eyed yellow.
 

lambertius

Banned
Messages
341
A guide would be great, the lens on my black car have got to that hideous p*ss colour/malaria eyed yellow.

The sanding/polishing part is pretty straight forward, just time consuming. You don't need to split the lens to do that - just take the headlight out of the car. The way it is recessed into the bumper makes it impossible to do without scratching the paint.

The sanding process is basically start at the finest grade you need. Every grade harsher you go doubles the amount of time spent sanding, so if you can start on 1500 grit and remove the yellow, do it. Basically just sand in one direction on any given grit, so if you start with 1500 only go one way (say horizontal). When you go to 2000 sand perpendicular until you can no longer see any more horizontal scratches. With plastics always go to 3000 grit.

The headlight restoration kits aren't good for removing the sanding scratches. To do it properly you need a mini RO polisher. Once you hit 3000 grit (like I said I went to 8000) spend a long while using a cut polish on an RO until all the scratches are gone and it is just polish haze before moving onto a polishing compound.

Put up some photos.
 

lambertius

Banned
Messages
341
So there was a superglue repair on one of my headlights:

71099

I ended up repairing it properly with a plastic weld

71100

After repairing and cleaning everything I wrapped each individual piece until I'm ready to reassemble:

71101

I made an unfortunate discovery though - the chrome coating on the rings around the reflectors is different than the chrome on the reflectors and comes off when touched! I'm looking for somewhere to recoat them now, a bit of a pain but once that is done I can finally get them back together!

71102
 

lambertius

Banned
Messages
341
Went to drop off some parts - the current state of my car!

71144

All the interior screws are M5 Phillips heads - they're all stripped. I'm replacing them all with button hex heads so that nonsense doesn't happen any more!

71145
 

lambertius

Banned
Messages
341
I Also found this photo from when I just purchased the car before I had a go at the headlights at all..,

71146
71147

Here are the lenses after finishing with them.
71148
 

Twinspark

Member
Messages
460
That's interesting, are you getting the car resprayed? I've also noticed that your headlights don't look body colored with the car when they're on, but they're black when the lens are off.

7115071151
Here are photographs of my headlights, all hazy and yellowed out. :(

UNADJUSTEDNONRAW_thumb_47b4.jpg

Ideally, I'd love it to be as clear as this.

By the way, is your car Nero Carbonio? That's what most black GranSports are but mine is actually Nero Pastello, I'm planning to do a respray as its had a horrible paintjob sometime in its past and its getting the dreaded rear light rust spots (yes, even in the hot desert).
 

lambertius

Banned
Messages
341
That's interesting, are you getting the car resprayed? I've also noticed that your headlights don't look body colored with the car when they're on, but they're black when the lens are off.

Here are photographs of my headlights, all hazy and yellowed out. :(

Ideally, I'd love it to be as clear as this.

By the way, is your car Nero Carbonio? That's what most black GranSports are but mine is actually Nero Pastello, I'm planning to do a respray as its had a horrible paintjob sometime in its past and its getting the dreaded rear light rust spots (yes, even in the hot desert).

The car is getting a fair bit done, but not 'technically' a full respray. Some of it is under insurance as the car was reversed into shortly after I got it and some of it is due to the Australian sun. The hood was cracked awfully with crows feet, and the driver's side was pretty woeful, door mirrors and such. I'm assuming the previous owner must've parked it in a way that it was north facing as the driver's side headlight was pretty awful as well. Because of the insurance claim and the body shape, almost all of the car will be redone so I squeezed in some jobs that weren't covered by insurance so the colour matches all around. Now you ask, I just assumed my car was Nero Carbonio and haven't checked. The paint is metallic if that helps differentiate. I had a chat with the paint guy while I was there, and the crows feet is caused by spraying water based paint over 2-pak. The factory paint appears to be 2-pak but the colour code for the car calls for water based paint. He ended up using some Ferrari paint code which was a bang on match. My headlights were the wrong colour, they had a silver insert - the reason I dismantled them was to get the insert sprayed the correct colour.

As for getting the yellow out - doing it properly is a major pain. Project Farm did a video on restoration kits recently
. The short version is that it is pretty much impossible to get it right without a mechanical polisher. Also, absolutely take the headlights out of the car! If you want to get the headlights redone I could refurb them for you, I've got all the equipment to do it right - but you'd need to send the headlights to Australia.

I came up with a solution for my chrome rings - I couldn't be bothered getting the plastic chromed so I went with a paint...

71160

I used VHT anodised paint, its a super thin paint that carries over the texture of the undercoat. Each coat you add darkens the result, I went very dark. Depending on the lighting it looks black but under direct light it will look blood red. I figured it would match with the red calipers and the red/black interior.

71161

This was what it looked like after the first coat

71162

This is an example of the paint on an engine cover:

71165
Completely unrelated, I also put on some new rotors on my BMW today
71163
71164

And I also played around with my MX-5 a little - finished detailing it all a few days ago, and it is super hydrophobic now

71166