Ghibli II winter works

HaydnW

Junior Member
Messages
63
Nice work Spacecadet. Are you going to replace the flywheel central bearing too? I'd say it's worth doing while you're in there, though when I replaced mine it was a little tricky to remove. I ended up mocking up a tool using a steering wheel puller which gradually dragged it out.
 

Wally

Member
Messages
244
There’s a simple trick for that: Put some oldfashioned screen kit in the centre hole. Hammer it in with an old tool That has a tight fit. Gradually add more kit, hammer etc. In the end the bearing Will be pushed out.
 

spacecadet

Member
Messages
378
Yes, I'll replace the bearing as well, it's not running super smoothly. Neither the release bearing, but I think none of these were the problem but the input shaft bearing of the gearbox. There is a big play on the shaft. Fortunately I have the other overhauled gearbox ready.

I've also read about the stuff with bread method, like grease, paper, etc.
 

philw696

Member
Messages
25,016
Agreed Voicey but I tried the bread to see if it would work and it does and we used the apprentice's lunch.
 

spacecadet

Member
Messages
378
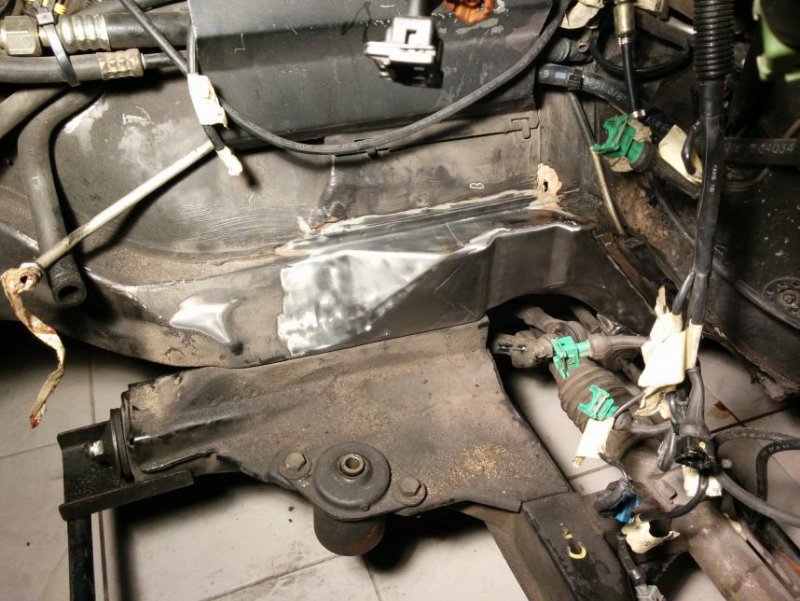
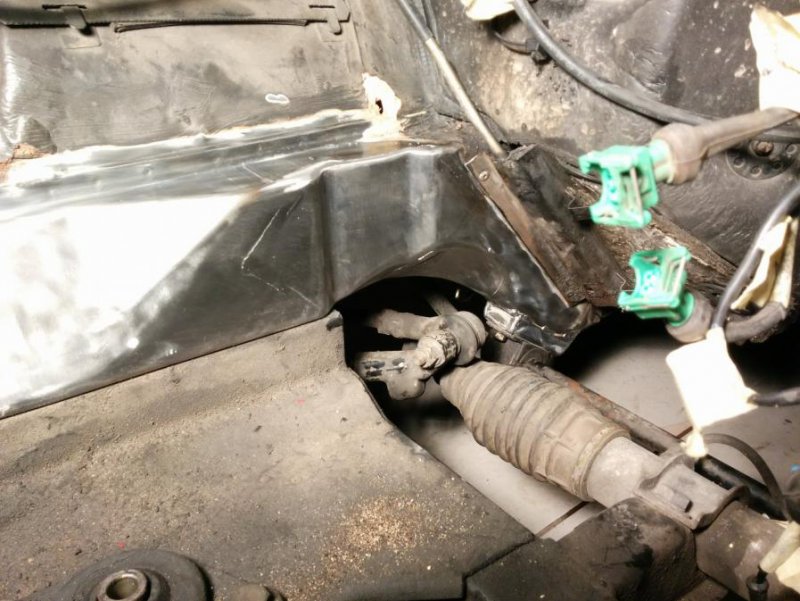
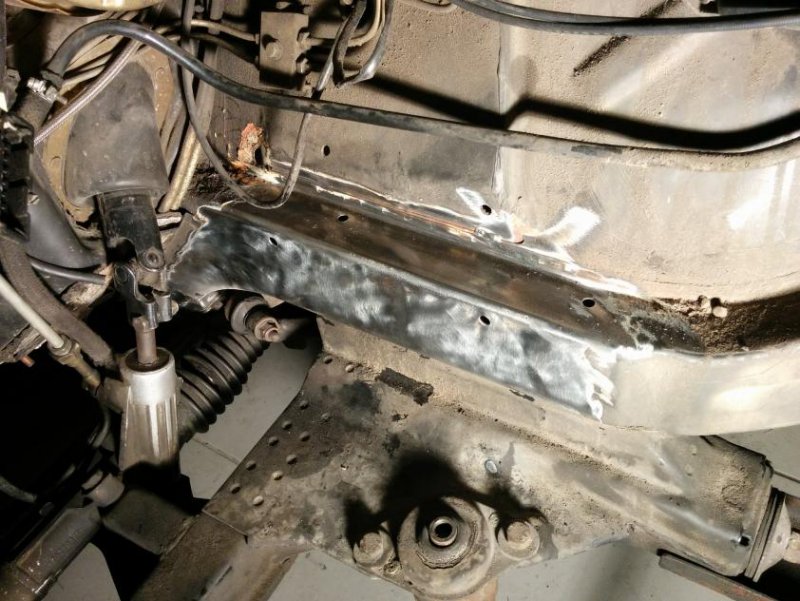
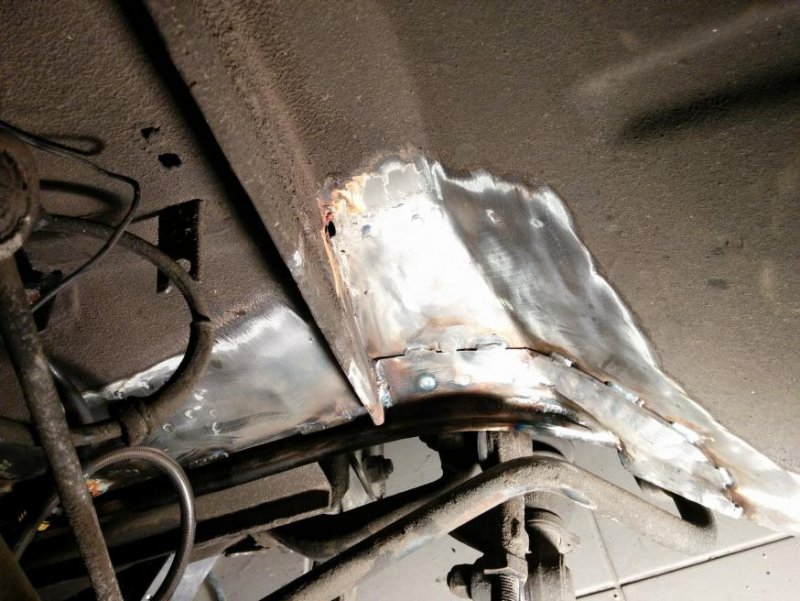
Cracks have been repaired. Turned out that on the L.H. side outside in the wheel well the lip was cracked the same way as on the R.H. side. The cut in R.H. rail and the quality of the weld done in the factory was a joke. Besides these front rails are like rubber, made from thin sheet metal without necessary strengthening. No wonder they crack. They can mainly move in the vertical direction. Strengthening them partially is not possible because the forces will cause cracks further down. The only possible solution is rebuilding them from thicker sheets all they way until they join the main structure.

What I don't understand, they didn't learn from the earlier Biturbos?

I'll clean up the engine bay now before refinishing. Still unsure whether to ask for a partial repaint or do the whole engine bay. If the partial can be done in a proper way, without visible boundaries I'll probably go that way.

IMG_20180201_081639.jpg

IMG_20180201_081653.jpg

IMG_20180201_082453.jpg

IMG_20180201_083201.jpg
 

spacecadet

Member
Messages
378
Me? No way I would go anywhere close to the car with my non existent welding skills :)

Fortunately I found someone with decades of experience in chassis preparation for race cars, and he did it between two bigger jobs.
 

spacecadet

Member
Messages
378
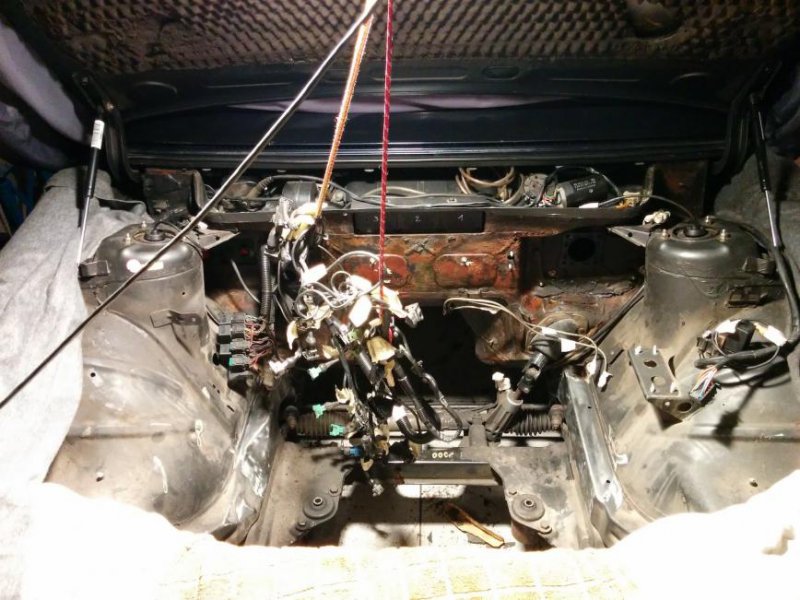
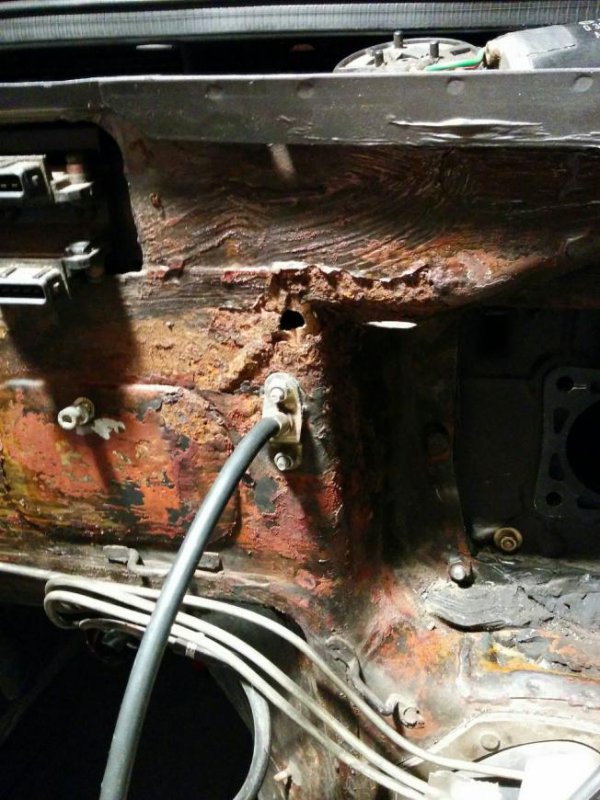
Stripped the engine bay, to make space for a proper respray. Initially only removed the lower part of the firewall insulation because it was in the way, but then saw some rust around the accelerator cable, so removed the whole. Unfortunately it's a proper rot behind, but at least it will be also addressed now.

IMG_20180211_135132 copy.jpg

IMG_20180210_185622 copy.jpg

After a few hours of scrubbing

IMG_20180211_162910 copy.jpg
 

chad5k1

New Member
Messages
167
yes, doesn't look good. Think this is turning into a bit of a common spot on these cars too
 

spacecadet

Member
Messages
378
And I think the root cause is the same as for the other common spot around the root of the A pillars. Bad water drainage and ****** seam sealing, either too liberal, sometimes nothing, or too much. Below the brake booster is was such a big mess, couldn't even remove it first because it was glued on from all the sealant.
 

spacecadet

Member
Messages
378
Flywheel resurfaced, also the new clutch set was measured and it can hold 550Nm torque. I was told that the disk also looks to be good quality, so if the whole set fits without issues this will be a solution for the unavailable clutch parts problem.

IMG_20180215_111916.jpg
 

spacecadet

Member
Messages
378
Small update:

Not too much happened in the last month, I was mostly waiting for the body shop and also didn't really have time to work on the engine because of illness, family, etc.

The rusty parts are finally removed, and the refinishing will also be done in the next few days.

01.jpg

02.jpg

03.jpg
 

spacecadet

Member
Messages
378
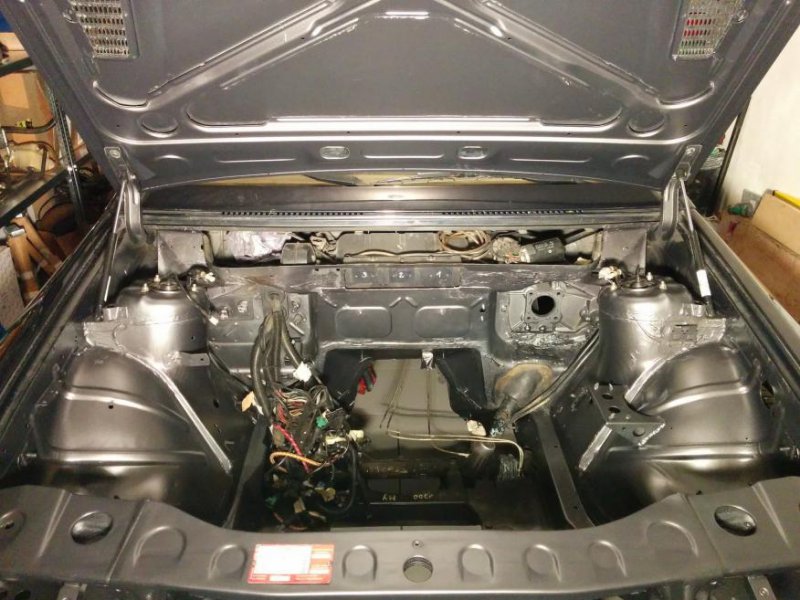
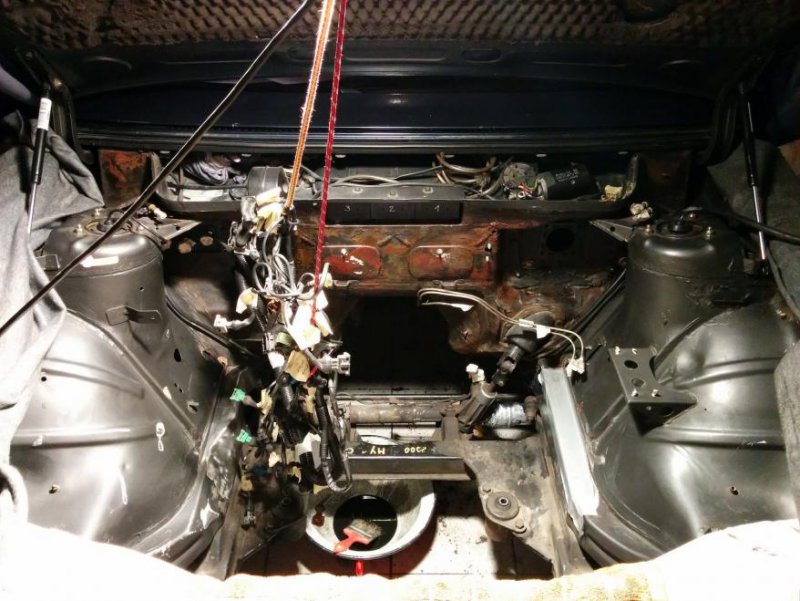
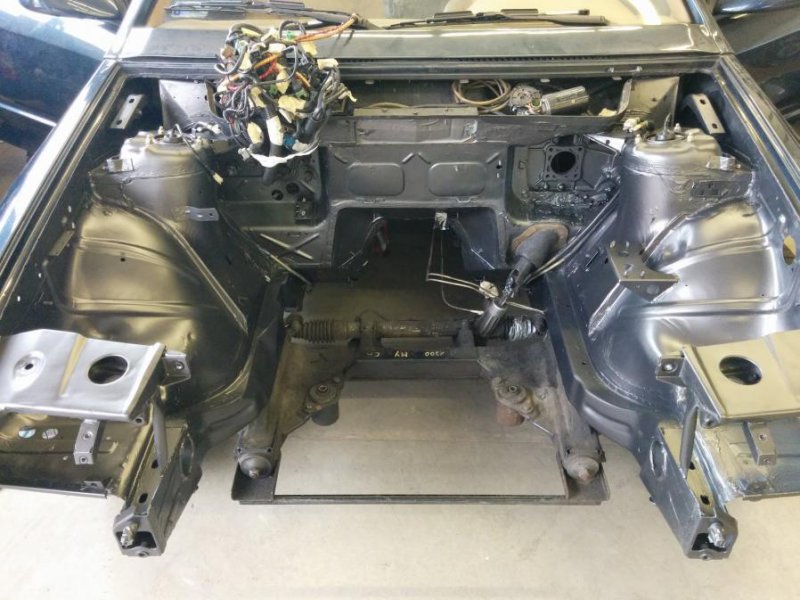
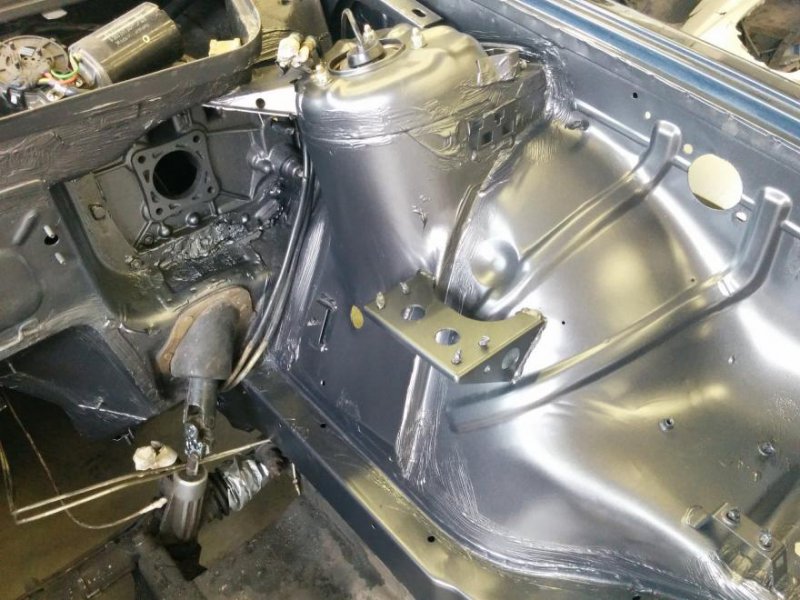
Refinishing is finally done and it's now back at home.

I was trying to find out the factory colour code, Maserati Classiche didn't have any data, but Carrozzeria Campna told it's Maserati Mat Grey no.502, but then neither PPG nor Maserati couldn't find anything with this name, so we had to find something as close as possible.

Seam sealant was also applied in the same brushed style.

There are some blemishes here and there because not everything was cleaned perfectly, but most of those places won't be visible because they are behind the insulation, or similar.

Talking about firewall insulation, I'm still undecided whether I should get the same tailored made part (it's said it's still available from the factory), or use something aftermarket, with better heat insulation properties which the original lacks, and it's also not really waterproof. My only concern is that most of these are aluminium sheets on the outer layer and not black like the original.

While there the hood insulation was also removed, it was falling apart on every touch, and underneath was also repainted. I'll glue on a new one later.
IMG_20180319_090749.jpg

IMG_20180319_090810.jpg

IMG_20180319_182515.jpg