JT's 2001 Maserati 3200GT Rebuild! Story, Parts and Advice

JTop

Junior Member
Messages
47
Hey mate, regarding parts, have you taken a look at this site : https://www.eurospares.co.uk/Maserati/3200/3200_GT_GTA_Assetto_Corsa/PartDiagrams

Shows you the diagrams of everything and you can buy the parts directly from the diagrams. I have no gone through them before so I can't tell you whether they're good but might still be a worthy resource
They are good, but like many not all items are in stock.
Safrane answered it perfectly.
Only have some engine parts, the rest are off one they wrecked, otherwise they try to source from the Archive. Cheaper to go to another middleman in Italy than them.
Oh and you won't get a 60£ knock sensor without 120£ of shipping from Eurospares :)
Should attach that quote here, it's a beautiful piece of C U in the NT iness
 

JTop

Junior Member
Messages
47
My hatt off to you!

I thought my rebuild was an adventure!

https://www.sportsmaserati.com/index.php?threads/saving-a-3200-from-the-scrap-heap.34772/page-4

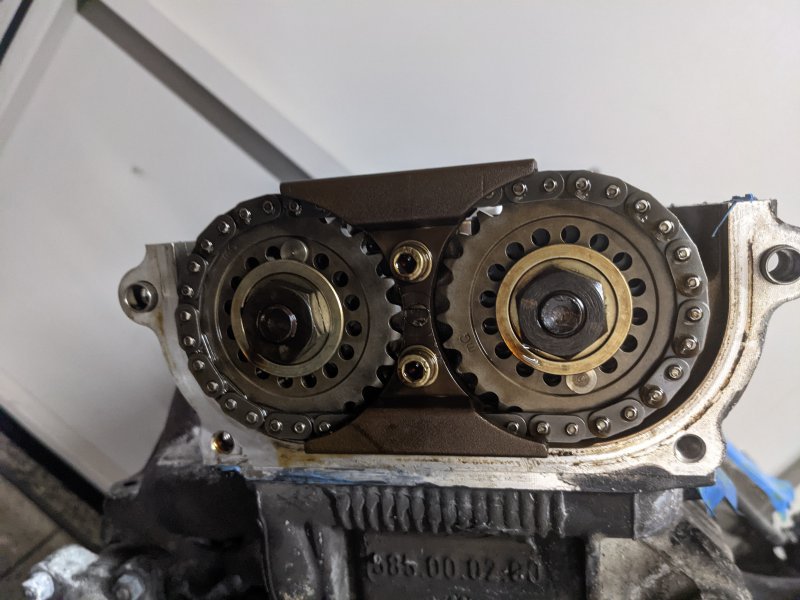
I wonder how you are going to align the intake and exhaust camshafts in reference to each other and cylinders 1 and 8 at TDC?

I'm well further in than I ever imagined :| haha
Props to you too, reviving one for yourself :)
Don't call me a copycat in a few months by the way, I coincidently picked the same silver scheme for the manifolds and exhaust housing :oops:

Something I am yet to get to!
Comes down to the shims, how worn out the cams and chains are and if there are any existing references(on the cam sprocket)
I would optimally love to get new chains, I should start hunting for alternatives.
Whilst the heads are off, it would be best to set your TDC with 1 and 8, and then get the heads on! Being mindful of those two that are at TDC when installing the cams.
That way you have a reference for those two points, and set it from there. The only issue is once you turn the crank, then you would be hunting the special 3 dial gauge setup.

I will have an old school mechanic help me with assembling the motor, as the time comes.
I'm hoping to get it together before the end of the year. Will see how that goes..
 

Spitfire980

Member
Messages
116
I'm well further in than I ever imagined :| haha
Props to you too, reviving one for yourself :)
Don't call me a copycat in a few months by the way, I coincidently picked the same silver scheme for the manifolds and exhaust housing :oops:

Something I am yet to get to!
Comes down to the shims, how worn out the cams and chains are and if there are any existing references(on the cam sprocket)
I would optimally love to get new chains, I should start hunting for alternatives.
Whilst the heads are off, it would be best to set your TDC with 1 and 8, and then get the heads on! Being mindful of those two that are at TDC when installing the cams.
That way you have a reference for those two points, and set it from there. The only issue is once you turn the crank, then you would be hunting the special 3 dial gauge setup.

I will have an old school mechanic help me with assembling the motor, as the time comes.
I'm hoping to get it together before the end of the year. Will see how that goes..

Well now you know how beautiful it will look once you ceramic coat them!

In my case, the chains/cam/sprocket are clean however I'm having a tough time figuring out how to reference intake and exhaust in relation to TDC

From reading the manual, its clear that both 1 and 8 need to be at TDC, the mistake I did was thinking it was only #1 at TDC and that's were I marked it on the crankshaft

I was hoping somebody would have a better/cheaper alternative than the special Masi 3 dial gauge setup for the intake/exhaust valves

In the mean time, I managed to get TDC tool that works on our AM585 engines for cheap

https://www.ebay.com/itm/193255474655
 

JTop

Junior Member
Messages
47
9865998660
Not sure if either of these might help, since this is the LHS bank Cyl 5-8
Cyl 8: Intake-closed
Exhaust-closed (TDC, so must be)

Cyl 7: Intake-open/starting to open
Exhaust-closed

Cyl 6: Intake-closed
Exhaust-starting to open

Cyl 5: Intake-starting to open
Exhaust-closed

If the pattern is 1-8-4-5-7-3-6-2
You can simply graph at which point in time each lobe will press against the shim to open the valve. Given each cam is fixed, and the crank is rotating a set direction, you can simply conclude the timing on each head(as they should be just just just, off of being the identical).
Break it down, step by step and it'll come easy.
The entire system for injection and ignition is based on the crankshaft and camshaft position sensors. If you have the Engine Fuel Supply pdf document, it goes into full detail as to how and when these trigger at what rotation-angle, and from my understanding; it takes two full crank rotations (720degrees) to fire all 8 cylinders. The gap on the crankshaft balancer is 12degrees, and acts as a reset point for each rotation, which each position is broken down into 6degrees(parts of 58, given 360-12 = 348/58 = 6deg, pardon my poor arithmetical layout). Since the document states the injection and ignition times of each trigger point, you can figure out your intake and exhaust cycles from here(using a gauge on the crank to figure out the rotation from TDC).

Hope this might give you some help!
 

JTop

Junior Member
Messages
47
Alright quick one
Been knocked out all week with the flu, but prior to being disabled, I had a quick visit to the engine shop!
Crank has been internally cleaned; glad I asked for that to be done since the scoring on the bearings was a clear indicator that the galleries weren't in great condition. Perfect for oil starvation.
Fresh caps have been replaced the "Ferrari" way with aluminium plugs. I'll have some photos in a few weeks. I'd have proper plugs if my shipment would arrive after 3 months of waiting for my order... If it works, don't complain!
98963
^Image of the oil gallery
The remainder of the block looks like it's back in its immaculate original condition, the heads are next to go under the knife.
The only bad news from the trip was that confirmation of the two oil rings being broken. Unfortunate as it goes.

All the pistons and liners have been cleaned up, just have to be coated and replenished. Lots of work left and I'm waiting for the bill $$$$$

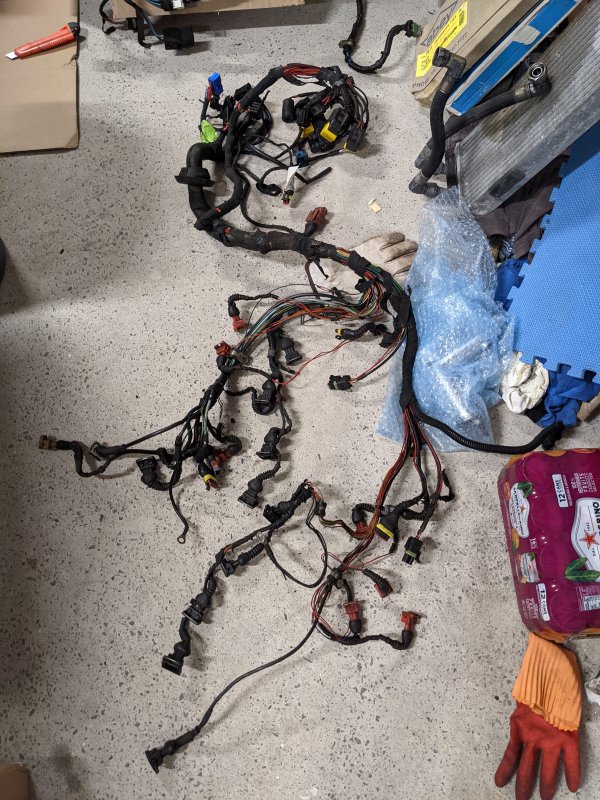
This week, finally have received the proper engine wiring harness! Needs a bit of work, but it's in a complete condition. Will test continuity given I have the full pinout mapped from my burnt cable but don't know if it'll be operational until turning over the key.
I've also received the auxiliary engine bay harness, which is chopped in random spots(and has dirt in some connectors indicating accident car/poor storage conditions). Given mine is burnt on the crossover section at the firewall, I can transplant/rebuild my one, and if that fails, transfer the connectors onto this new one(given it has all the correct features!!)
98962

Just sat down this arvo and started attempting to 3D scan the A-pillar vent and cleaned up another couple of plastic pieces that are in the engine bay.
Might sort the replication of these parts this week.

I need to focus on getting this all complete.
 

RichardJohn

New Member
Messages
3
So the Trunk is done; and I got the battery on spot on; took a bit of fiddling to get the positive terminal on correctly.
Anyway; Negative terminal was neglected and damaged so I fitted new heatshrink on
View attachment 93841View attachment 93842

Car also started paying itself off; as I got the Passenger seat out to inspect the running mechanisms for comparison and understanding of the system(mainly for the drivers side, so I can move it with some power)
View attachment 93843
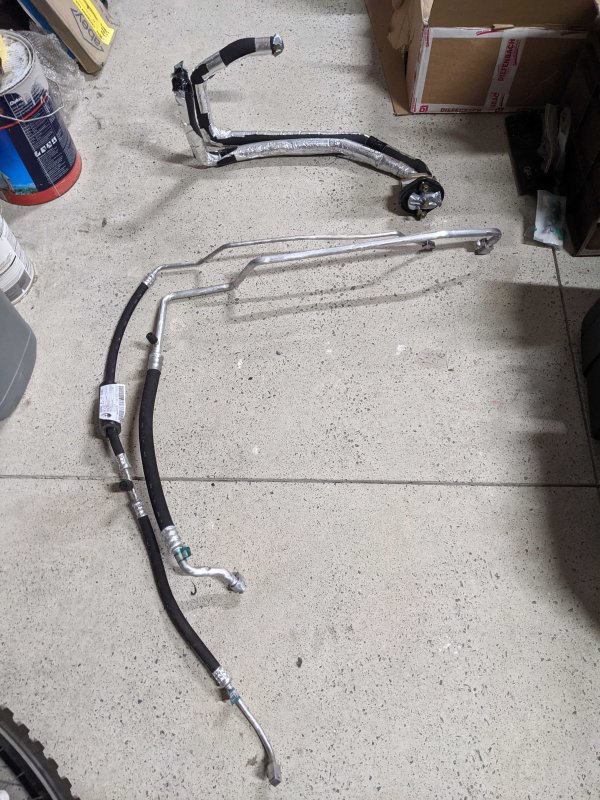
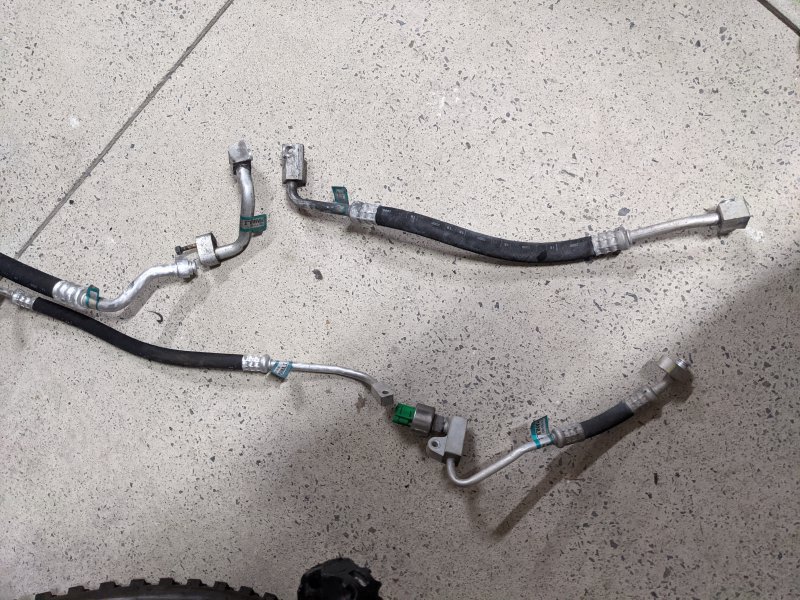
And really; I've been doing a lot of cleaning and polishing; so done both AC lines as they were white...
View attachment 93844
Top is not yet done and the lower section was cleaned up! I'll go hunt for new O-Rings to suit each end; make sure they seal when I reinstall the lines.
With this; I also installed the very first part I've bought! Honestly I thought ordered longer ones that sit along the rear firewall; ended up being a little piece to replace my squished and damaged one.
View attachment 93845View attachment 93846View attachment 93847

Did lots of cleaning; heaps to do and will update as I get through things. Might be best
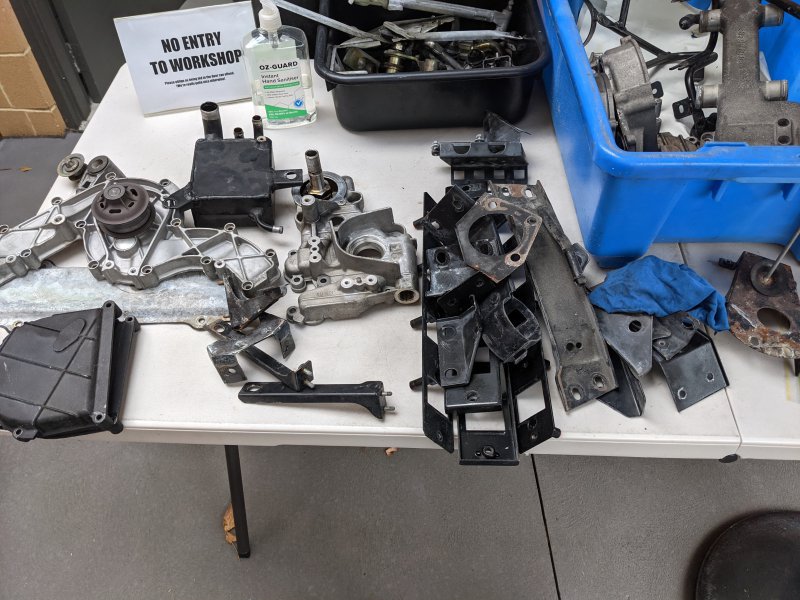
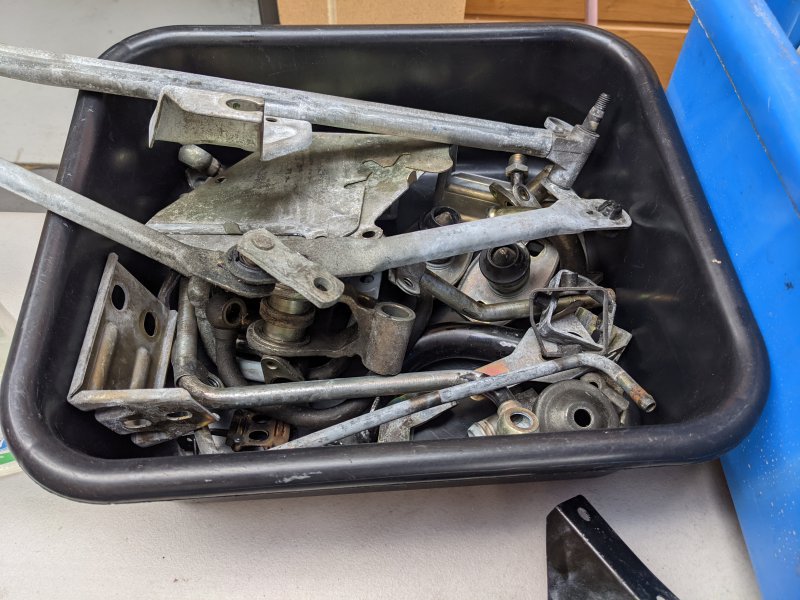
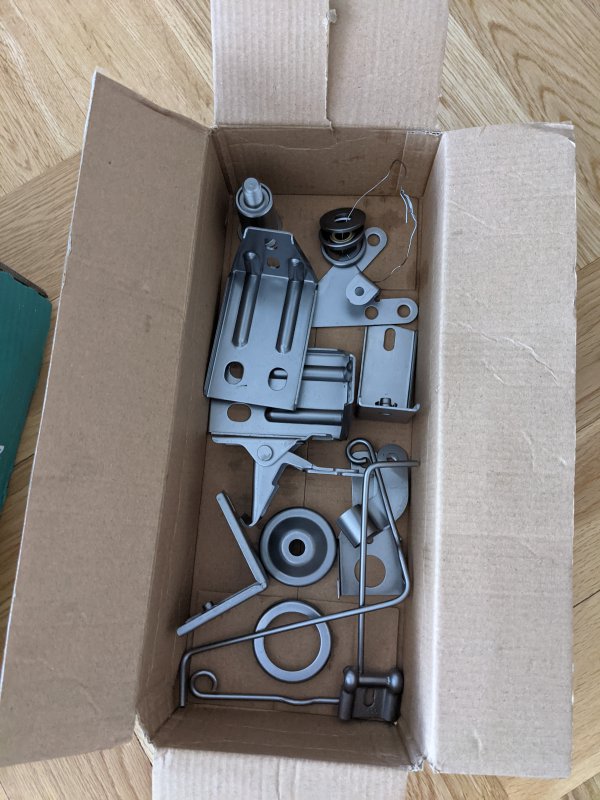
Oh and if anyone needs the order for their bonnet latch; here's a photo. I've cleaned up most of the parts; takes time to slowly brush them all up. The ones plated in zinc will be redone completely! Hydroblasted and recoated.
View attachment 93848

This week; aim is:
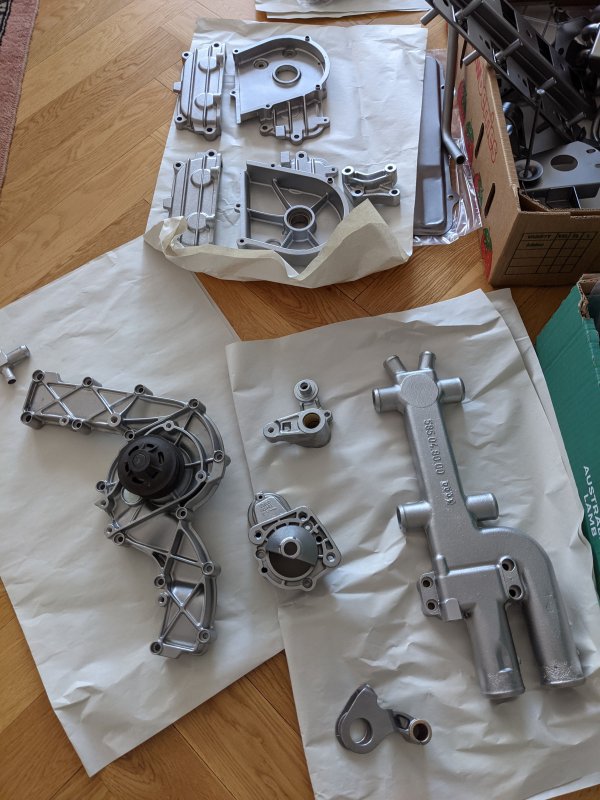
Powdercoating the intake manifold, cam covers and all those. Been sitting under a table for too long
Heads; removing all the valves and getting those hydroblasted and prepped; ready to be reassembled back on the block.
Seat out, cleaning interior before assembling the rear section together again
Radio, sorting out the connections and fixing the mess made by a "professional shop" (most probably lol)
Order the 633186A timing bearings from one of the 20 Alibaba shops... that have replied over the past month(I just zoned out)
That's all I'll do; will update again next weekend! Cheers all
Enjoy your morning/evenings :)
Hi, this is a great read many thanks. Do you have pictures of both AC lines by any chance ?
 

RSM Masser

Member
Messages
2,437
Absolute mammoth and no doubt costly task
Hats off to you for attempting it!
Given time space and money I am pretty sure I would be doing something similar. There is something very satisfactory about a 20 year old motor looking like it’s box fresh out of the factory.
 

JTop

Junior Member
Messages
47
Hi, this is a great read many thanks. Do you have pictures of both AC lines by any chance ?
9913999140

That's the entire AC System, from end to end. Hope that's of some help
O-Rings? Click me!


Absolute mammoth and no doubt costly task
Hats off to you for attempting it!
Given time space and money I am pretty sure I would be doing something similar. There is something very satisfactory about a 20 year old motor looking like it’s box fresh out of the factory.
haha, thank you! I'm sitting here just waiting to get the engine pieces back so I can move the project along!

Need to order rubber connector boots as most have perished. Might go count some quantities right now!
 

JTop

Junior Member
Messages
47
I have certainly fallen off the planet this year. wow.. it's been half a year since I've caught a moment of time to sit down and reflect on this journey. I can't believe I started this all a mere year and some months ago; never did I expect this to expand into the precise depths of every single prolific element that makes. no. defines this.... creature? or should I say, obsession

I sit here with my sincere regret to not keep up with frequent updates; but there was a blank period where nothing did happen(other than work, conferences, travel and general life things) the impasse of just waiting for shops to complete their simple but somewhat complex tasks.(Still waiting on two... no joke)

Let's see what I remember:

May -> Not much happened, shipment arrived and I received a tonne of parts that I needed with regards to the motor(headgasket/s - fun story, gaskets of all sorts, seals, brake fluid reservoir and miscellaneous bits and pieces.) All which took a mere 5 months of discussions and motivation to get done
107391107392107393
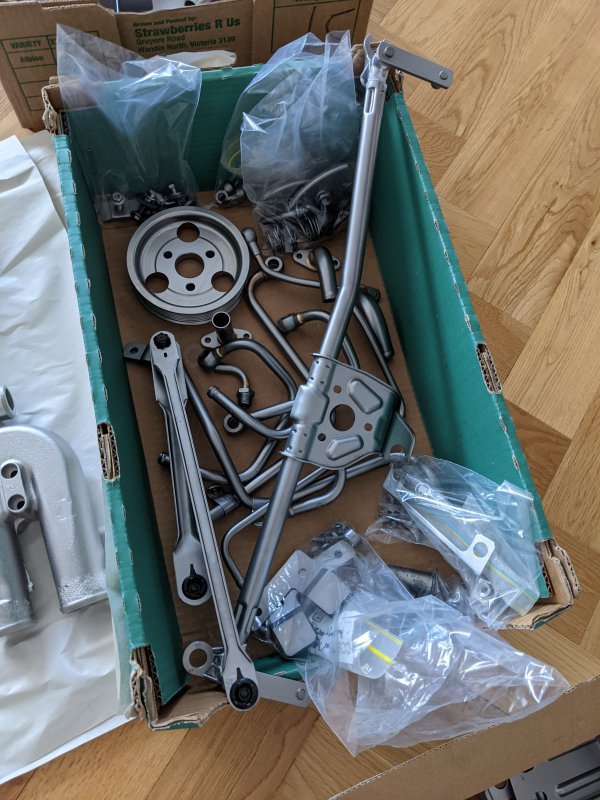
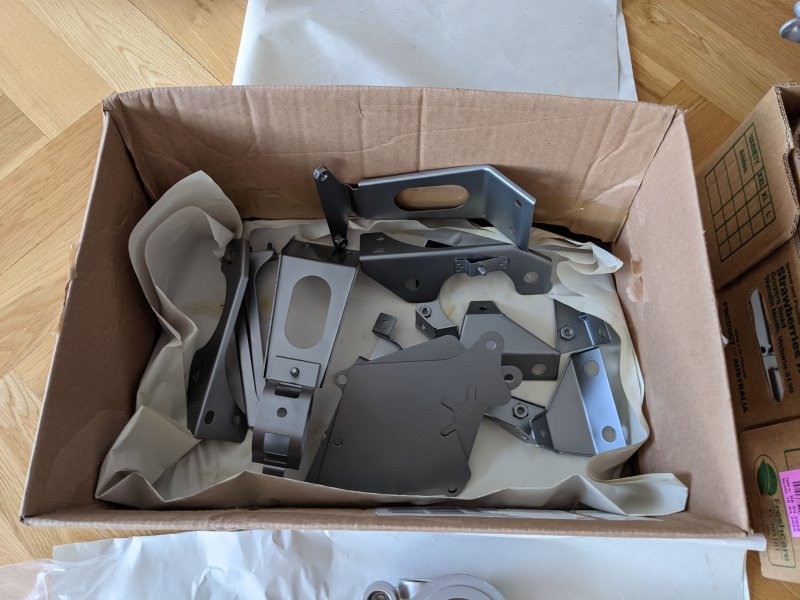
Before heading off to France-Croatia for the work conference, see family and have a holiday break. Quickly dropped almost everything to get hydroblasted ready for new silver-yellow zinc plating, or black powdercoating. I remember Greg mentioning that the black paint was incredibly difficult to remove even after multiple chemical baths, as it just became a tough sludge. Maserati and the Japanese used a special technique to coat these parts; which I now remembered about but forgotten the name. I will ask him again the next time I see him. Placeholder for Method

Paris France; heading to the Moulin Rouge for an evening out; and not even 100m before. I immediately noticed Boomerangs on a Black, beautifully maintained example and then internally "fan girl-ed" so hard for a brief moment before contemplating hood vent theft HAHAHA. First recent time I've seen one out in public, obviously more common here in Europe than in Australia!

Whilst traveling around, Frank at the engine shop sends me these two marvels. As well as the Teflon coating on the rear of thrust washers to bring them back into perfect specification; rather than to buy new. Should last a very long while!
107394107395

June(end of) - July ->
Two days after I arrived back both progress on the heads finally began!
107401107396107399
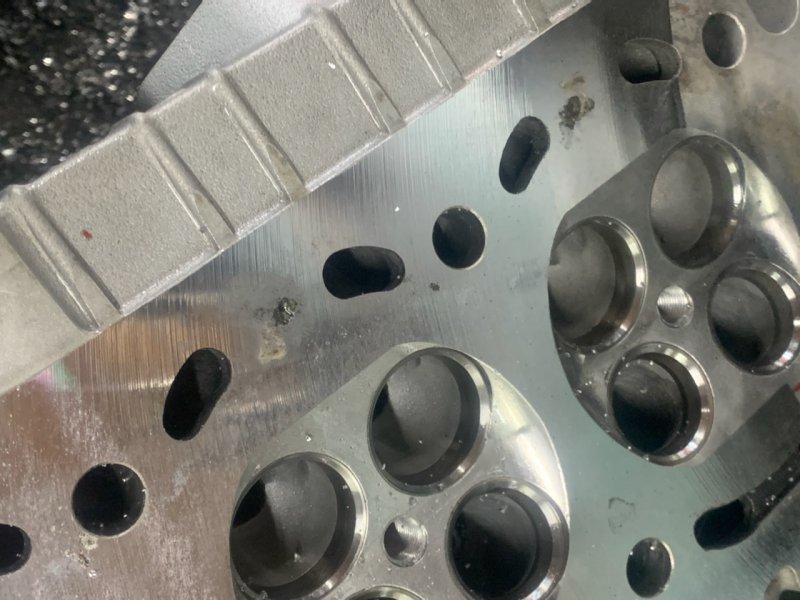
Perfection on one head(where the headgasket did not corrode) and the second; it became evident
107400
Here I prompted Frank to reweld the holes, albeit the corrosion wouldn't effect anything as they are covered by the gasket. The only potential is that they could allow for more coolant to infiltrate these air gaps; causing potentially premature gasket failure. Given the longevity of how long I personally wish to keep the car. No brainer

Photo Limit and Dinner TIME! Next post tomorrow, I have stockpiled a fanatic gallery of photos :p
Ciao Ciao
 

JTop

Junior Member
Messages
47
Keep it up what a fantastic effort from such a young lad
It only gets better from here :)
I think..

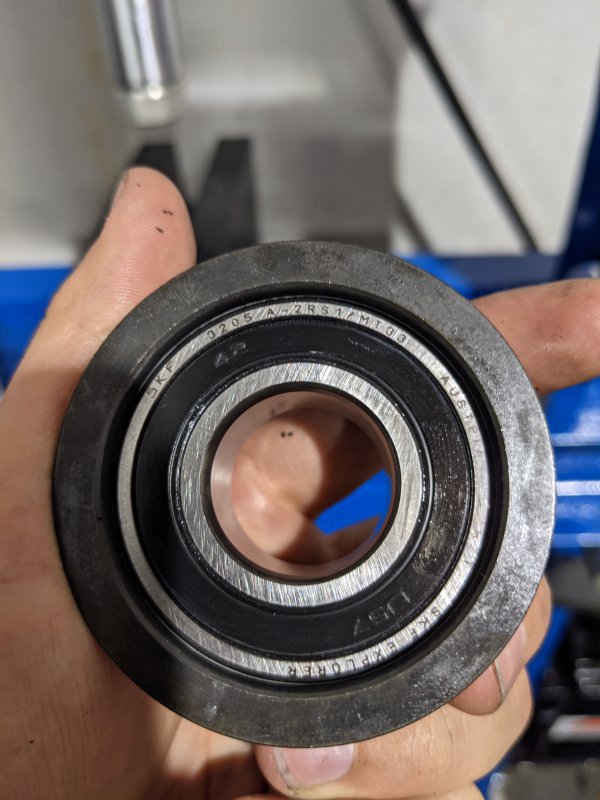
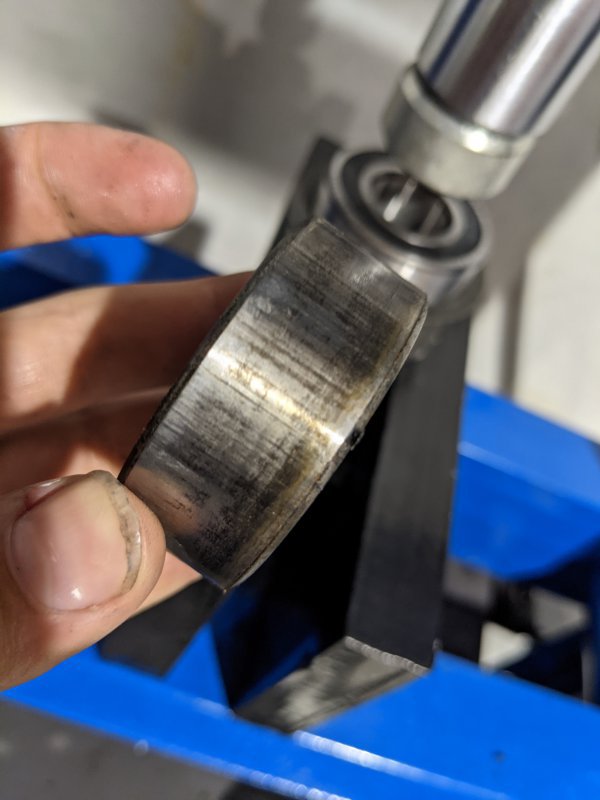
Wickedly enough, as soon as I arrived home I had access to a mate's brand new hydraulic press to swap the bearings out of their metal guide shells.
I attempted to do this prior to leaving for my trip, in a vice and that was to no avail. The press however, after a dozen pumps abruptly gave way and there I knew I had false hope of magically removing it with the vice or with any other piece of equipment haha
107417107418
These Explorer bearings were cheaper to attain from Europe than anywhere locally in Australia, and I spent more than enough time hunting for the original SKF 633186A part just for the over extreme Dynamic capacity(C) that these are rated for. Again my understanding only contributes to the theoretical rotational life of the bearing. So a larger number would benefit to live a longer lifespan. But nobody has them sooooooooooooo
Bit of lithium grease and new ones pressed in for both housings. Might as well :p

July ->
Spent the month repairing my VW and bought another(as a quick project) as I've left it neglected for a little bit too long... This month was conclusion month for the engine shop too
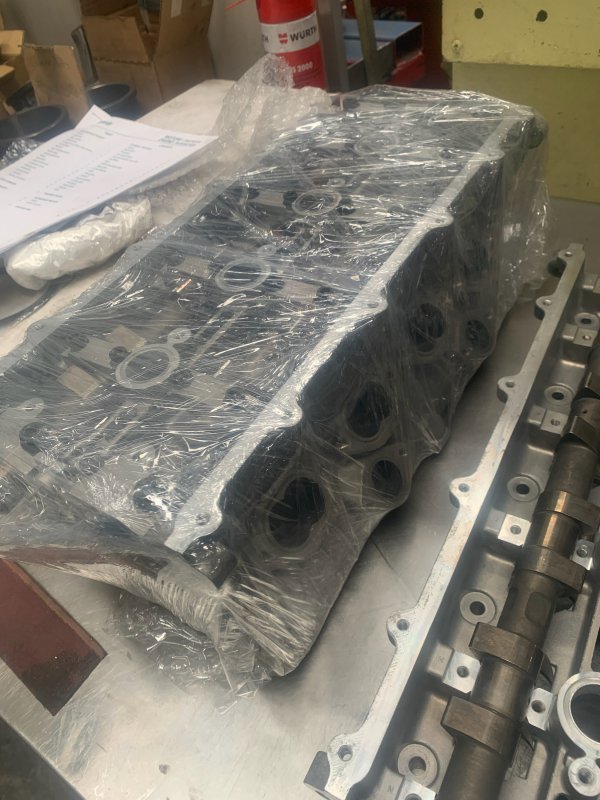
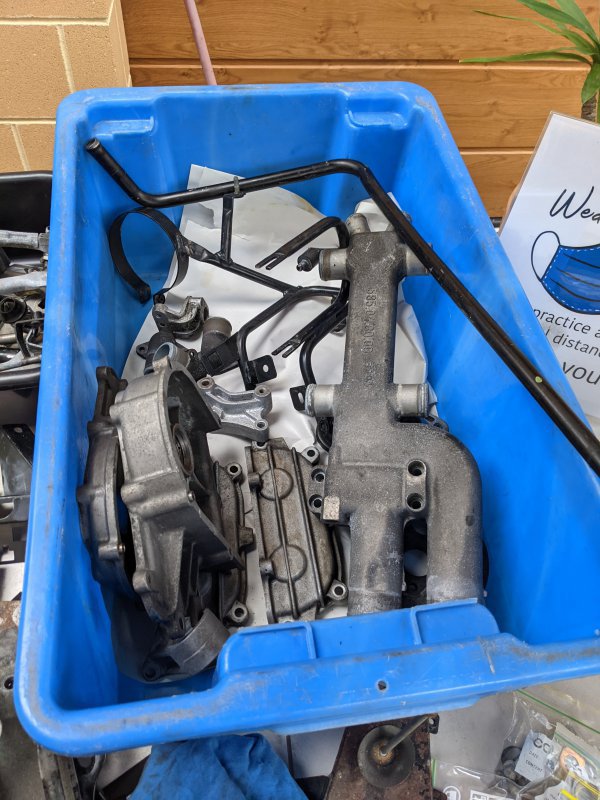
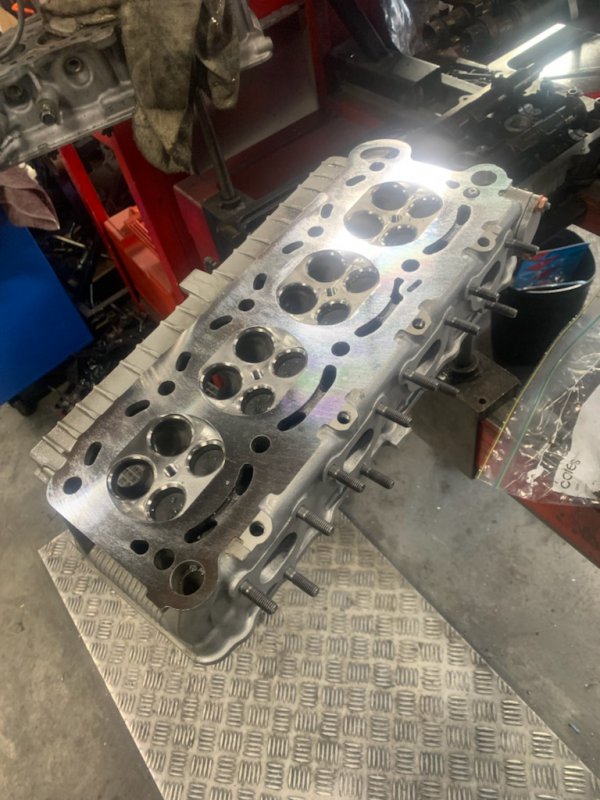
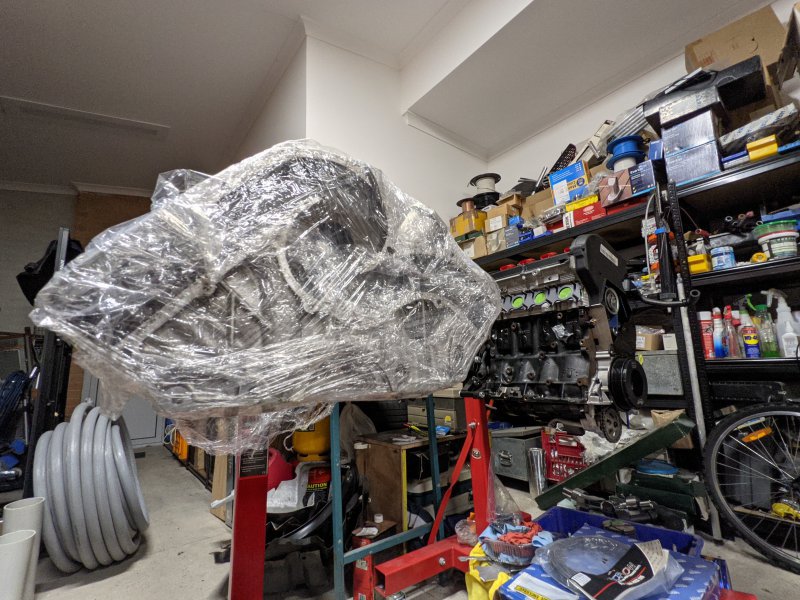
Frank had stuck into getting everything ready for me and it definitely has gotten there. Block was cleaned and back to its former glory. Here he also finished up with the heads and had everything package up for me ready to go!
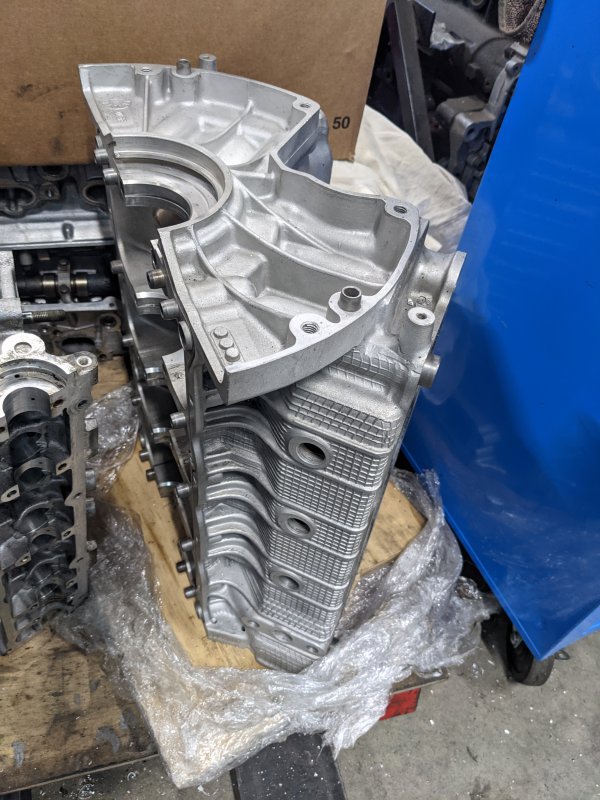
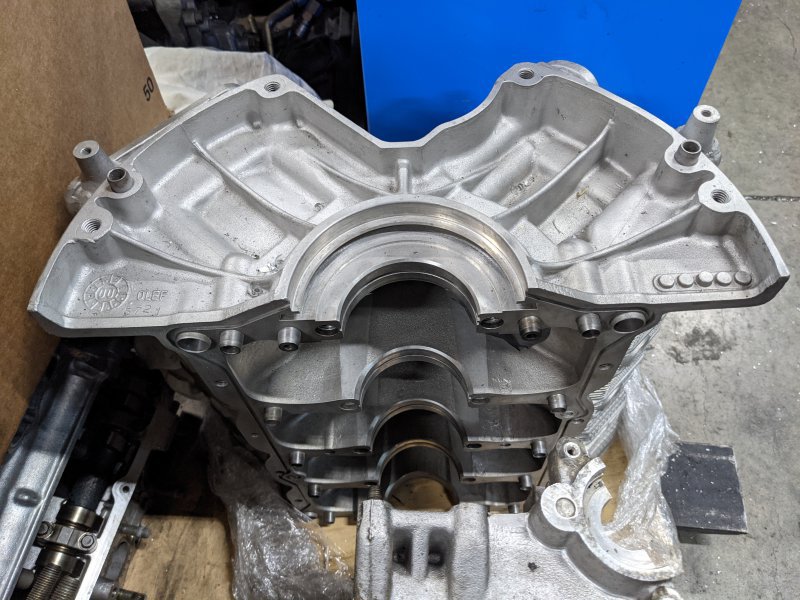
107419107420107427
Crank was hot tanked and journals were polished and all dimensioned checked for wear(as good as out of factory! Checked this myself too, prior to handing it(might not have been worth doing anything if it wasn't) over and after getting it back from the shop check the clearance for the brand new bearings.)
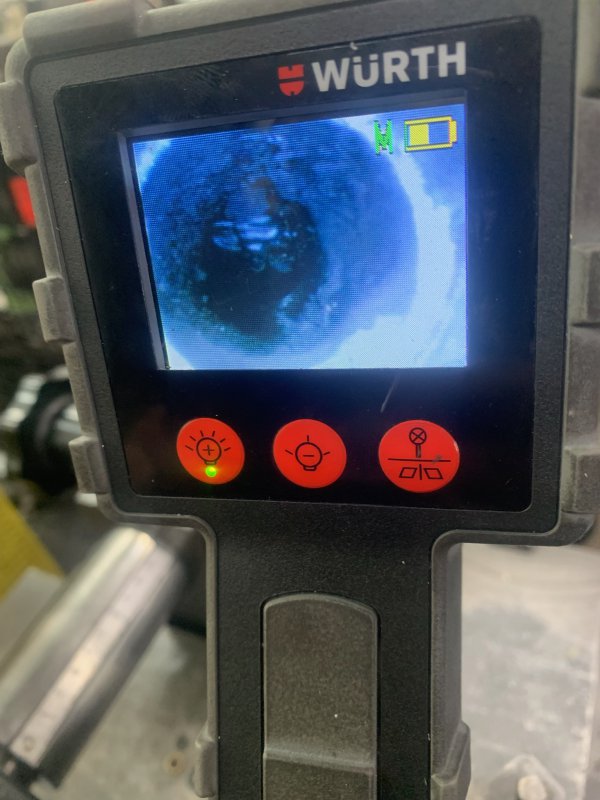
Oil galleries were drilled out, and all hardened carbon grit was cleaned up(I posted a photo earlier of the camera view of this gunk) and new plugs installed via the "Ferrari" method.
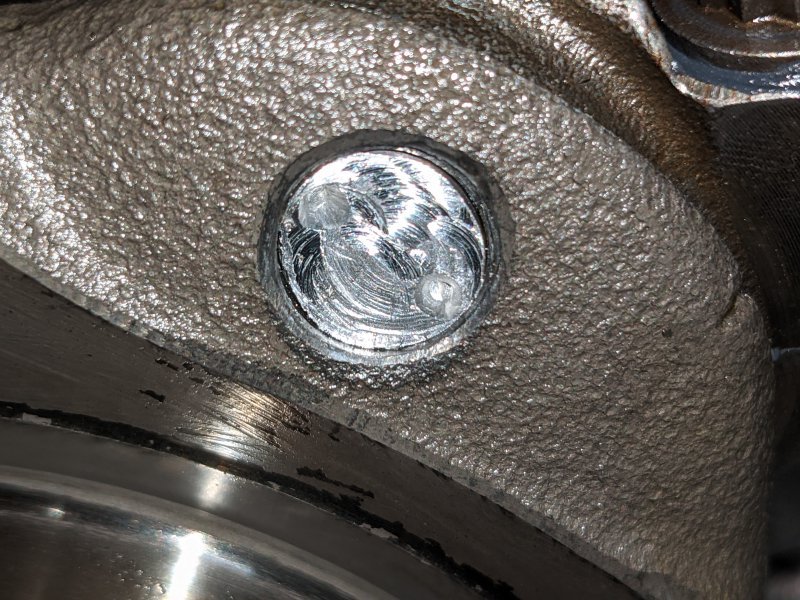
107428

Block was jet washed, degreased, cold tanked and bead blasted; unsure of Frank's specific order of these tasks
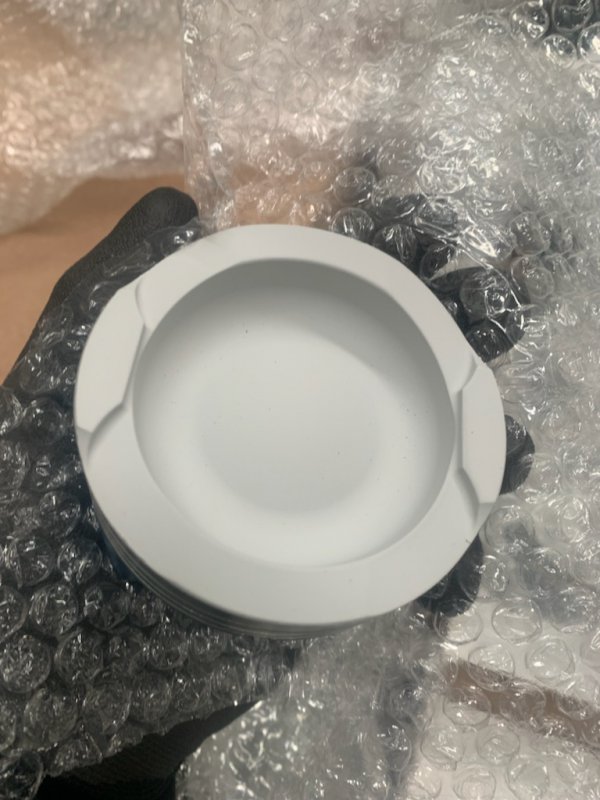
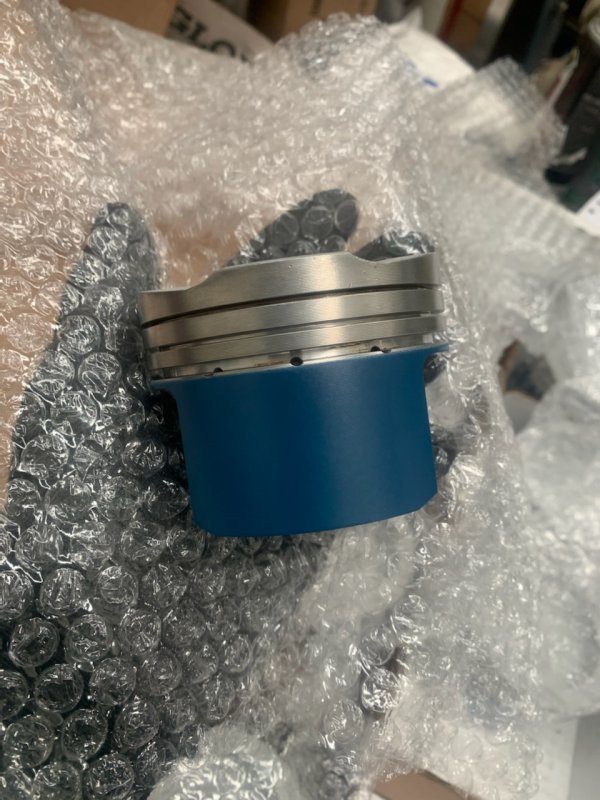
De-carboned all pistons and cleaning all ring landings - preparation for ceramic and teflon coatings.
Liners all prepped and set for power honing for new piston clearances
All pistons and rods then fully assembled, with a reset on piston rings (got brand new Nissan VQ25 rings that were a spot on match to the originals as some were already broken or snapped when trying to be removed)
Re-tapped all holes except head bolts, I ended up doing this.

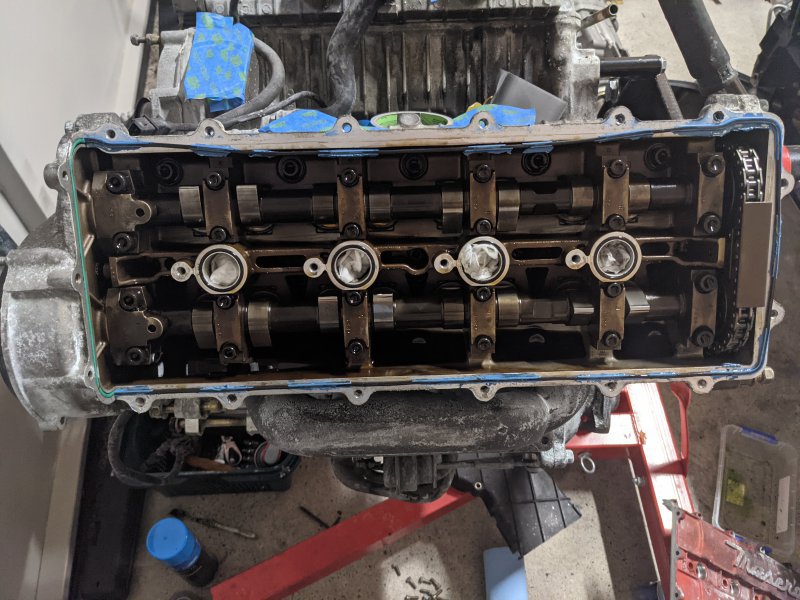
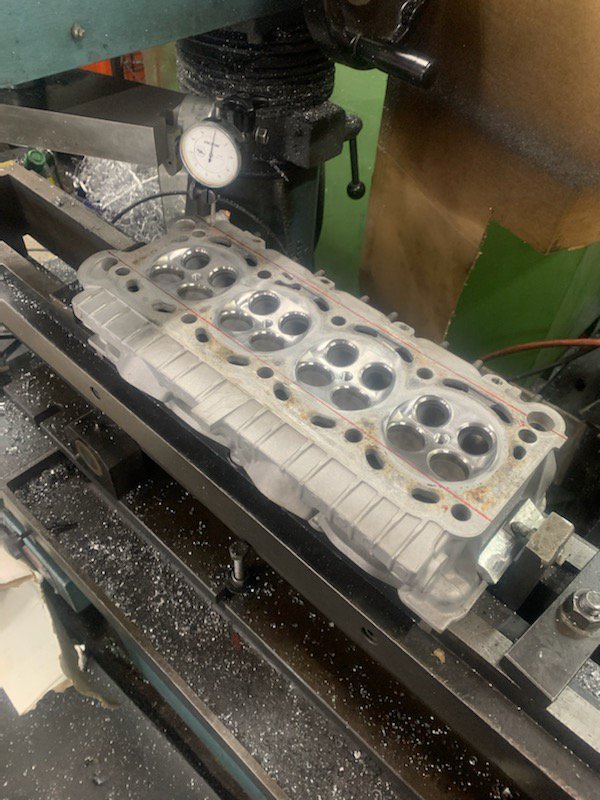
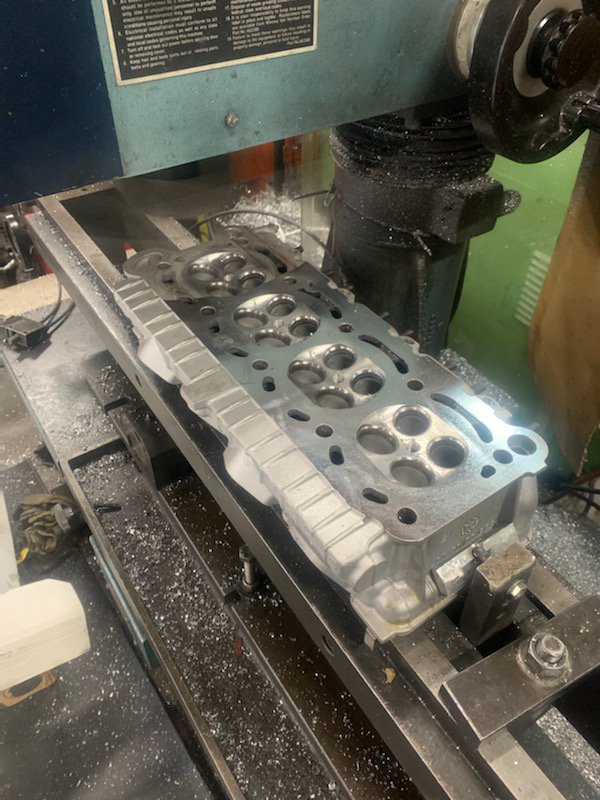
Heads were stripped, cleaned with intake and exhaust ports bead blasted. Then passed through the sergi jig, corrosion welded and passed through the jig again
Then cleaned, both valve seats and valves refaced. Power honed the valve guides, reset the valve stem protrusion.
New valve stem seals(I got through Maserati, but they are just Elring seals... nothing fancy) Spring rates checked.
Finally re-shimmed to match specifications and finally doing a vacuum check to be sure the valves are not leaking!

The only thing that Frank was afraid of bead blasting, was the cam box, and I agree with him. Any beads damaging the cam surface and it's trouble. I would need to seal these tight and let Greg blast the exterior (another job to be done another day!) Or to leave it as evidence to the history of it :|

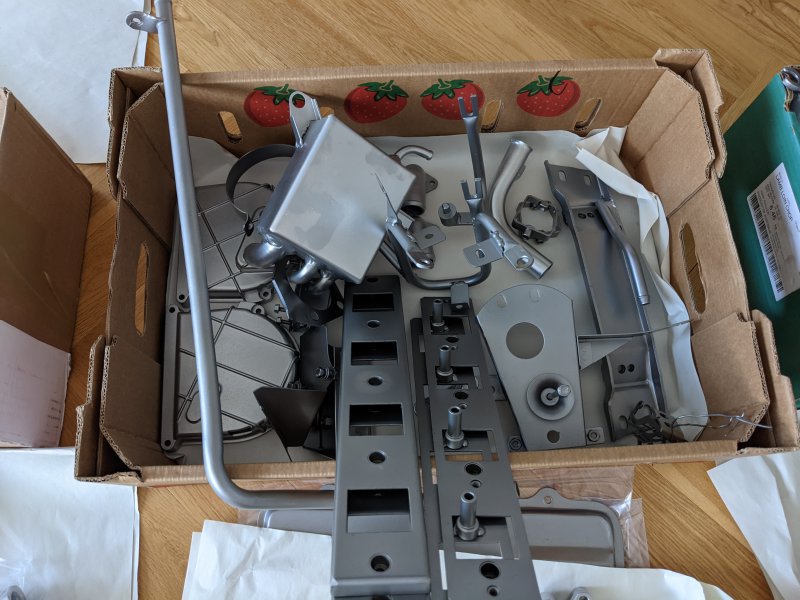
Next day; after a months worth of work! All the Hydroblasted bits were complete and ready for their next journey
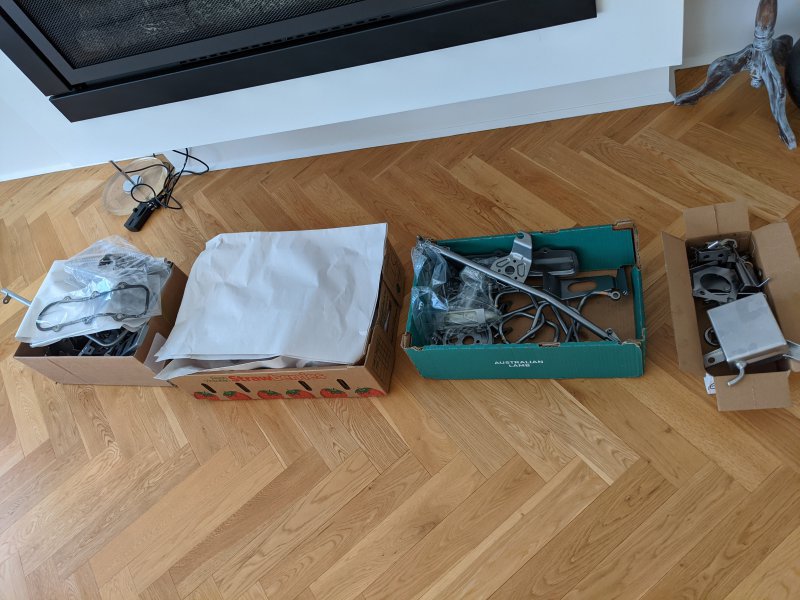
107421
Greg had some trouble with dismantling the brake master cylinder and mentioned if I can dismantle it, he'll gladly get it done. It was as simple as pushing the spring in and turning it upside down for the pin to fall out of the exchange ports. And back it went along with the throttle body(and few other smaller bits I forgot about). This. was a disgusting mess(which I still haven't finished, ugh) I'll explain this in the next post
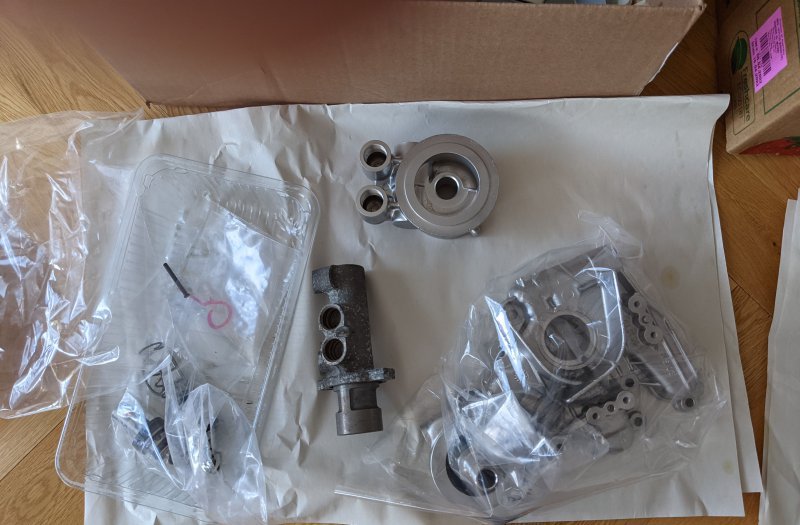
107422107423

Anyway; here are some one pretty pictures of perfect looking parts :)
107424

Photo Maximum; I'll continue seeing as I'm a tad bored today, lol
 

JTop

Junior Member
Messages
47
107438107439107440107441
I mean, this is the first layer of satisfaction haha

Now this.. This is the next one :) but I'll get to this in the next few days
107442

Actually, I am tired.... throttle body spiel tomorrow! But. When do I get the next page, bit packed here lol
 

philw696

Member
Messages
25,352
Great write up and pictures too.
Fantastic work being done and I'm certainly not bored of seeing it.
Keep the posts coming love it :)
 

Wally

Member
Messages
244
Swaybar links, I think there is a polish firm that offers them on Ebay, will try to find it If you still need them (So much to read here…)
 
Last edited:

JTop

Junior Member
Messages
47
Great write up and pictures too.
Fantastic work being done and I'm certainly not bored of seeing it.
Keep the posts coming love it :)
my professor said my ideas and writing style is atrocious and difficult because it's all over the place.
I totally agree with him when I have no passion for his written topic HAHA. so cheers, albeit I know I can devise this better :p
Believe Practice makes perfect, and I'm out of it all :)

Swaybar links, I think there is a polish firm that offers them on Ebay, will try to find it If you still need them (So much to read here…)
uh, cheers for the pointer. I do read a lot so have been on TenCAR's website, but yet to have something I ought to purchase from them.
Superformance.uk has been my original go to for OEM parts. Eric at Maserati Spares has also been a delight with some items too.
Daniele at PassioneBiturbo also been some expensive help. AutoVivo is a certain middleman for items from the Archives
Lots of things that are hush hush in this community; for the ones who know most benefit from it all. Only once you've been through it all, do you figure the shortcuts and the least pocket burning methods of doing such simple things.

OK OK, little late today because I went glove hunting for my dad. He's after some Pureboxer BMW gloves, that are sold out globally and back in stock next year. His hope was purely that dealerships might have some in Europe... Oh well

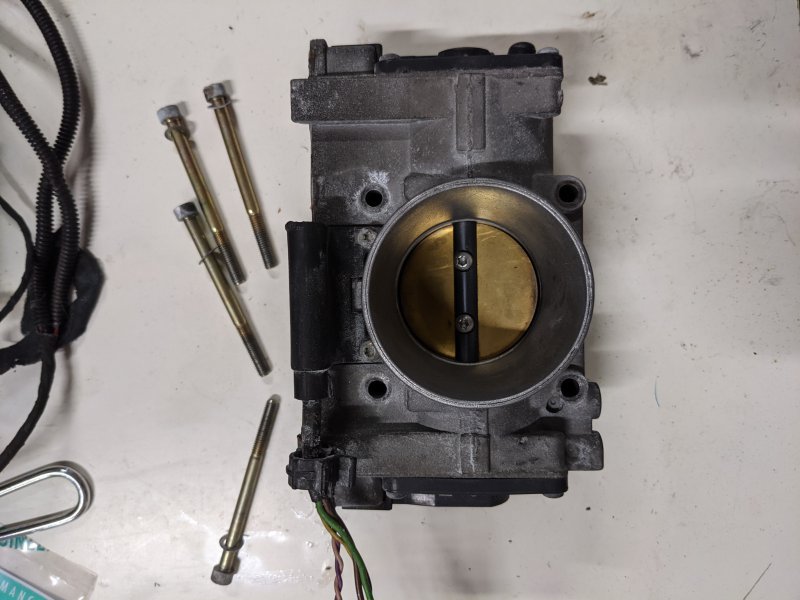
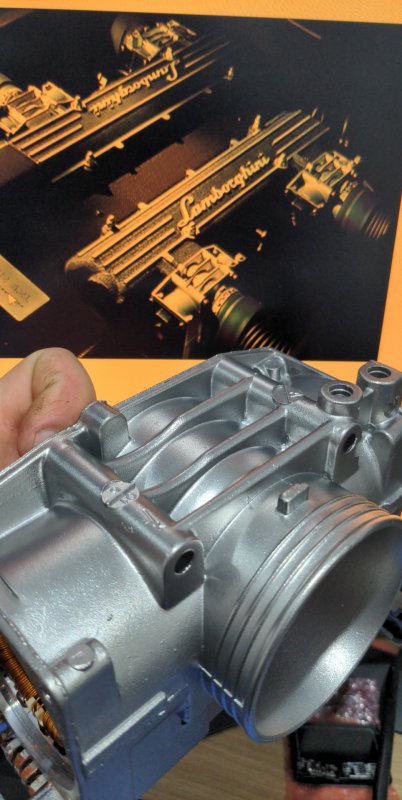
Beginning of August I embarked on the Throttle body
My understanding was; it's super complicated and thoroughly difficult to operate on.
PFFT.
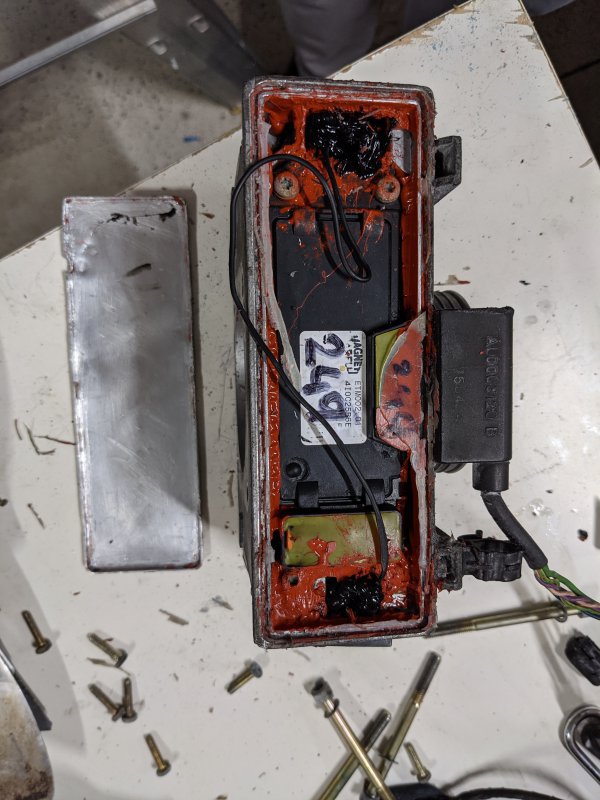
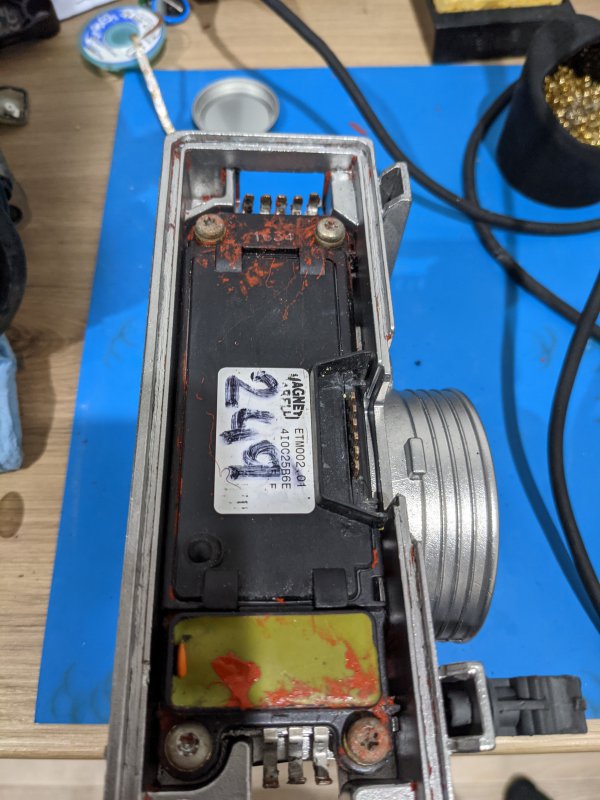
Top Cover off and...
107473
Someone's been here before me... AAHHHHHHHHHHH
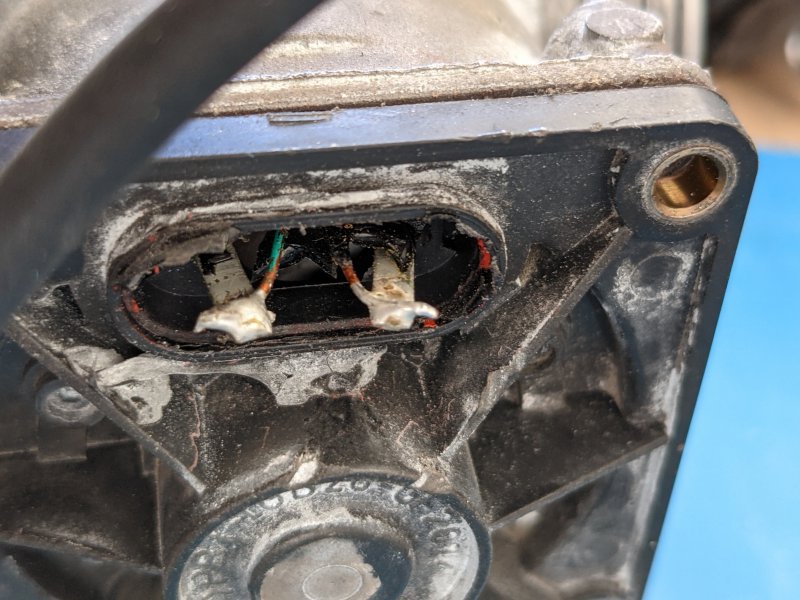
107474107475
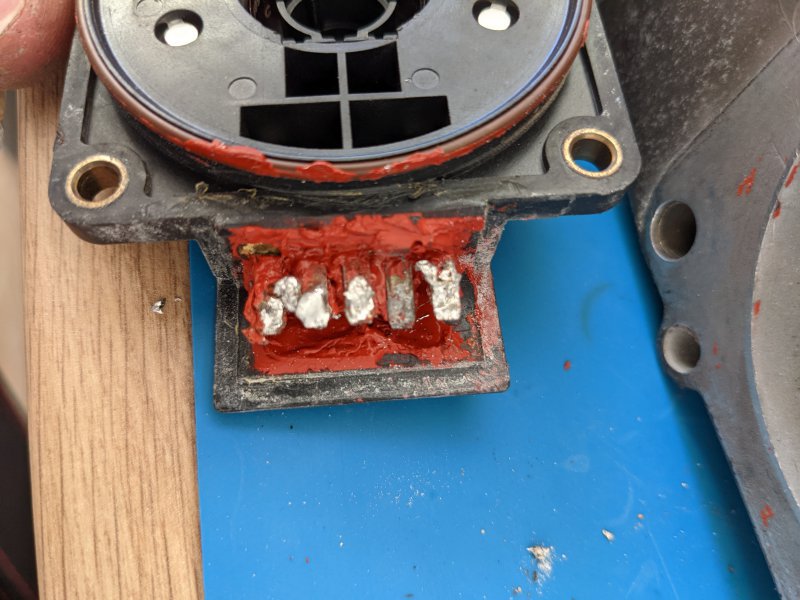
Dry. Stupid amounts of Solder. Creating disgusting Blob joints. This all made me want to puke.
No doubt, this thing would have been a fantastic issue for a noob to start with. Like undoubtably, a handful.

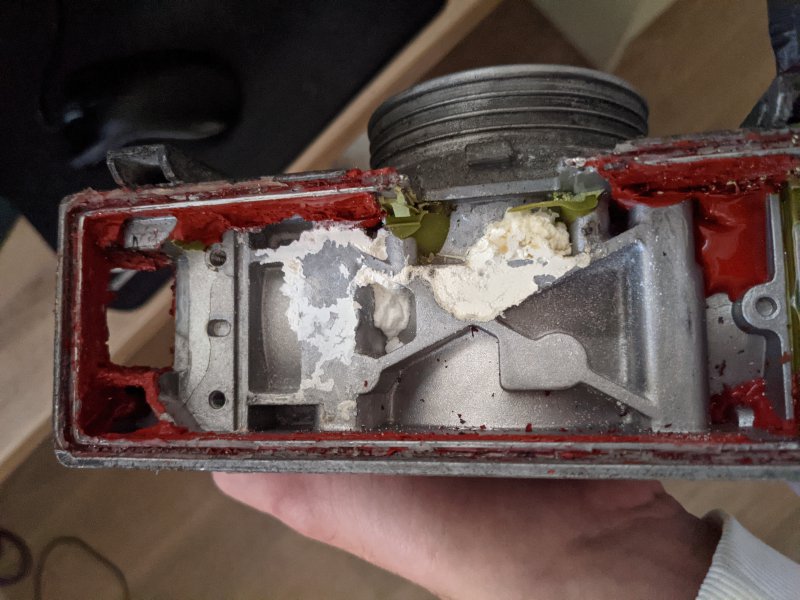
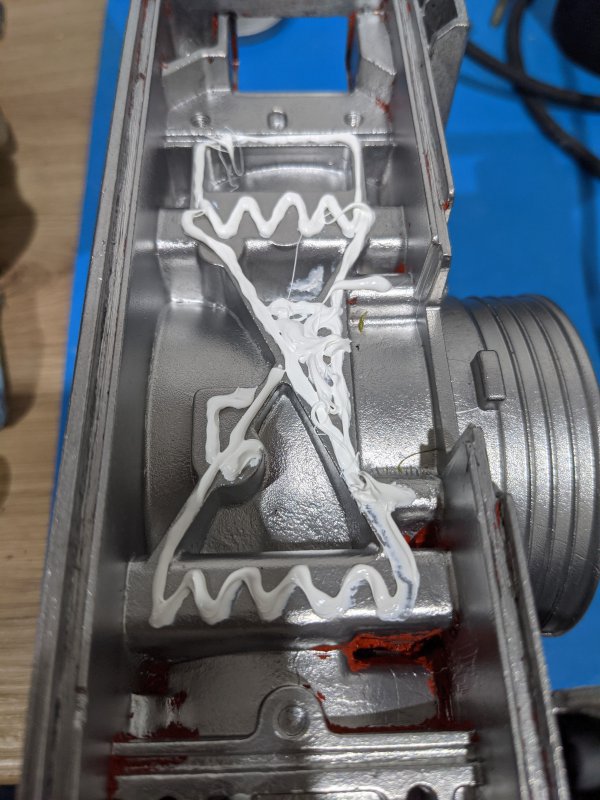
Took me a solid while to realise that the logic board has just been stuck down with thermal paste, silicone and 4 screws.
It took quite a bit of tedious cleaning to get it as spotless as possible! Not perfect(nobody's going to see the little bit of silicone, but well. now everyone will hehe)
107476107478
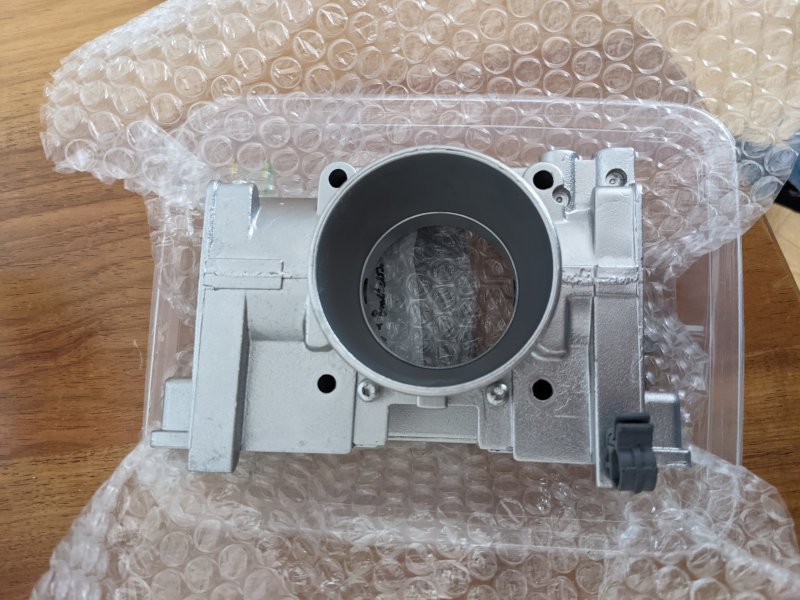
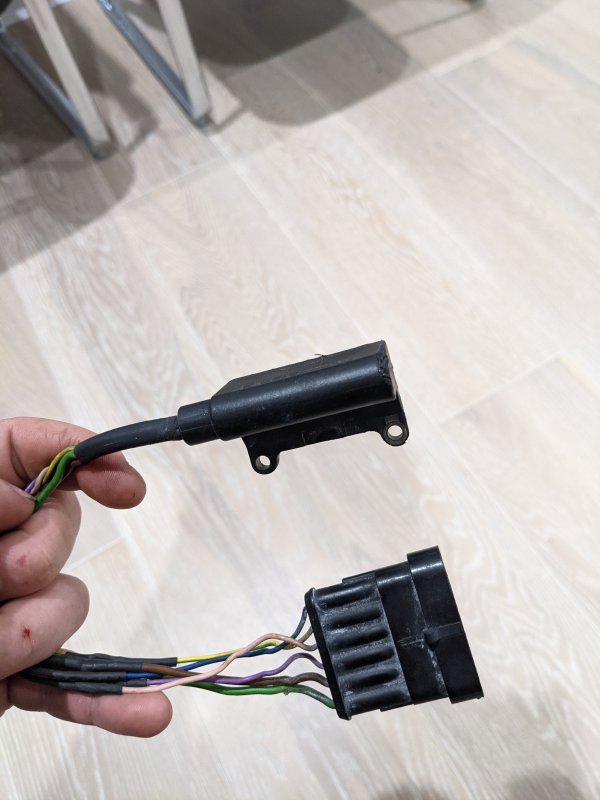
Another amazing job done by Greg, all that's left for me is to reassemble except, I was hunting for a new pigtail connector as mine.. well was shortened and damaged.
107480107481
Fresh thermal paste, and cleaning up all the excessive solder on all the tabs without putting too much heat into them. Was a tad tricky but I managed. Will confirm only once it's operating in the car. But yeah, I've left it at that.
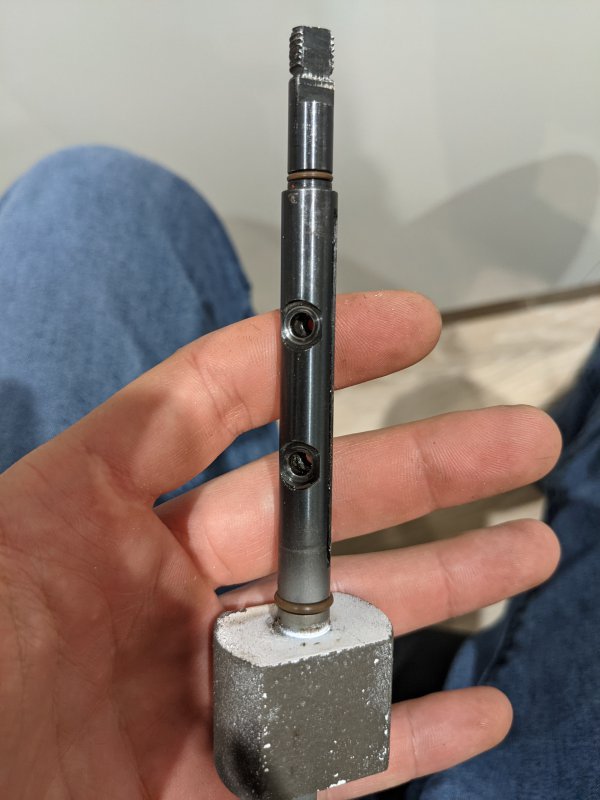
Spoken to Dave with regards to the remaining bits like the pigtail and the magnet; as newer revisions apparently have the magnet encased in aluminium. Solves the degradability problem with age. Haven't sorted anything yet other than four new O-Rings seals for the magnet and side panels! Will see when I decide on something.
107482107483
That should be almost ready, but realistically requires final tuning once the car is running because I didn't mark the position of the magnet to feed the SACER feedback position thingy(brainfarts). Which realistically this throttle body never required in the first place, because it was a 2001 model. Having the revision that I believe had a different positional feedback track, but I don't have the parts so I will never know...

These Volvo throttle bodies...
Definitely infamous for the wrong things.
But used for.. Well. Only the best ;)
107484

Photo limit and dinner time!
Posts will be staggered for the rest of the week, I've got lots of travelling to do to get back to Australia, will probably draft up the next post while I'm bored on my flight
Ciao Ciao
 
Last edited: