Parisien
Moderator
- Messages
- 34,927
Ok guys...this is from a virgin "fixer", well my on behalf of my mechanic, that is! No doubt one or two of you have read my tribulations with this item, it all seems so long and drawn out.
Step 1.
Secure a fund of £20 in £1 coins for your swearbox.
Step 2
Secure an additional fund of another £10 in £1 coins in case the first fund runs out!
Ok...Ok......false start......here we go.
Step 1.
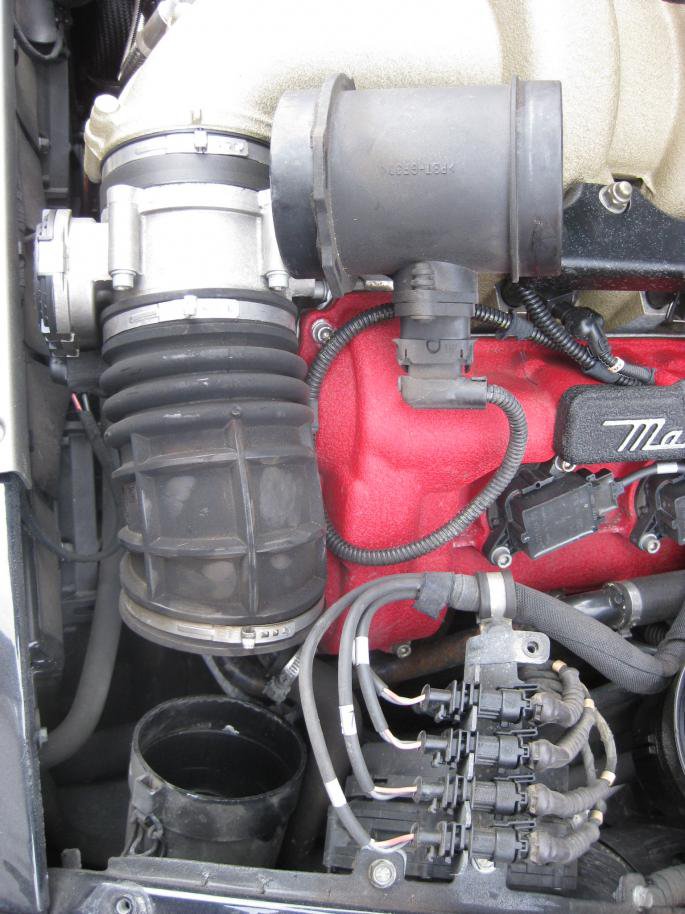
Remove passenger side engine cover, plus surrounding supporting plastic framework, front and rear edge of plastic surround also, unclip the clip which attachs the gas strut of the bonnet at its base and then re-clipping into place once the plastic surround is off.
This then allows you access to the air intake pipe, this section is to be removed along with the air flow sensor section.
Step 2.
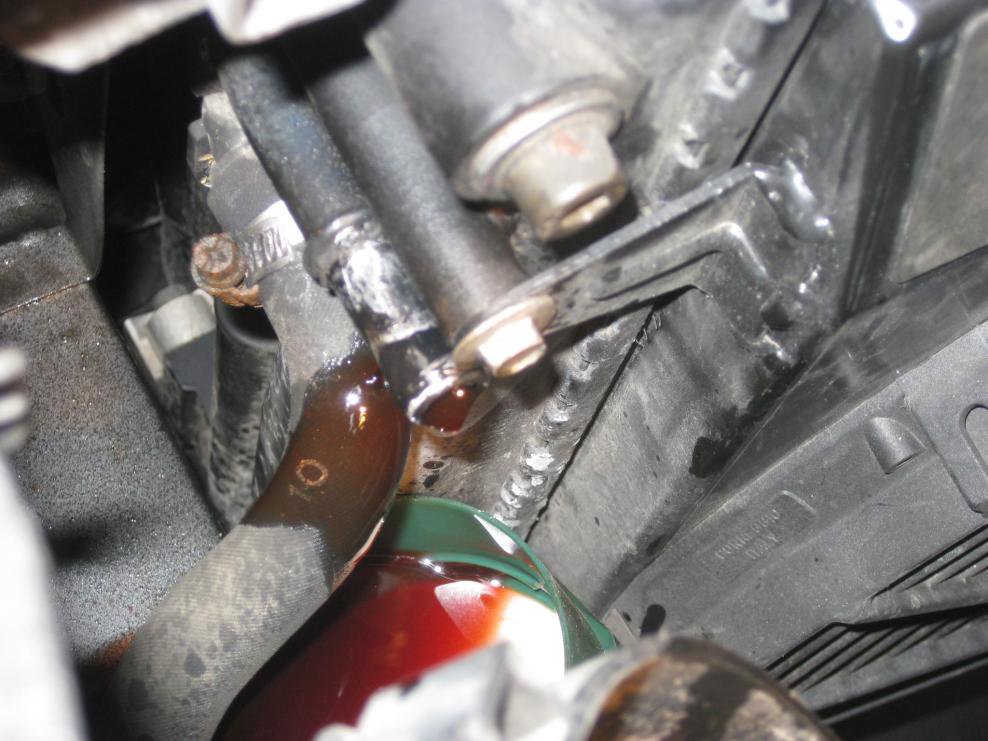
Once these have been displaced/removed, you can get at both inlet and outlet pipes for the power steering exchanger. In this photo the top hose and jubliee clip have been removed ( the bottom hose is still attached) , red steering fluid will leak from the hose and outlet, be sure to put lots of rags onto the lower lip of the front spoiler below to catch any excess. Allow remainder fluid to drain into small container. The jubilee clips are usually quite corroded or unusable ( got two supplied but they were too big!)
Remove 2nd jubilee clip plus hose from exchanger.
Step 3.
Removal of front grill - this has been covered before, nevertheless its worth going over. Firstly as you're removing a metal object from a painted opening, please be sure to mask as much as you can around the opening to prevent scrapes to paintwork.The grill is retained by 5 screws underneath the top edge, and 4 clips on the lower edge behind the actual mesh. These are both awkward and difficult to detach. Best to use some WD40 plus loosen the clip on the pin by levering them a little using a small screw driver. Then using a hook of types on the lower edge of the grill, tug quite forceably to release the clips, this is tedious and difficult. One broke partly due to their fragility.
Then slowly finally remove the grill.
Step 4.
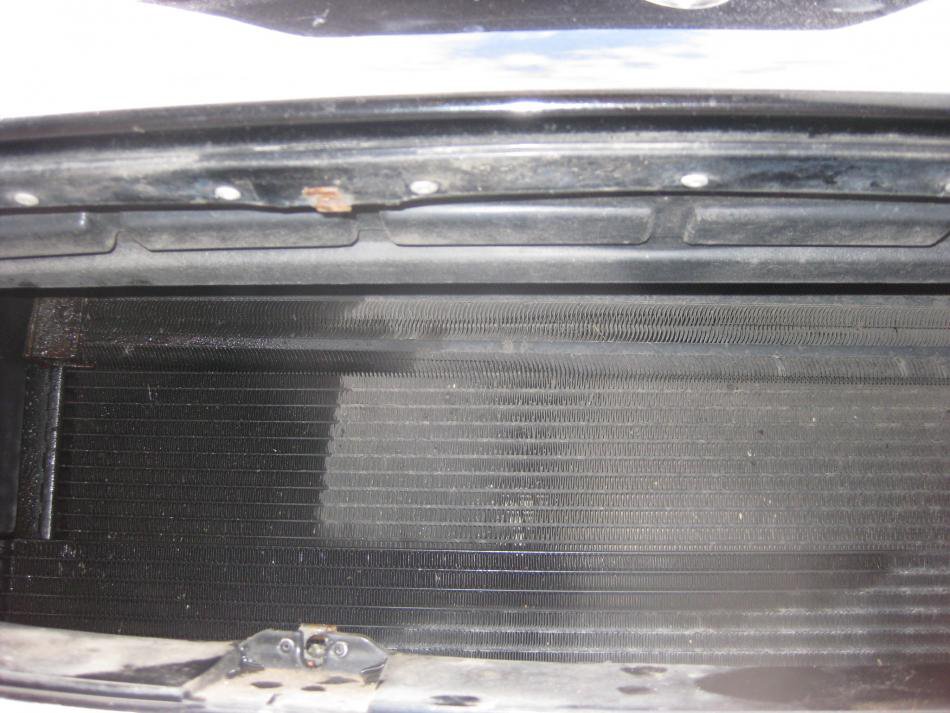
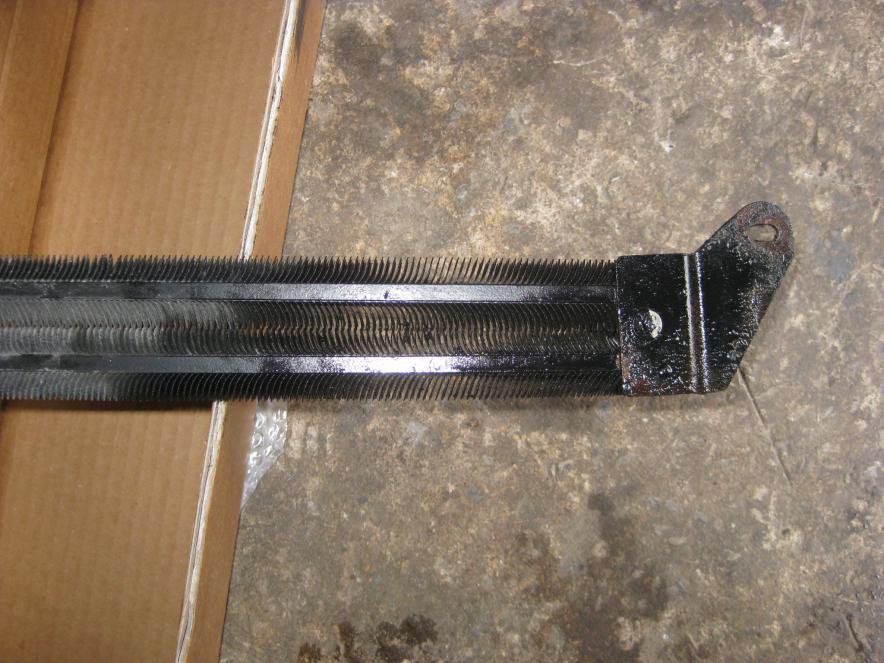
The exchanger is seen in this photo already partly loosen at the top of the main radiator. The darker area of both parts is due to the fluid leaking and staining them. On the left hand side its held in place by on bolt, on the right handside where the inlet/outlet pipes are, its retained by two bolts.
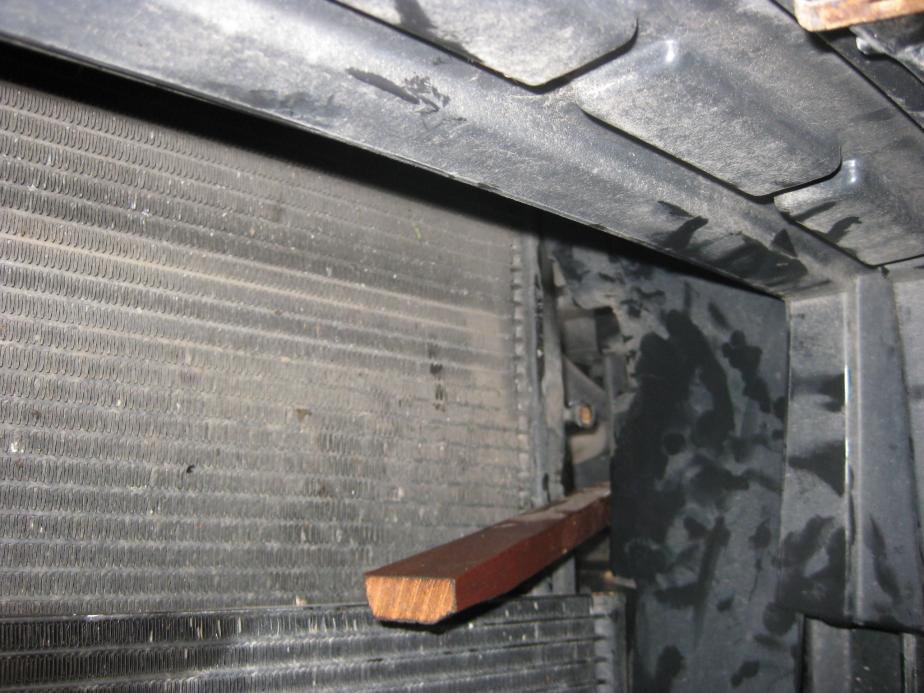
Due to the very confined space we also removed the bolts holding the main radiator in place so we could push it back to gain greater access ( partly blocked by a vertical plastic piece of the bumper), indeed we used a piece of wood to wedge it in place. Even so it took 20 mins of working and levering to remove, as the pipes are located on a couple of brackets and are 90 degrees to the exchanger......plus the pipes were bent to 110 degrees during their removal.
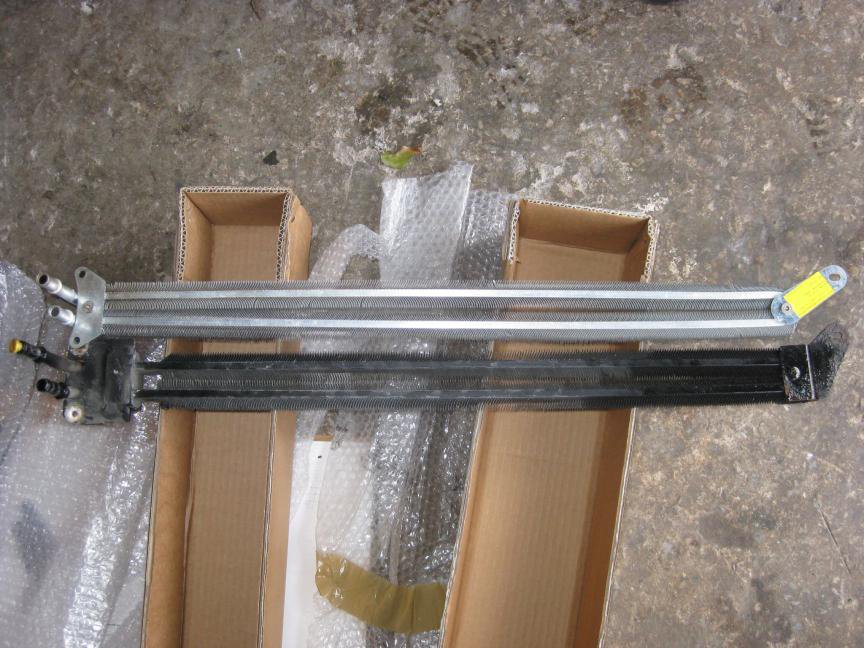
Once removed you can see in this photo the slight differences in the new and old parts, the new one is a bright metallic colour, plus has a slightly smaller bracket on the pipes end the old one black with staining to one end. Its made by a different manufacturer too.
Step 5
Then the hardest part, actually getting the part into place, as we couldn't really bend the pipes too much this was a difficult and slow process as the pipes had to be located on the retaining brackets whilst manoeuvring them around the edge of the main radiator! At this point it began raining, hence the lack of photos from this point onwards, nevertheless the re-instating of everything else is the reversal of the previous steps.
But not before filling the empty reservoir and starting the beast up to check for leaks, it took nearly 750mls to fill it.
Final checks done and 2 and a half hours later I was on my way home.
A big thanks to my mechanic, Davy!
P
PS Am just hoping it all comes out on the post as it should.......if not.....
Step 1.
Secure a fund of £20 in £1 coins for your swearbox.
Step 2
Secure an additional fund of another £10 in £1 coins in case the first fund runs out!
Ok...Ok......false start......here we go.
Step 1.
Remove passenger side engine cover, plus surrounding supporting plastic framework, front and rear edge of plastic surround also, unclip the clip which attachs the gas strut of the bonnet at its base and then re-clipping into place once the plastic surround is off.
This then allows you access to the air intake pipe, this section is to be removed along with the air flow sensor section.

Step 2.
Once these have been displaced/removed, you can get at both inlet and outlet pipes for the power steering exchanger. In this photo the top hose and jubliee clip have been removed ( the bottom hose is still attached) , red steering fluid will leak from the hose and outlet, be sure to put lots of rags onto the lower lip of the front spoiler below to catch any excess. Allow remainder fluid to drain into small container. The jubilee clips are usually quite corroded or unusable ( got two supplied but they were too big!)
Remove 2nd jubilee clip plus hose from exchanger.

Step 3.
Removal of front grill - this has been covered before, nevertheless its worth going over. Firstly as you're removing a metal object from a painted opening, please be sure to mask as much as you can around the opening to prevent scrapes to paintwork.The grill is retained by 5 screws underneath the top edge, and 4 clips on the lower edge behind the actual mesh. These are both awkward and difficult to detach. Best to use some WD40 plus loosen the clip on the pin by levering them a little using a small screw driver. Then using a hook of types on the lower edge of the grill, tug quite forceably to release the clips, this is tedious and difficult. One broke partly due to their fragility.
Then slowly finally remove the grill.
Step 4.
The exchanger is seen in this photo already partly loosen at the top of the main radiator. The darker area of both parts is due to the fluid leaking and staining them. On the left hand side its held in place by on bolt, on the right handside where the inlet/outlet pipes are, its retained by two bolts.
Due to the very confined space we also removed the bolts holding the main radiator in place so we could push it back to gain greater access ( partly blocked by a vertical plastic piece of the bumper), indeed we used a piece of wood to wedge it in place. Even so it took 20 mins of working and levering to remove, as the pipes are located on a couple of brackets and are 90 degrees to the exchanger......plus the pipes were bent to 110 degrees during their removal.


Once removed you can see in this photo the slight differences in the new and old parts, the new one is a bright metallic colour, plus has a slightly smaller bracket on the pipes end the old one black with staining to one end. Its made by a different manufacturer too.


Step 5
Then the hardest part, actually getting the part into place, as we couldn't really bend the pipes too much this was a difficult and slow process as the pipes had to be located on the retaining brackets whilst manoeuvring them around the edge of the main radiator! At this point it began raining, hence the lack of photos from this point onwards, nevertheless the re-instating of everything else is the reversal of the previous steps.
But not before filling the empty reservoir and starting the beast up to check for leaks, it took nearly 750mls to fill it.
Final checks done and 2 and a half hours later I was on my way home.
A big thanks to my mechanic, Davy!
P
PS Am just hoping it all comes out on the post as it should.......if not.....
Last edited:


