richard_masa_4200
Junior Member
- Messages
- 195
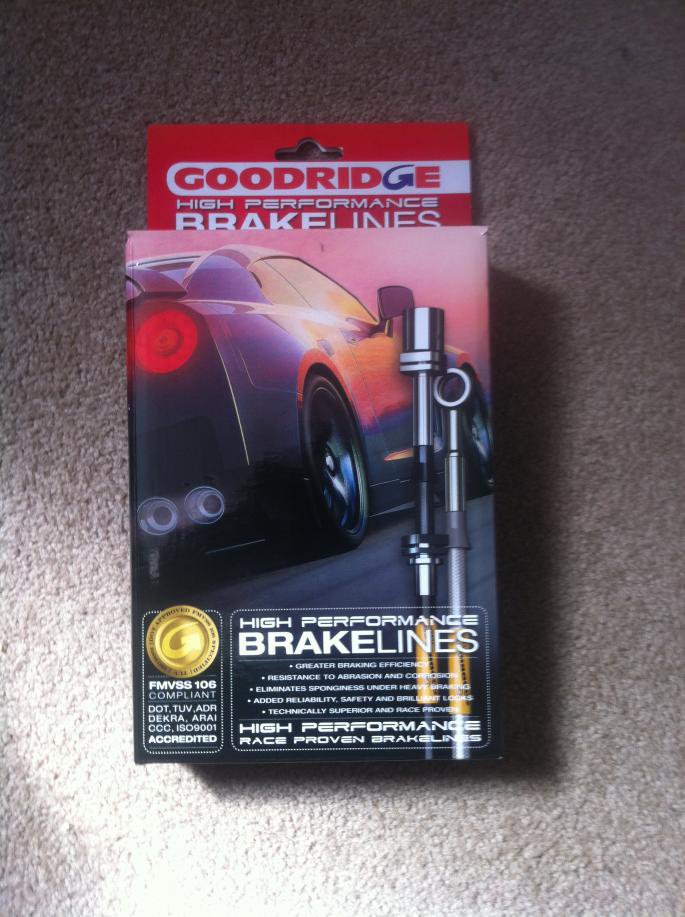
A few months ago I received a set of Goodridge Stainless Braided Brake lines for my 2002 EU 4200 and finally decided to install them this weekend. Hopefully this information may help anyone else attempting to do this on their own.
1. Jack up car and put on stands, remove all of the wheels.
2. Loosen the master cylinder resevoir cap.
3. Start with a front wheel.
Both front wheel brake line assemblies are identical so I will only explain one side. However, some of my pics are from the right and some are from the left side, so you may have to mentally flip them on the vertical.
The OEM brake line looks like this:
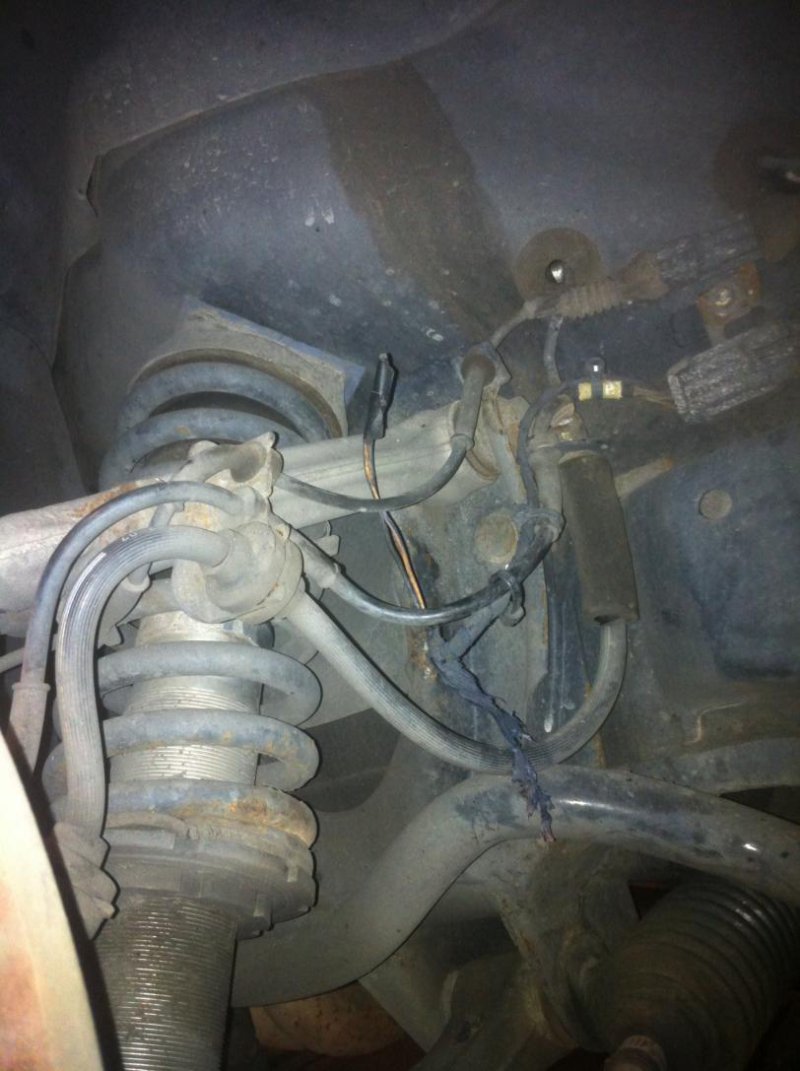
The brake line is the lower tube heading up to the large rubber sleeve where it goes through a locating tab attached to the body and then connects to the male connector on the brake hardline.
First you need to remove the hardline from the brake hose. I suggest getting a flare spanner for the brake line connections. They can be a pain in the %&%& to loosen and you may even have to use vice grips on some if they are really far gone. Do not use a C-spanner. Here is a closer view with some WD40 applied.
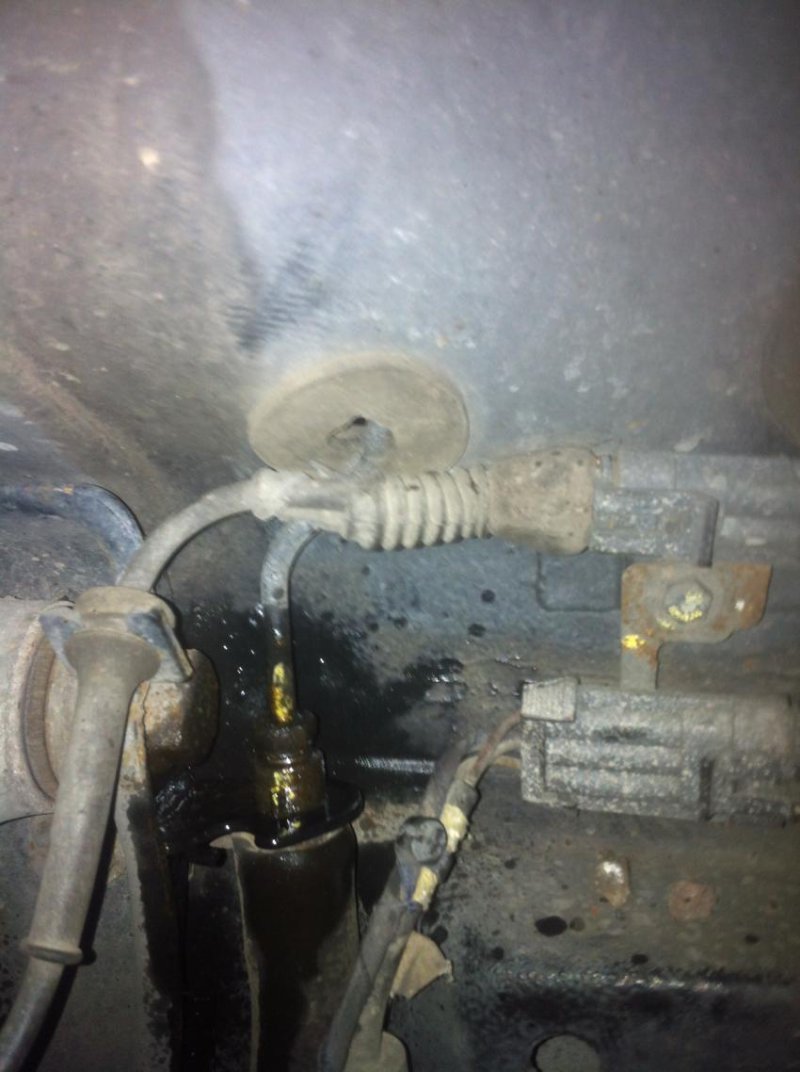
I think the hardline nut is an 11mm and you dont need a spanner for the brake line female end as it is locked in the locating tab. Once you start to loosen the hardline nut you are going to have brake fuid p1ss everywhere. I suggest you fit a 5mm plastic tube to the end of the hardline once you have separated it from the brake line and put the other end in a bottle. If you have any thoughts about plugging it up and saving the fluid, forget it, you're kidding yourself, all the fluid will drain out. I did try to plug the hardline with a caulking gun pipe but it was useless.
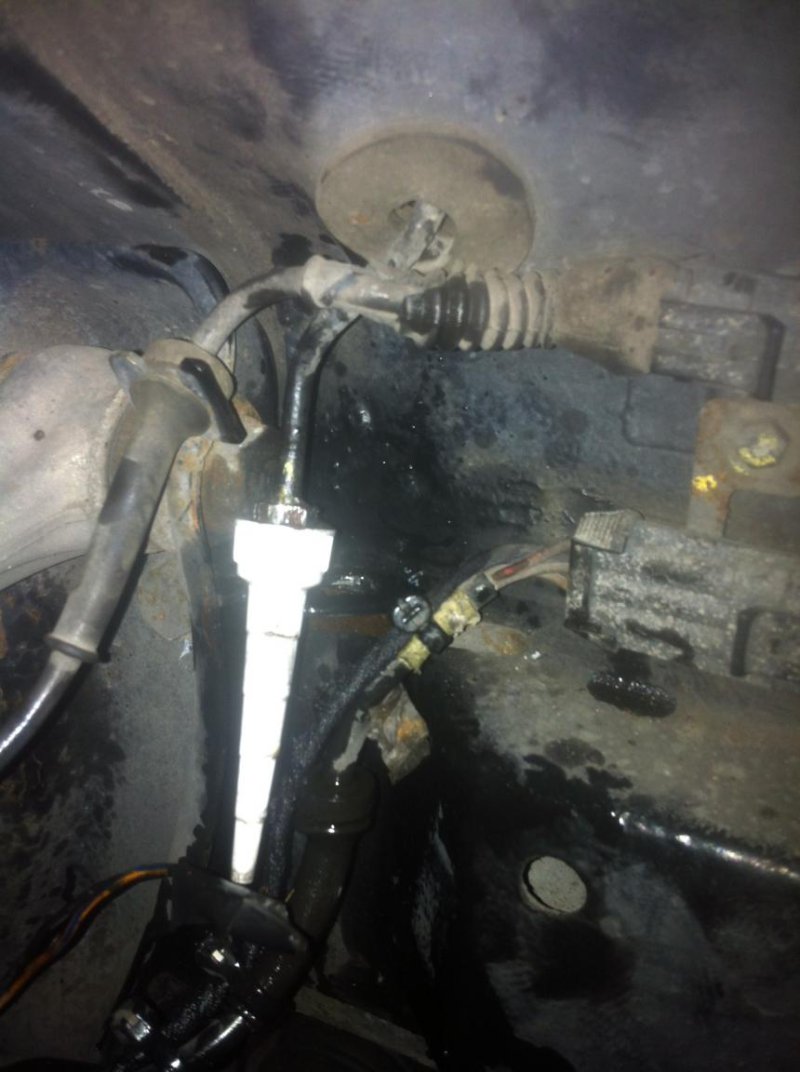
The top end of the brake line can now be removed from the locating tab by exerting a good ammount of pressure to pull it out. You may even be able to tap it on top with a hammer to encourage it to move. It's just jammed in there. Here is what it looks like when you have removed it.
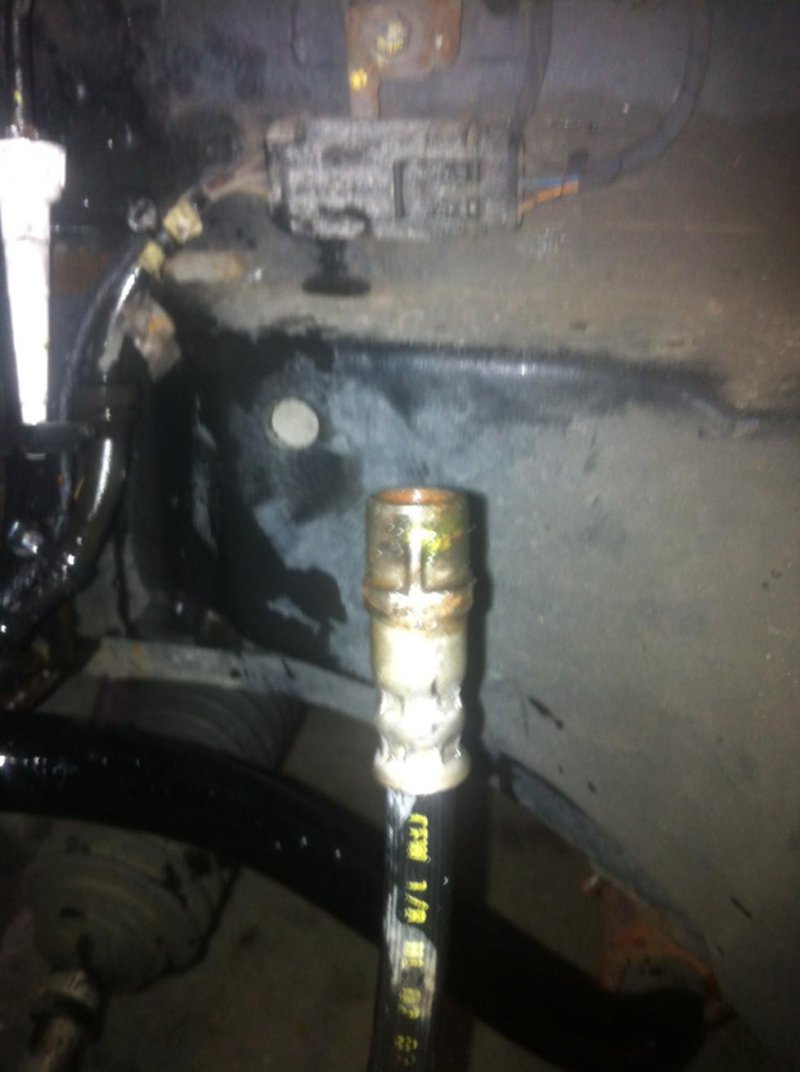
Remove the other end of the brake line. This connects to another hardline located behind the hub. The hardline goes to the back of the caliper. You can see it in the background of this picture.
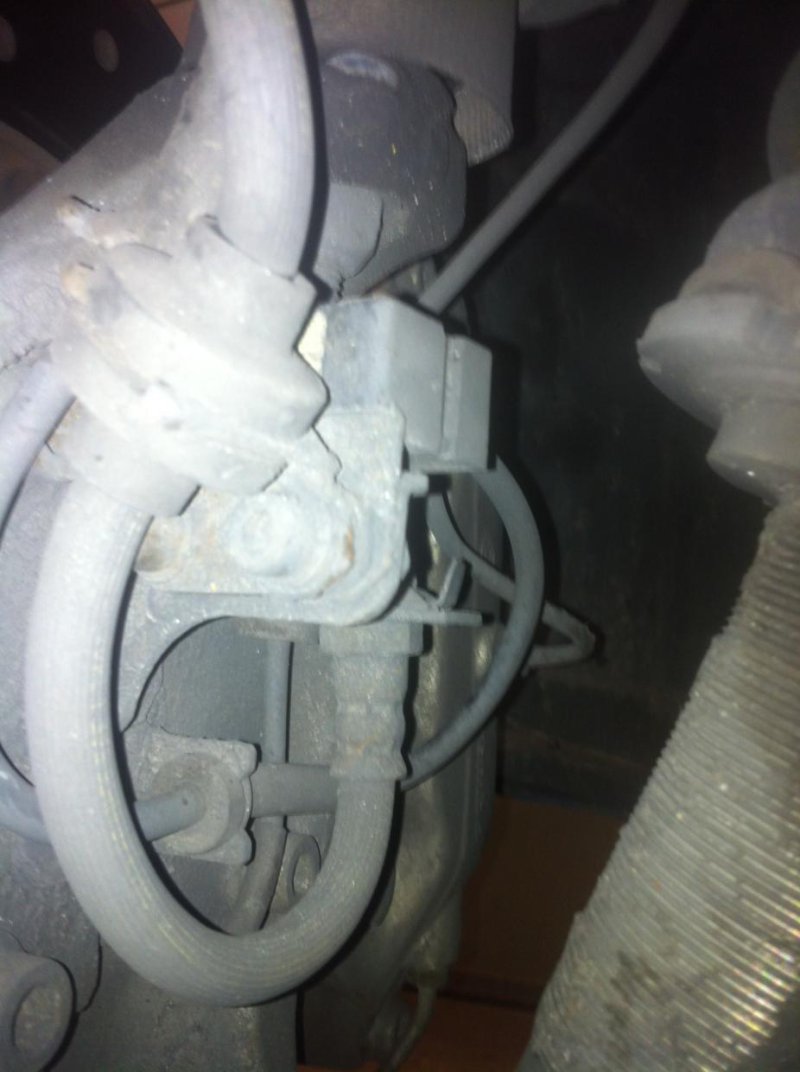
The brake line fitting locates in to a tab connected to the hub and is secured by a fastener on top of the tab. Remove the fastener with a screwdriver or pliers. It should just slide out.
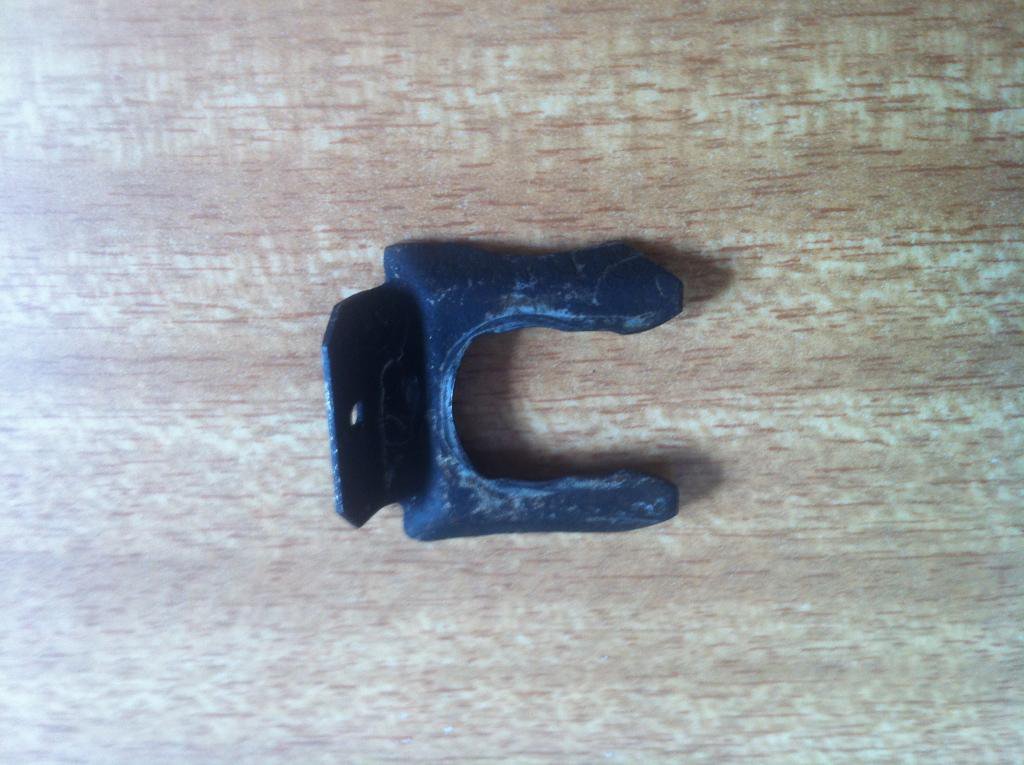
You can use 2 spanners to remove the brake line from the hardline.
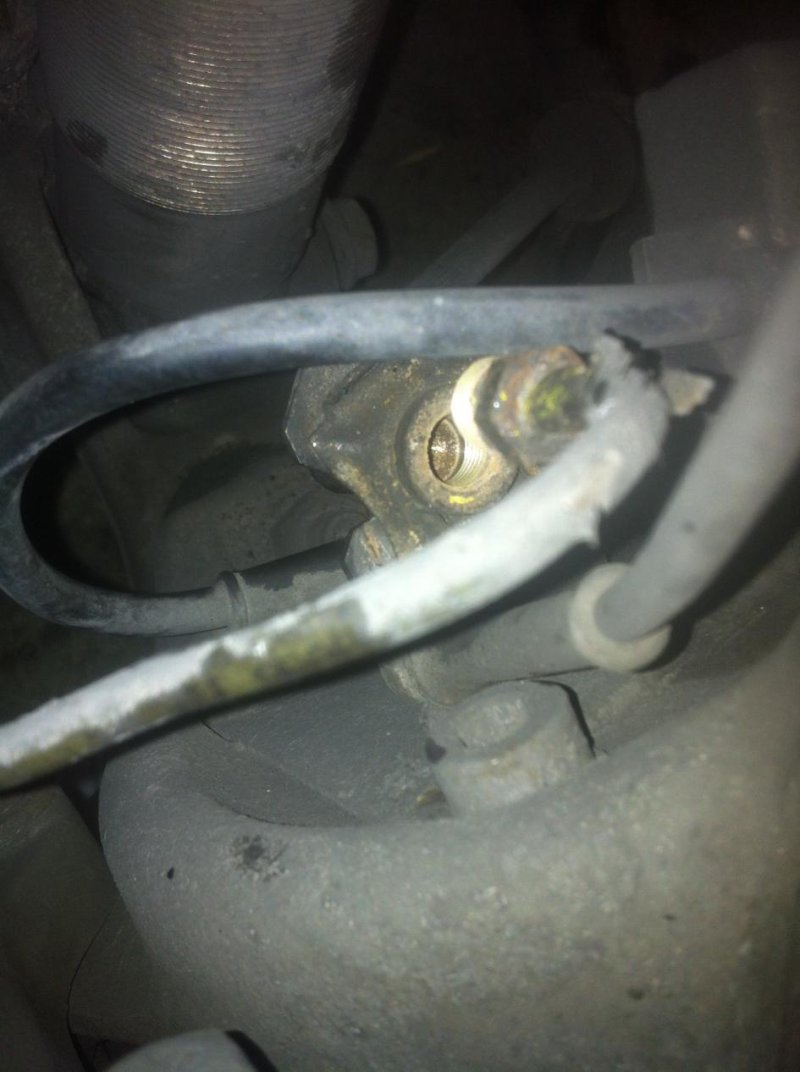
You need to remove the caliper end of the hardline.
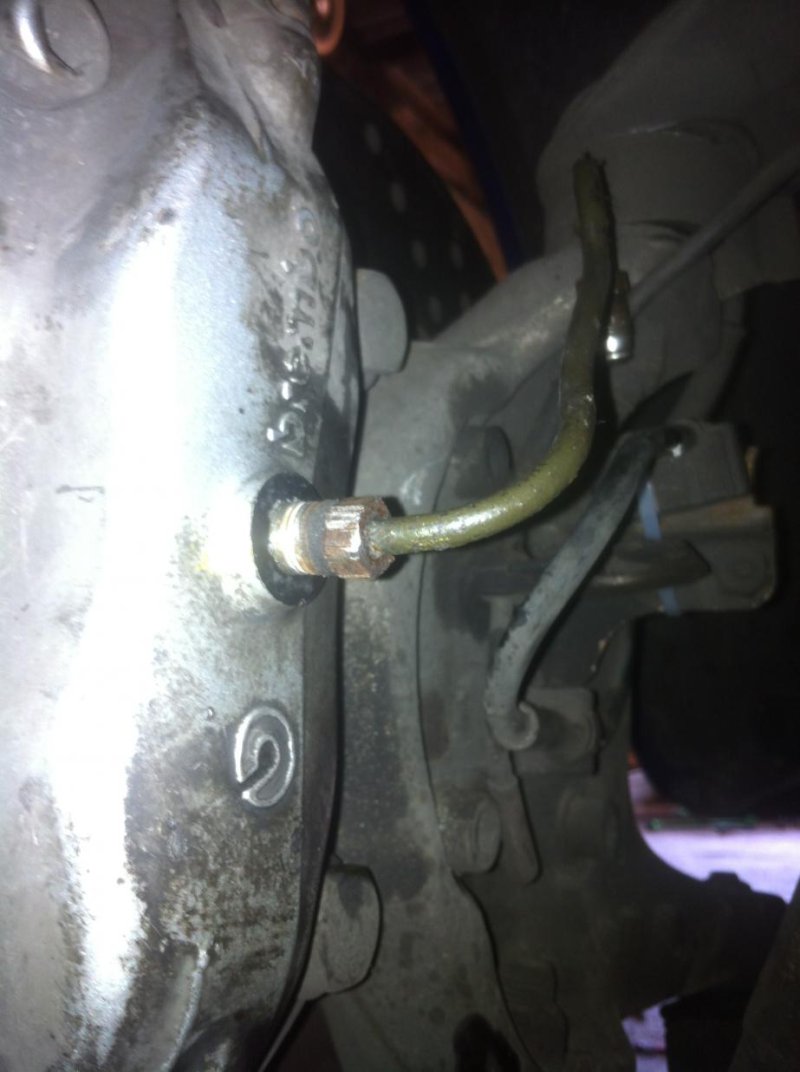
You will end up with something like this.
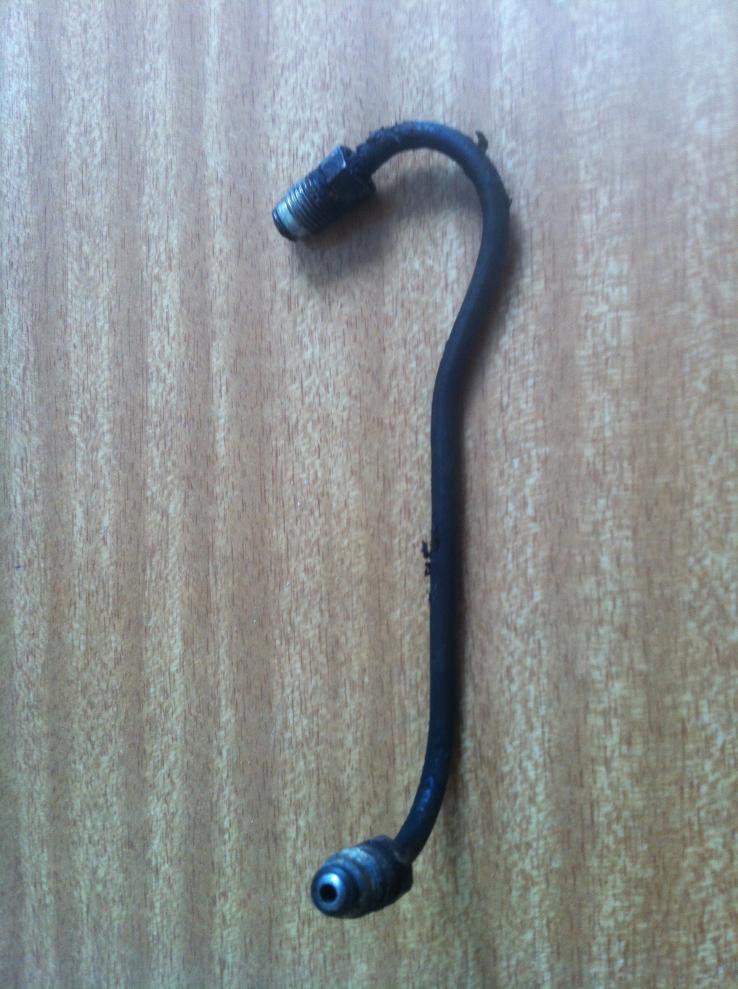
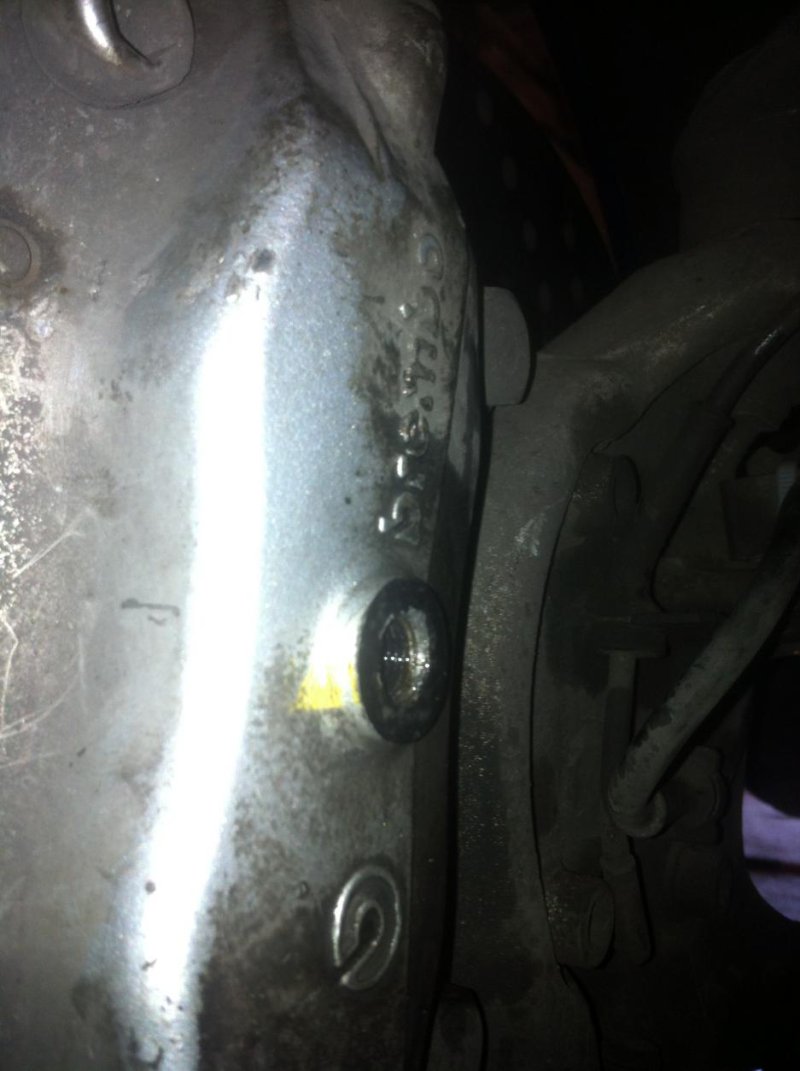
The banjo fitting brake line is used on the front. This is where I encoutered a problem. The banjo fitting replaces the hardline that connected to the back of the caliper. The banjo bolt in the set was too long (just). I couldn't get it to tighten with the crush washers in place. How do I know this? I inserted the banjo bolt in to the caliper and tightened as hard as I could until it hit bottom. The banjo fitting and crush washers were still moving. My brain thought "I should get my torque wrench", my hands said "F, it" and tightened the bolt a little more to see if it would grip. Here is what happenned.
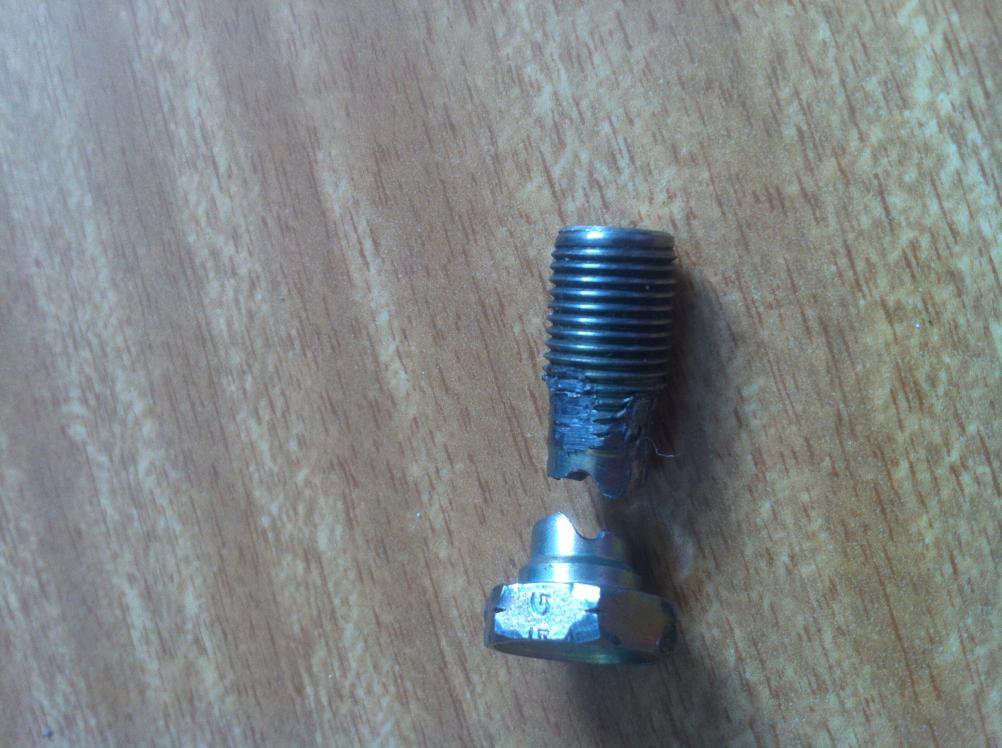
Please insert a hefty amount of swearing and cussing that I'm sure my neighbour's kids did not appreciate. Lucky I have a brake parts place around the corner and was able to get a couple of near perfect replacements. Unfortunately they were still the same length. I could have sawn off a couple of mm, but I opted to use a couple of SS washers to make the bolt shorter. Make sure you insert crush washers on either side and tighten with a torque wrench. My banjo bolts were rated from 12-24 ft-lbs. I went for 17. Seems to have done the trick.
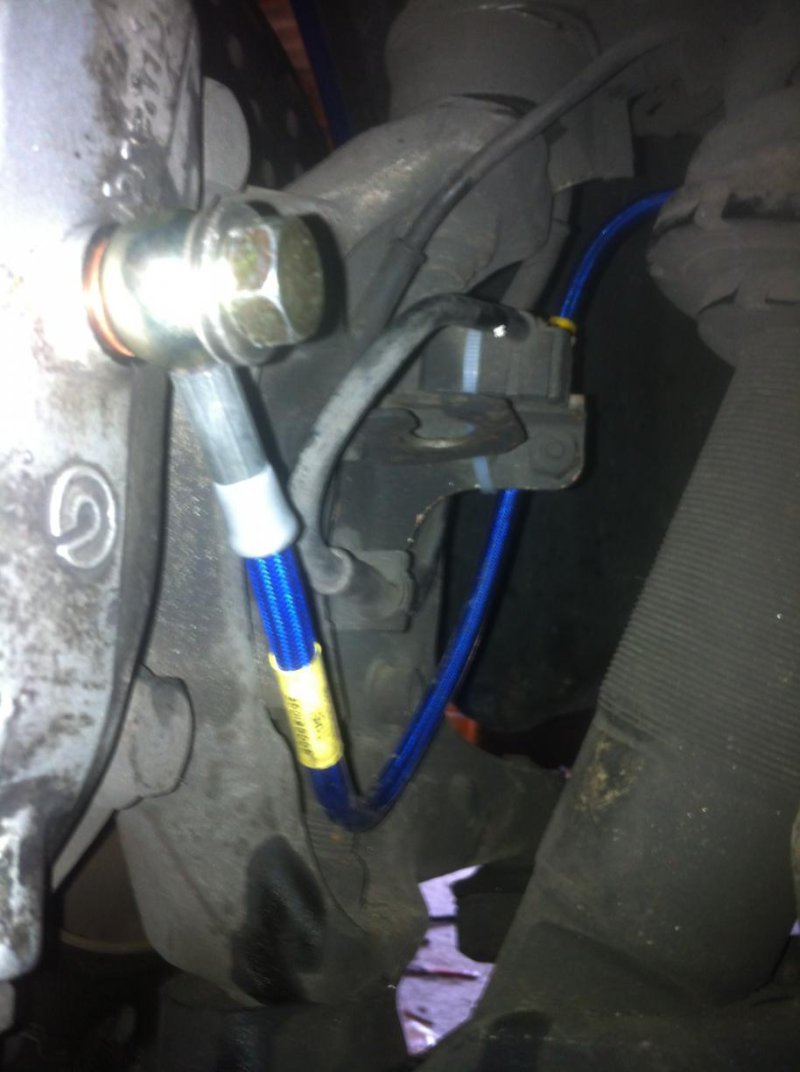
You can just make out the SS washers near the bolt head.
You can attach the other end. The brake line female connector fits in to the loating tab and you connect the male hardline connector with 2 spanners. Remember to use a flare spanner for the hardline nut.
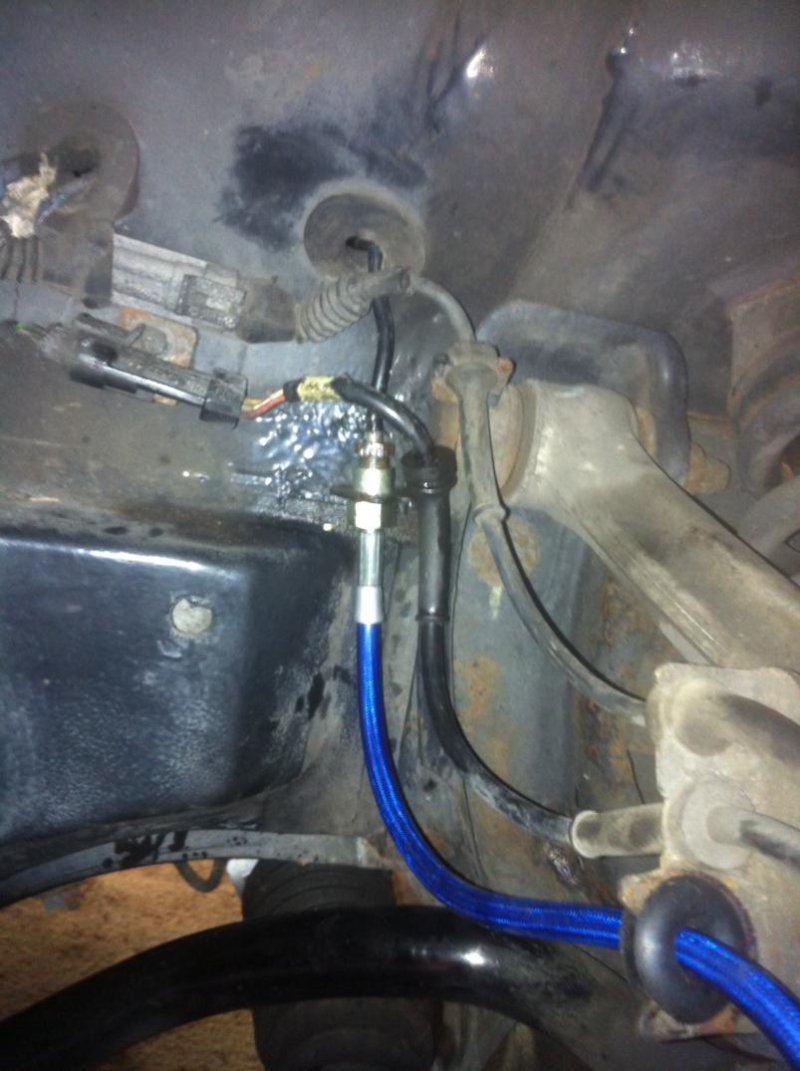
Congratulations!! That's one front wheel done!!
<REPEAT ON THE OTHER SIDE>
Congratulations!! That's two front wheels done!!
Now you can start on the rear wheels. Each is different at the non-caliper end, so I will go through each of those, but only one caliper end.
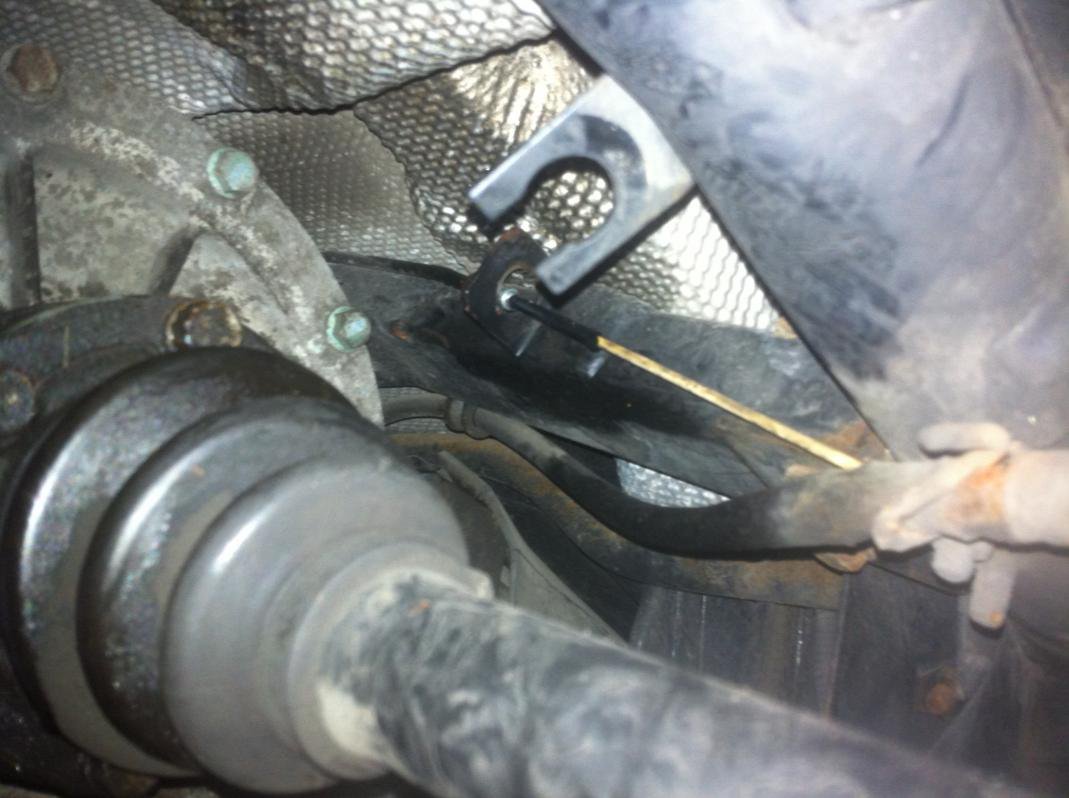
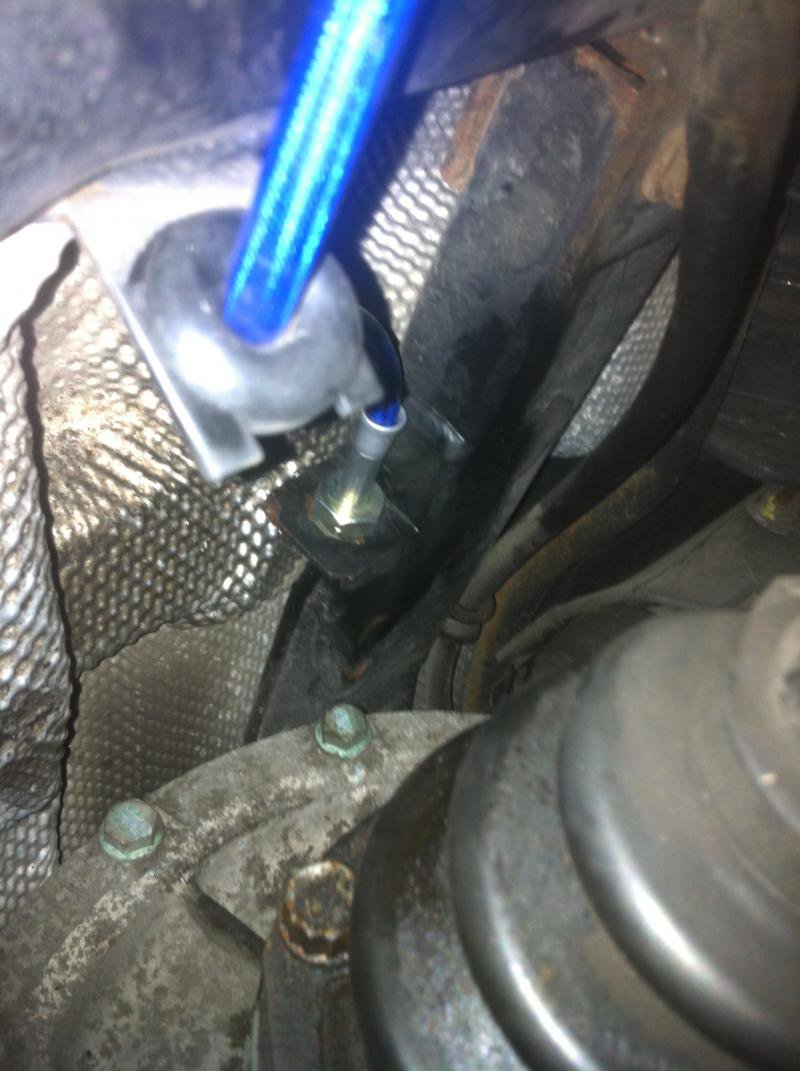
Look at the RHS or driver's side for my car. You have to look up underneath the boot and forward of the rear driveshaft, just about where it connects to the gearbox and you will see the brake line connect to a hardline through a locating tab with the associated fastener. Remove the fastener with a screwdriver or pliers it slides out like the other one and disconnect the brake line from the hardline. You will find that the brake line connectors will not move, you will have to unscrew the hardline connectors. You will need long arms to do this unless you are able to slide under the car completely. Lucky I have long arms. I have a photo of the brake line already removed and a skewer inserted in the end of the hardline.
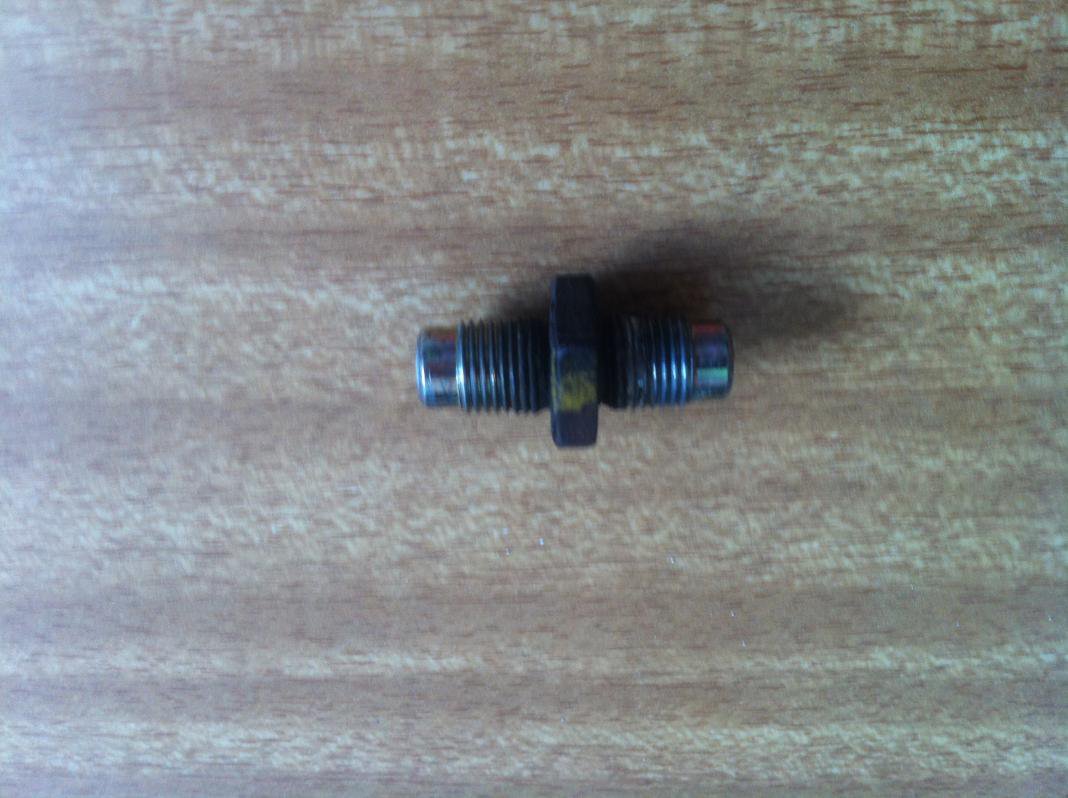
Next you need to remove the brake line from the caliper end. There is also a female to male converter that needs to be removed. You get a new one in the kit. the old one looks like this.
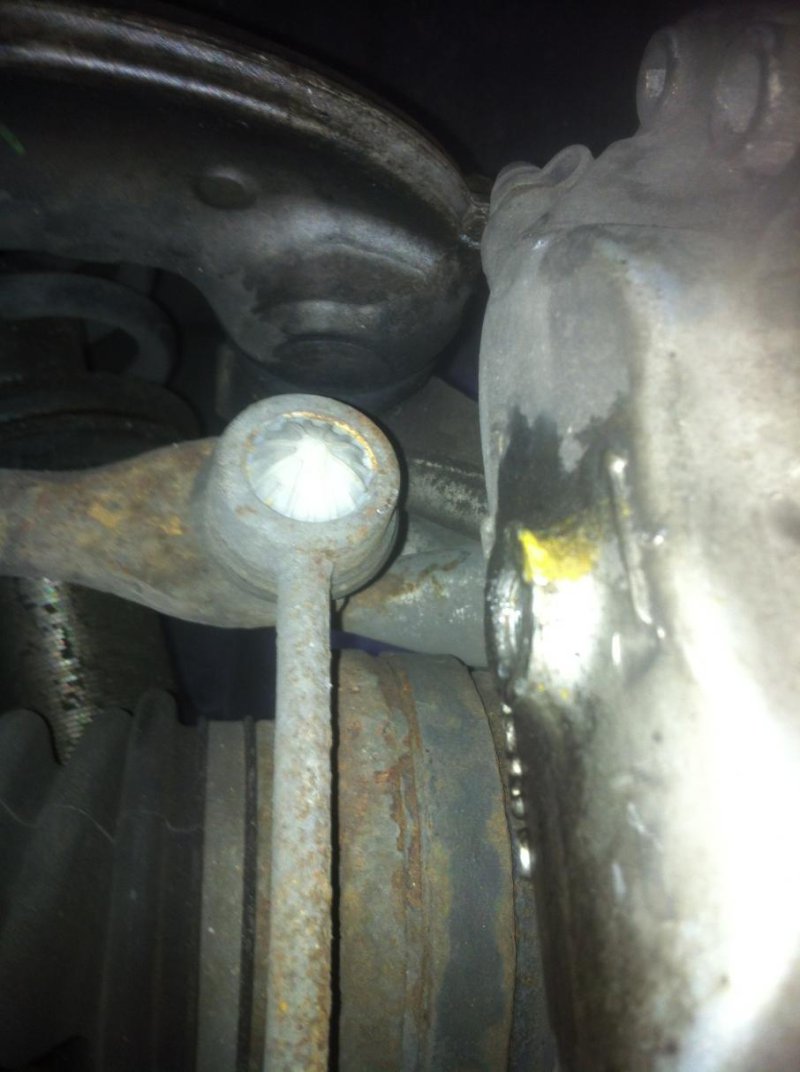
So you end up with a rear caliper that looks like this.
Insert the hardline end of the brake line into the locating tab and secure with the fastener by sliding it back in place. Connect the hardline and tighten with 2 spanners.
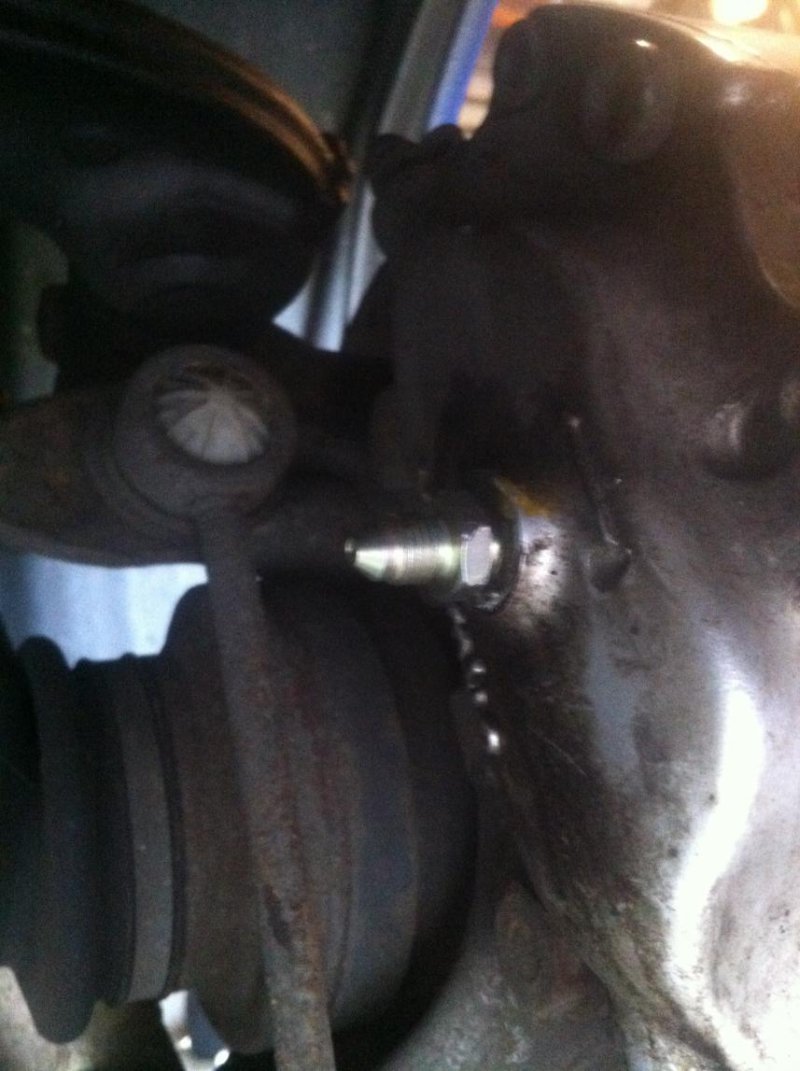
Now to the caliper end. Insert and tighten the female to male converter into the caliper. Make sure the pointy nipple is facing out as it marries with the brake line connector.
Now you can attach and tighten the caliper end of the brake line.
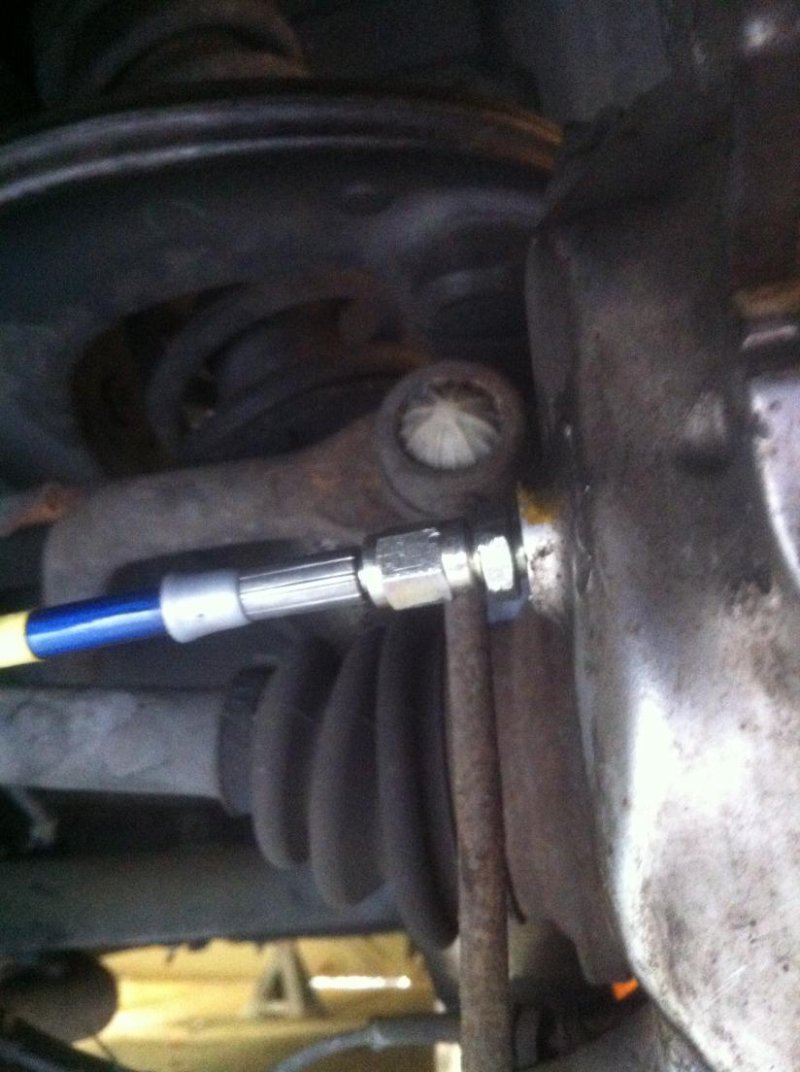
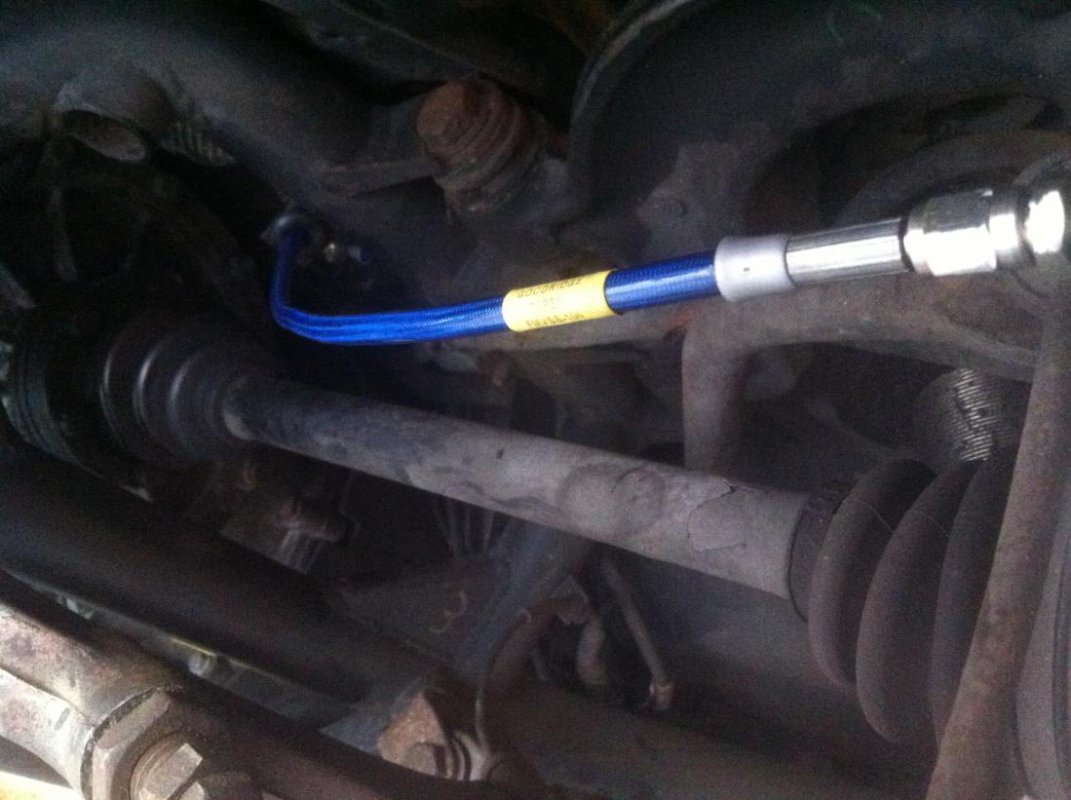
Congratulations! That's one rear wheel done!
The other side is different at the hardline end. The hardline is located closer to the wheel hub, but it is still forward of the drive shaft.
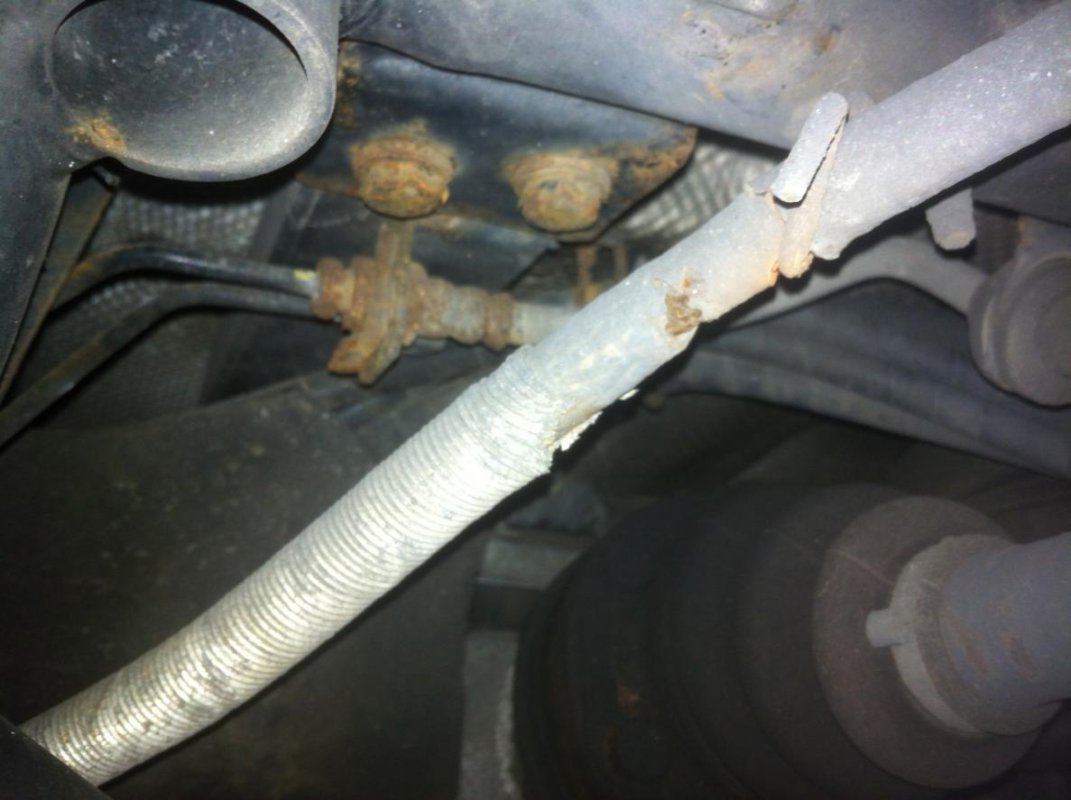
As with the other side you will see the brake line connect to a hardline through a locating tab with the associated fastener. Remove the fastener with a screwdriver or pliers and disconnect the brake line from the hardline. You will find that the brake line connectors will not move, you will have to unscrew the hardline connectors.
Follow the same steps for the other side at the hardline and caliper end to install the new brake line.
THAT'S IT!! You've done it!!
Unfortunately now you have no brakes as there is no fluid in the system. You will need to bleed the cr@p out of your brakes. On my 2002 4200 there are 2 bleed nipples per caliper. This was the most frustrating part of the whole job. I ended up borrowing my mate's vacum bleeding kit as this was the only way I could get a solid brake pedal.
When you finish up double check that there are no leaks and that all connections are tight and secure, including all of the bleed nipples. As you are dealing with brakes, you don't want any mistakes or mishaps.
Was it worth it?
Now I have nice bright blue brake lines! As far as performance goes, I can notice a little difference. The brakes seem more solid under heavy braking and more immediate from the initial foot tap to putting the anchors on hard. Anyway, it kept me busy all weekend.
Enjoy.

1. Jack up car and put on stands, remove all of the wheels.
2. Loosen the master cylinder resevoir cap.
3. Start with a front wheel.
Both front wheel brake line assemblies are identical so I will only explain one side. However, some of my pics are from the right and some are from the left side, so you may have to mentally flip them on the vertical.
The OEM brake line looks like this:

The brake line is the lower tube heading up to the large rubber sleeve where it goes through a locating tab attached to the body and then connects to the male connector on the brake hardline.
First you need to remove the hardline from the brake hose. I suggest getting a flare spanner for the brake line connections. They can be a pain in the %&%& to loosen and you may even have to use vice grips on some if they are really far gone. Do not use a C-spanner. Here is a closer view with some WD40 applied.

I think the hardline nut is an 11mm and you dont need a spanner for the brake line female end as it is locked in the locating tab. Once you start to loosen the hardline nut you are going to have brake fuid p1ss everywhere. I suggest you fit a 5mm plastic tube to the end of the hardline once you have separated it from the brake line and put the other end in a bottle. If you have any thoughts about plugging it up and saving the fluid, forget it, you're kidding yourself, all the fluid will drain out. I did try to plug the hardline with a caulking gun pipe but it was useless.

The top end of the brake line can now be removed from the locating tab by exerting a good ammount of pressure to pull it out. You may even be able to tap it on top with a hammer to encourage it to move. It's just jammed in there. Here is what it looks like when you have removed it.

Remove the other end of the brake line. This connects to another hardline located behind the hub. The hardline goes to the back of the caliper. You can see it in the background of this picture.

The brake line fitting locates in to a tab connected to the hub and is secured by a fastener on top of the tab. Remove the fastener with a screwdriver or pliers. It should just slide out.

You can use 2 spanners to remove the brake line from the hardline.

You need to remove the caliper end of the hardline.

You will end up with something like this.


The banjo fitting brake line is used on the front. This is where I encoutered a problem. The banjo fitting replaces the hardline that connected to the back of the caliper. The banjo bolt in the set was too long (just). I couldn't get it to tighten with the crush washers in place. How do I know this? I inserted the banjo bolt in to the caliper and tightened as hard as I could until it hit bottom. The banjo fitting and crush washers were still moving. My brain thought "I should get my torque wrench", my hands said "F, it" and tightened the bolt a little more to see if it would grip. Here is what happenned.

Please insert a hefty amount of swearing and cussing that I'm sure my neighbour's kids did not appreciate. Lucky I have a brake parts place around the corner and was able to get a couple of near perfect replacements. Unfortunately they were still the same length. I could have sawn off a couple of mm, but I opted to use a couple of SS washers to make the bolt shorter. Make sure you insert crush washers on either side and tighten with a torque wrench. My banjo bolts were rated from 12-24 ft-lbs. I went for 17. Seems to have done the trick.

You can just make out the SS washers near the bolt head.
You can attach the other end. The brake line female connector fits in to the loating tab and you connect the male hardline connector with 2 spanners. Remember to use a flare spanner for the hardline nut.

Congratulations!! That's one front wheel done!!
<REPEAT ON THE OTHER SIDE>
Congratulations!! That's two front wheels done!!
Now you can start on the rear wheels. Each is different at the non-caliper end, so I will go through each of those, but only one caliper end.
Look at the RHS or driver's side for my car. You have to look up underneath the boot and forward of the rear driveshaft, just about where it connects to the gearbox and you will see the brake line connect to a hardline through a locating tab with the associated fastener. Remove the fastener with a screwdriver or pliers it slides out like the other one and disconnect the brake line from the hardline. You will find that the brake line connectors will not move, you will have to unscrew the hardline connectors. You will need long arms to do this unless you are able to slide under the car completely. Lucky I have long arms. I have a photo of the brake line already removed and a skewer inserted in the end of the hardline.

Next you need to remove the brake line from the caliper end. There is also a female to male converter that needs to be removed. You get a new one in the kit. the old one looks like this.

So you end up with a rear caliper that looks like this.

Insert the hardline end of the brake line into the locating tab and secure with the fastener by sliding it back in place. Connect the hardline and tighten with 2 spanners.

Now to the caliper end. Insert and tighten the female to male converter into the caliper. Make sure the pointy nipple is facing out as it marries with the brake line connector.

Now you can attach and tighten the caliper end of the brake line.


Congratulations! That's one rear wheel done!
The other side is different at the hardline end. The hardline is located closer to the wheel hub, but it is still forward of the drive shaft.

As with the other side you will see the brake line connect to a hardline through a locating tab with the associated fastener. Remove the fastener with a screwdriver or pliers and disconnect the brake line from the hardline. You will find that the brake line connectors will not move, you will have to unscrew the hardline connectors.
Follow the same steps for the other side at the hardline and caliper end to install the new brake line.
THAT'S IT!! You've done it!!
Unfortunately now you have no brakes as there is no fluid in the system. You will need to bleed the cr@p out of your brakes. On my 2002 4200 there are 2 bleed nipples per caliper. This was the most frustrating part of the whole job. I ended up borrowing my mate's vacum bleeding kit as this was the only way I could get a solid brake pedal.
When you finish up double check that there are no leaks and that all connections are tight and secure, including all of the bleed nipples. As you are dealing with brakes, you don't want any mistakes or mishaps.
Was it worth it?
Now I have nice bright blue brake lines! As far as performance goes, I can notice a little difference. The brakes seem more solid under heavy braking and more immediate from the initial foot tap to putting the anchors on hard. Anyway, it kept me busy all weekend.
Enjoy.
Last edited:


